Category: Hydroponics

  • Grow Light Height Above Plants

    Grow Light Height Above Plants

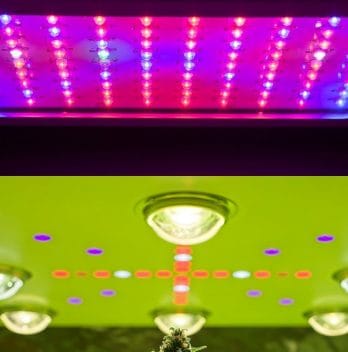
    The height of grow light above plants needs to be positioned appropriately for your plants to absorb adequate light and at the same time prevent plant burns. With the various types of grow light available in the market, each of them has a specific distance to be obeyed so your plants can flourish.

    All the stages of a plants’ life cycle, be it vegetative, flowering, fruiting, or even seedlings require the correct grow light distance to grow adequately. This shows the distance you give between your grow light and plants will have a say on the overall indoor garden yield. So, let’s get right into discussing grow height above plants.

    How Close Should Grow Lights Be To Plants?

    Even though determining the exact grow light height above plants cannot be specifically ascertained: we can still give a good starting point. What will help is to begin with trial and error. Then you gradually move the grow light closer to or farther away till you get the appropriate distance that suits your plant’s growing needs.

    Like we said, various grow lights have different hanging distances. So, each of this grow lights will determine the distance to your plants’ canopy. The wattage (which is one of the determinants of the strength of a grow light) of the grow light will as well decide how far or how close the distance will be.

    How Close Should Grow Lights Be To Plants

    For example, grow lights that generate more heat will require them to be hung a bit far from the plants’ canopy to avoid plant burns. At the same time, some grow light generates powerful spectrum that requires them to be hung a bit far from plants’ canopy to prevent bleaching. (I.e. leaves turning white)

    Let’s take a look at the grow light height above plants for LED, HID, and T5 fluorescent lights. We will also look at how far your grow light should be during various plant stages such as seedlings, vegetative, flowering, and fruiting stage.

    1.    HID Grow Light Height Above Plants

    HID grow lights are known to generate more heat. Thus, they should be positioned at least 12 inches from your plants’ canopy. Also, if your grow light is powerful say for instance 1000 watt, it should be hanged at least 15 inches away. Lesser HID wattage lights of 400 or 600 watts can be hanged around 20 to 25 inches respectively. This grow light distance is ideal for all plants stage.

    2.    LED Grow Light Height Above Plants

    Even though LED lights don’t emit too much heat, their light spectrums are very powerful. They can be too overwhelming on some types of plants that they may suffer bleaching if positioned too close.

    Grow light of 900 watts and above should be positioned 26 to 42 inches away from plants’ canopy. Then 600 to 850 wattage of LED light should be positioned 24 to 26 inches away. 450 to 550 watts LED grow light should be hung 20 to 30 inches away from plants. And 240 to 400 watts needs 16 to 30 inches LED grow light distance.

    While this LED grow light height above plants is obeyed, it is necessary for LED lights to be moved closer to the plant during the flowering phase. This is because they will require more light intensity during this stage.

    3.    Fluorescent Grow Light Height Above Plants

    Fluorescent grow lights are one of the most efficient lights to use as they offer smooth blended energy and spectrum. They are low generating heat which makes them safe to be placed close to plants’ canopy. Placing them too far from the plants will reduce their light intensity thus; reducing the energy the plants receive.

    Although fluorescent light comes in various shapes and sizes, we will generally recommend a distance of at least 12 inches away from your plants. Ensure the height does not exceed 12 inches as this can reduce the light energy your plants receive.

    2-Pack T5 HO Grow Light – 1 Bulb Light System – Fluorescent Hydroponic

    61CoQuvOHjL. AC SX679

    However, you can do a trial by starting at a grow light distance of 5 inches. If you notice any discomfort symptoms shown by your plants you can move the grow light a bit higher. Do this until you find the perfect spot that will suit your plants.

    You can use the stated grow light distance using fluorescent light for all plant stages.

    Grow Light Distance Seedlings

    Seedlings are known to be pretty fragile. So this is why we need to know the appropriate grow light hanging distance to these seedlings. However, seedlings also need to be supplied with a good amount of light so they can grow efficiently. Depriving seedlings of adequate light will cause slow development and leggy growth.

    For LED grow lights, you can do a distance of 8 to 12 inches away from your seedlings. While for T5 fluorescent grow lights, you can do a distance of 5 to 6 inches away from your seedlings.

    How Much Light For Seedlings

    Let’s determine the amount of light seedlings require using PAR (Photosynthetically Active Radiation). We will be looking at achieving 120 to 150 micromoles per second per meter square of PAR delivered to your seedlings. Also, you can supply your seedlings light for 12 to 18 hours per day.

    How Much Light For Seedlings

    FAQ’s 

    Do Grow lights have to be above plants?

    Grow lights can be placed above the plants.
    Grow lights can be placed at any height from ground level to 15 feet or more. I would recommend that you do not place your grow light directly on the soil as this will cause your plant to burn and eventually die. The best way to position a grow light is to have it over a pot so that the roots are just barely touching the sides of the pot and the rest of the plant is in shade.
    This will keep the plant healthy and happy. You can also hang a hanging plant holder with a light bulb in it over a pot.
    Any wattage will do as long as it produces enough light to promote growth. A good wattage light would depend on what type of plants you are growing, how much space you have and your budget. There is no “best” wattage light. It depends on your own personal preference and budget. Grow lights are available in a wide variety of wattages, from 1 watt to 50 watts. The higher the wattage, the more light is emitted.

    How do you tell if grow light is too close?

    There are many ways to tell if a grow light is too close to the plants.
    You’ll want to consider the distance from the light fixture to the plant, and the height of the light fixture. If the light fixture is high enough, it will not be visible above the top of the pot or growing substrate. This can be a problem with fluorescent lights, which are very high. If the fixture is too low, you’ll see shadows cast by the light fixture on the plants.
    You can measure the amount of light your plants get by measuring how far the light has to be moved to get the same amount of light on the plants.
    The first thing to look for is light color. If the light is very yellow, then it is too close. If the light is blue, then it is too far away. This is because red light penetrates deeper into the plant and makes it grow faster, while blue light makes the plants more spindly.
    Another way to tell if the grow light is too close is to look at the reflection on the leaves. If there are little lights reflected on the leaf, then it is too close. If you see a lot of refl

    Can grow lights be too bright?

    Grow lights can be an important part of growing indoor plants. However, some growers have noticed that their plants seem to grow a bit more slowly when the lights are on, and they also grow a bit larger. Growers sometimes use light intensity to control the size and shape of their plants.
    Your choice will depend on how much light you need, the type of light you want to use, and your budget. The three main types of lights are fluorescents, metal halide and high-pressure sodium lamps. Fluorescents are the cheapest, but have a very narrow color spectrum, which can cause problems if you’re using plants that require more than one color of light. Metal halide is the most expensive, but has a broad color spectrum, and produces a lot of heat,. High-pressure sodium lamps are the least expensive of the three, and they have a broad color spectrum, they produce less heat, and the spectrum is similar to natural sunlight.

    Final Note On Grow Light Height Above Plants

    Determining the appropriate grow light height above plants is not so difficult to tell if you have the right knowledge. Different grow lights are built differently and they have their various hanging distance that must be followed. Follow our guidelines on the right distance to hang your grow light.

    Also, some of these grow lights have the manufacturers’ recommended hanging distance stated on the grow light package. You can also start with that and later adjust your grow light until you get the appropriate distance.

    Note that once you purchase a new grow light, it is recommended you keep a close eye on your garden to see how your plants receive this new light. This way, you can quickly notice any slight change in your plants’ response to the light and make the right adjustments accordingly.
  • COB vs SMD LED For Growing

    COB vs SMD LED For Growing

    Let’s discuss COB vs SMD LED for growing plants. In the grow light technology, there has been continuous improvement in various LED lights to offer a better yield.

    LED lights are very popular and preferred by many indoor growers because of their durability and efficiency. They are also less power-consuming. However, not all LED models are the same. There are different models of LED in the market today which COB and SMD are one of them. But what differentiates these two great LED models? We will be discussing what COB vs SMD LED will offer your plants for their growing needs. So, continue reading to be informed.

    COB Grow Light

    First, we define what COB LED grow light design is. COB which stands for Chip On Board and it is one of the most recent LED light technology developed. COB is known to be more heat efficient and offers better or quality lumen per wattage. This is thanks to the great COB LED design as well as the substrate chips of their cooling ceramic.

    They are built with many or multiple diodes on are a single surface. COB designs are a little similar to SMD, however, COB has more diodes.

    COB Grow Light

    Usually, the chips of COB have 9 or more diodes and in these multiple diodes, they have only 1 or 2 contact circuits. Thus, this results in a simple circuit design that allows them to have that panel-like appearance.

    COB LED grow lights are so energy efficient that they can generate a large amount of lumen using less energy. They work as a single strong light source and in some instances; a single COB can make up a whole fixture.

    Full Spectrum COB LED

    The COB LED grow light offers a complete spectrum which is required by your plants to flourish. The complete spectrum is tailored to suit your plants’ development.

    This full spectrum gives different wavelengths of light as your plant grows. Each color spectrum will prompt your plant to carry out various tasks that are associated with your plants’ growth.

    For example, red light enhances budding and encourages better yield in the flowering stage of a plant. While blue light enhances root development and vegetation. These two are the most important color spectrum, however, other colors of the light spectrum are as well absorbed.

    The only drawback we notice in this complete COB LED spectrum is that they are fixed spectrums. The spectrum mix cannot be changed unlike with the traditional SMD LED.

    Phlizon CREE COB 3000W LED Plant Grow Light Full Spectrum Indoor Plants

    71ncabpwoKL. AC SX569

    The COB LED spectrum is built by mixing a blend of phosphor which is used as a coating over the COB. This phosphor mix is then made to generate light. However, the SMD LED isn’t fixed and can be combined to generate a particular spectrum. The spectrum can be switched by simply dimming or increasing the different colors.

    SMD Grow Light

    SMD stands for Surface Mounted Device and this type of LED light is built to have a specific spectrum in each diode. They are one of the most common types of LED shared in the market as they are popular because of their flexibility.

    There is a fusion of the LED chip to its printed circuit board (PCB). The PCB in the SMD light is assembled on a rectangular-shaped flat surface and this is what is usually seen as SMD.

    Unlike COB that has just 1 or 2 contact circuits, SMD LED can have more than 2. However, their diodes are lesser which can be up to 3 or more. These diodes are built on a single chip and each of these diodes has its personal circuit. One cathode and one anode will go for each circuit. Thus, this gives rise to 2, 4, or even 6 contacts on a single chip.

    SMD LED light also offers high-efficiency output for lesser energy consumption. Thus, they will generate more lumen per watt for your growing plants. The SMD LED chips are very bright and can emit up to 50 to 100 lumen per wattage.

    SMD Grow Light

    COB vs. SMD LED For Growing

    We now have and a hint of what SMD LED vs COB LED is. So, we can now look into COB vs SMD LED for growing.

    Even though both SMD and COB LED lights are both efficient and will offer your plants great benefits, they still have their difference. Below, we have some comparison between COB vs. SMD LED for growing.

    1. Lumen per watt: both COB and SMD offer great lumen that will give your plant good brightness for their growing needs. However, COB offers a higher lumen per wattage ratio. COB can generate more amount of lumen using lesser energy consumption. They can generate a minimum of 80 lumens per watt and more, while SMD will offer about 50 to 100 lumens.
    2. Diodes: COB chips can have 9 or more diodes with 1 circuit and 2 contacts. While SMD can have up to 3 diodes on a single chip.
    3. Versatility: COB LED grow lights are not capable of producing color-changing lights or bulbs. They can only generate a single color effect. The reason being that they only have 2 contacts and 1 circuit but multiple channel adaptations are needed to generate that color-changing outcome. SMD on the other hand is more versatile because they can have up to 6 contacts on a chip. Thus SMD can generate any color it contains with just a simple adjustment in their output level.
    4. Brightness: both COB LED and SMD LED will offer you great brightness. However, COB LED offers more brightness than SMD LEDs.

    FAQ’s

    Which one is brighter, COB or SMD LED?

    LEDs are rated in terms of their forward current and luminous flux. They are also rated in terms of how much power they require. This means that the higher the forward current and the lower the power rating, the brighter the LED will be.

    So, for example, a 5W COB LED might have an average forward current of 5mA (that’s milliamperes), while a 3W SMD LED might have an average forward current of 30mA. Both would have an average luminous flux of about 2000 lumens (lumens is a unit of light that is equal to one lumen per one candela per second).

    If you want a brighter LED, then the one with the higher forward current (5mA) would be your best bet. If you want a brighter LED, then the one with the lower power rating (3W) would be your best bet.

    The 3W SMD LEDs are much more expensive, so it’s a trade-off between cost and brightness.

    The main difference between the two types of LED is that COB LEDs have a much higher luminous flux (i.e. brightness) than SMD LEDs. The COB LED has about 2 times the luminous flux of an SMD LED. In order to make sure that you get a similar amount of light from your LED, you can use a similar type of LED, just with different power ratings.

    Which is better for plants, COB or SMD LED?

    COB means that the LED’s are mounted to the substrate with a soldering process. SMD means that the LED’s are mounted to the PCB with a reflow process. So basically it comes down to a choice between a clean installation process, and a cheaper labor intensive process. The problem with SMD is that you can’t really control the orientation of the LED’s very well, which means that the light from the LED’s won’t be uniform. This is not a big deal for indoor grows, but it can be a problem when growing outdoors. It is also possible to use COB with high power LEDs, such as those found in fluorescent lights. SMD has several advantages over COB.

    The most important advantage is cost, since the SMD process is less labor intensive than the COB process. COB requires soldering of each LED, and requires the use of a flux, so it is more expensive. SMD doesn’t require any soldering, and there is no need for a flux. The other advantage to SMD is that you can install an array of SMD LED’s into a compact size package. This is an advantage when using LEDs in fluorescent lights, since a standard fluorescent light fixture only holds one or two SMD LED’s. The last advantage is that SMD is very easy to solder if you are experienced in soldering. COB requires that you have access to a soldering iron, which isn’t always available at a grow shop.

    Which one is more widely used?

    SMD is much more popular than COB, and it comes right down to a lower cost. It’s within reach of most people’s budgets?

    Do COB LED get hot?

    COB LEDs are typically more efficient than incandescent bulbs, and they also use less power, so they tend to get hotter than most other types of bulbs. However, they are not as hot as halogen bulbs or some CFLs.

    How much heat? Well, that depends on how much light you are putting out, and how much heat you are running off. The best solution would be to use a tent with a fan or air conditioner

    Conclusion On COB vs. SMD LED For Growing

    There’s no disputing that both COB and SMD are two great LED models you can use for your plant growing needs. They have their own unique features and we recommend you choose either of them based on your plant’s growing needs.

  • How To Make Rockwool Cubes

    How To Make Rockwool Cubes

    Rockwool is a great hydroponic grow media that offers excellent water retention as well as good air circulation. The rockwool cubes are used by hydroponic growers to start their seedlings and root their cuttings. So, if you’re wondering how to make rockwool cubes, we will enlighten you on this.

    It is one thing to buy ready-made rockwool plugs or starter cubes but do you know you can make some of these rockwool yourself? Making rockwool cubes will even cost lesser thereby saving you more. You also get more numbers of cubes at a lesser price.

    So, if you wish to learn how to make rockwool cubes for growing, read on to learn about this.

    Rockwool Cubes

    Rockwool is a natural product with a thick mat that comprises a long strand of natural fibers. They are formed by melting (at a very high temperature of 3000 degrees Fahrenheit) the combination of chalk and basalt rock to form lava. This lava is then tossed into a spinning chamber which forms the fibers that look like cotton candy.

    After spinning the fibers, a binding agent is used to mix and press them into bigger mats or slabs. It is these mats that are cut into different sizes and used as growing mediums in hydroponic systems.

    Rockwool Cubes

    So, because of this firing process, these rockwool cubes are biologically and chemically inert. This makes them a perfect growing medium for your hydroponics systems.

    Rockwool cubes are very efficient as grow medium because they will retain good moisture and also retain oxygen. This is essential for germinating seeds as well as cuttings for propagation. They are also used to grow various compact plants.

    Learn How To Make Rockwool Cubes

    Making your rockwool cube is a great idea to save up from excess cost. To make rockwool cubes, you need to obtain rockwool slabs. You can obtain them from large construction companies that buy in bulk and use them to your advantage as an indoor grower. You can also check any hydroponic supplies store for these slabs.

    Rockwool Growing Slabs

    Obtaining rockwool slabs will cost you lesser at the same time gives you plenty numbers of rockwool cubes to be used for planting. You can get almost 200 rockwool cubes from one rockwool slabs and they can be used for growing in rockwool slabs.

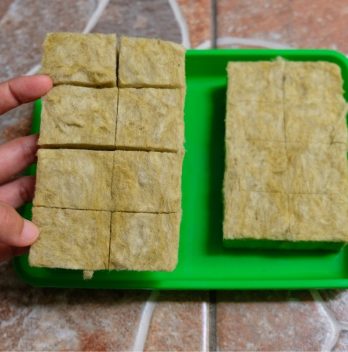
    So, after obtaining your rockwool slabs, pick one and make a cut along the middle length of the slab with a sharp knife or tool. Now that your slab has been cut into two, go ahead and cut them further into cubes. Cut the cubes according to the shapes you want.

    Learn How To Make Rockwool Cubes

    Once you’re done cutting the cubes, go ahead and soak and drain them in preparation of seed planting. You will need to make small holes or incision on the top of your rockwool grow cubes. This is to create the hole for your seed to be placed in. Then you go ahead and place your seeds into the holes for germination.

    Note: ensure you wear gloves and put a mask on while making or handling these slabs. Their dust or tiny fibers can become airborne and it’s important you prevent them from getting into your respiratory system.

    Benefits Of Using Rockwool Cubes

    There are many benefits to suing rockwool and they include:

    • Water Retention & Draining: Rockwool cubes are well-draining and overwatering issue is less likely to occur. At the same time, they will retain a good amount of water for your plant growing needs.
    • Air Circulation: they also allow adequate air to circulate thereby oxygenating the plant roots.
    • Reusable: Because they are derived from rock, they are less likely to degrade. Therefore, you can use them many times.
    • Sterile & Safe: They are very sterile and contain no pests or pathogens and they are free of weeds. They are also safe to use as they don’t contain any harmful chemicals.

    1.5″ Rockwool Starter Plugs, 2 Sheets of 49 Plugs

    612khtl3zkL. AC SL1000

    How To Prepare Rockwool Cubes

    Rockwool cubes preparation is an important step to take when using these cubes. Because of the manner in which they are made or manufactured, unprepared rockwool cubes have a very high pH. There is presence of lime in abundance in the rockwool fibers which increases the pH and the pH is usually around 8.

    With this high pH, if used in your hydroponic system unprepared, they can cause nutrient lockout thereby causing a nutrient deficiency. Plants majorly do well in slightly acidic mediums. Therefore, lowering the pH of your rockwool cube is required.

    Rockwool Grow Preparations

    A good way of preparing rockwool cubes for the purpose of lowering their pH is by soaking them in acidic water. This acidic water will dissolve the lime present in the rockwool fibers thereby lowering the pH to an appropriate range.

    Distilled water will do just fine because of its purity. However, you can also make use of tap water if that’s what you have available.

    When reducing the pH of your rockwool, ensure you do it slowly while testing the Ph level at the same time. You want to attain a pH level of 5.5 and nothing lower than 5.0. Make sure the pH does not go down below 5.0. This is so you don’t destroy the rockwool fibers when it gets too acidic.

    The rockwool cube should be immersed in water and allowed to soak for up to 24 hours. Once you’re done soaking. Take them out of the water and gently place them into your hydroponics system. With the prepared rockwool in your system, let your hydroponics system run without any plants.

    Do this and wait until the pH of your hydroponic system reaches 5.0 to 6.0 ranges. This shows that the rockwool cube is stable and are ready for planting.

    FAQ’s

    What is rockwool for plants made of?

    Rockwool is a natural, organic material that is formed when water seeps into the cracks in stone. Over time, these stones turn into hard, porous rock with the consistency of cheese. The rockwool is collected from the quarry and processed to remove impurities. What is rockwool used for? Rockwool is one of the most popular growing media because it provides many benefits for plants.

    It’s a great choice for high-light and low-light environments, and it can be used indoors or out. Rockwool also provides air and moisture circulation, as well as good drainage. It’s an ideal growing medium for houseplants because it absorbs water, helps prevent soil from drying out, and is perfect for retaining water.

    Rockwool comes in several different shapes, sizes, and textures. The best types for houseplants are pebble, granule, and cube. 

    How do you prepare composting with rock wool cubes?

    The following is how to prepare rockwool cubes to help you get your compost started.

    Step 1: Collect your material

    If you want to use rockwool cubes to start your compost, you will need to collect a wide range of materials. This includes organic waste that you normally throw out, such as food scraps, paper, leaves, grass clippings, and weeds. It also includes animal manure that you have collected, such as chicken, horse, cow, or rabbit manure.

    Step 2:Remove the packaging

    If you are using rockwool cubes to start your compost, you should remove the packaging before placing it in the pile. This includes removing any labels that might say “do not compost” or “biodegradable only.” It also includes removing any plastic wrapping that you might have put around the rockwool cubes. You should remove this wrapping before putting the cubes into the pile.

    Step 3: Place the cubes in the pile

    If you want to use rockwool cubes to start your compost, you will need to place the cubes in the pile. When you are ready to do this, first make sure that the material that you collected is dry enough to make a good compost. Then, simply place the rockwool cubes into the pile and cover them with an additional layer of the material that you collected.

    Step 4: Start turning the pile

    If you want to use rockwool cubes to start your compost, you will need to start turning the pile. This means that you will need to periodically turn the pile by lifting the material and turning it over. This will help to expose more of the rockswool cubes to air and light. You should keep turning the pile until the material is completely dry.

    Step 5: Water Your Composting

    Compost can be water-logged if there is too much moisture in it, which can lead to problems like mold or rotting. To prevent this from happening, you need to keep your compost moist. This means that you should add water when you add the materials. You should then water the pile regularly. This will help to keep the compost healthy. When you want to use a compost bin, you can start using one right away.

    Final Say On How To Make Rockwool Cube

    Rockwool cubes are one favorite grow medium amongst hydroponic growers and they are available in different sizes and shapes. They are safe to use and they will provide your seeds or plants the basic features to grow optimally.

  • Adding Nutrients To Aquaponics

    Adding Nutrients To Aquaponics

    Aquaponics combines raising fish and growing crops in a system and the fish waste serves as the plant’s nutrient. The plants also filter the water for the fish. However, sometimes the fish waste that serves as a plant’s nutrient may not be enough, and adding nutrients to your aquaponics system may be required.

    This is why it is important you test your nutrient solution often to know if any nutrient addition will be necessary. This will help you prevent nutrient deficiencies in your aquaponics system. Adding nutrients to your aquaponics system when necessary will also boost the yield of your plants.

    So, continue reading to learn about adding nutrients to your aquaponics system.

    Aquaponics Nutrients

    Nutrients are essential for plants growth and as we said earlier, the fish in your aquaponics provides these nutrients. The fish food you feed your fish usually contains all the appropriate nutrients required by your plants and it’s been supplied to your plants from the fish waste.

    However, this fish waste may not contain the required nutrient quantity needed by your plants to grow efficiently. This is why supplemental nutrients may be required. So, adding nutrients to your aquaponics system is for the purpose of balancing the low level or low amount of nutrients provided by the fish food.

    Aquaponics Nutrients

    Testing

    Before we look into adding nutrients to your aquaponics, the first thing to do is to test your nutrient solutions. This will help determine which nutrients are deficient and if they need nutrient supplements. Also, you will be testing for temperatures, pH range, and electrical conductivity. All these parameters need to be tested in your aquaponics system for nutrients to be absorbed appropriately.  There are different testing kits available for you to be able to do all this required testing.

    • PH Range

    It is important for the pH level of your nutrient solution must be in range. This is required for optimal nutrient uptake by your plant and also for your fish survival.

    If the pH level is out of range, plants will be unable to absorb nutrients appropriately. This is in turn causes the water to be polluted as this prevents the ammonia from converting to nitrates. It can also expose your fish to diseases.

    • Temperatures

    When the temperature of your fish surrounding is too low or too high, it will cause your fish to become stressed. At the same time, it will affect your plants’ growth.

    Inappropriate temperatures range can as well cause harm to the beneficial bacteria responsible for the conversion of ammonia to nitrates. When this happens, it can be quite detrimental to your aquaponics system.

    • Electrical Conductivity

    Inappropriate electrical conductivity can slow the growth of your plants. Thus, decreasing the quality of your plant’s growth. It can also make the growth of your plant very fast which may be bad for some plants that will enter into the bolting phase quickly.

    Electrical Conductivity

    Aquaponics Nutrient Supplements: Adding Nutrients To Aquaponics

    The most common nutrient deficiency that usually occurs in an aquaponic system is calcium, potassium, iron, phosphorous, and magnesium. These are part of the most essential elements required in your aquaponics system.

    So, depending on the nutrient element missing, here are the following ways of adding nutrients to your aquaponics system:

    1. Calcium

    The calcium deficiency can be solved effectively by spraying calcium solution over your plants. Mix calcium chloride with water and start with 4 teaspoons per gallon. Afterward, you can up the dose if need be. Ensure you spray once every week.

    1. Phosphorus

    Using rock phosphate is one of the most easiest and common methods of adding phosphorous to your plants. Adding this supplement directly to your plant beds will allow for instant absorption. However, ensure you protect your plant bed from direct sunlight to get a successful result.

    Adding shellfish bones to your fish tanks can also increase the supply of phosphorous as well as calcium.

    1. Potassium

    Spraying and food additives are two ways of adding potassium to your aquaponics system. Spray potassium chloride onto your plants and repeat this process at least once a week. For food additives, add kelp meal concentrate to feed your fish. This will serve as a source of potassium.

    TrueNute Potassium Silicate for Aquaponics, Hydroponics, Soil and Foliar Spray

    41dUXa6TAKS. SX425
    1. Iron

    To supply iron to your plants, a type of iron that can be easily absorbed by your plant should be used. You can use chelated iron and one excellent type we recommend is the Fe-DTPA. When using this, ensure your pH range is 7.5 or lower.

    Aquaponics Nutrient Deficiencies: Symptoms

    The most common deficiencies that may occur in your aquaponics systems are that of potassium, calcium, iron, phosphorous, and magnesium. So, here are their symptoms:

    • Potassium Deficiency: the symptoms include wrinkled and cupped leaves and this is usually noticed in older leaves.

    • Phosphorous Deficiency: you may begin to notice the leaves’ veins turning purple color. Brown spotting on leaves and spindly growth may be another sign of phosphorous deficiency. Stunted growth especially during the early stage of plant growth can be another symptom of phosphorous deficiency.

    • Calcium Deficiency: deficiency in calcium will result in stunted growth and brown spotting on the young stem and on the leaves. You may also notice the leaves cupping and interveinal chlorosis. The plant that is a fruiting variety will exhibit blossom end rot.

    • Magnesium Deficiency: the symptom of magnesium deficiency is interveinal chlorosis that will begin from the older leaves. You may also notice some white to brown necrotic spots.

    • Iron Deficiency: deficiency of iron is very easy to discover. You will notice interveinal chlorosis on all the young growth of your plant. The severity of the interveinal chlorosis can be so obvious that it displays an almost white appearance in the affected plant area.

    FAQ’s

    Can you add nutrients to an aquaponics system?

    Aquaponics combines the two technologies of aquaculture and hydroponics. Aquaculture is a form of farming that relies on the capture and rearing of aquatic animals for food, while hydroponics uses the nutrient-rich water in which plants are grown to nourish them. In the past, aquaponics has been mostly used by small scale farmers to produce organic vegetables, but now it can be used in commercial settings as well. With its high efficiency, low maintenance, and high yield, aquaponics has become a viable option for urban dwellers who want to live green and healthy lives. If you want to add nutrients to your aquaponics system, you can.

    How do I add nitrogen to my aquaponics system?

    Nitrogen is added to the water in an aquaponic system, either through the use of fertilizers or by adding air that contains nitrogen. Adding a fertilizer with nitrogen can be done at any time during the growing season. The amount of fertilizer added will depend on how much of the crop you are planning to grow and how much fish you are planning to raise. Air containing nitrogen is typically available at all times but you may need to add it more often during the summer months.

    What type of fertilizers can I use in an aquaponic system? There are many different types of fertilizers for an aquaponic system. The most common ones are: Organic Fertilizers These fertilizers are usually derived from plant materials and are usually free of harmful chemicals and other substances. There are many different organic fertilizers available depending on what you are planning to grow and the crops you are raising.

    What plant deficiencies are common in aquaponics?

    Aquaponics is a fascinating and fun way to grow food. But it’s also a complex and high-maintenance hobby that requires some understanding of the basic science behind it, as well as knowledge about plants and nutrition. There are many different ways to use aquaponics, from small urban systems that can fit on a balcony or rooftop to large commercial systems that can be installed in a warehouse or even a factory.
    The key to successful aquaponics is finding the right balance between water and fish. The water needs to be shallow enough to keep the fish from drowning. But you also don’t want to let the fish out of their tanks so that they will be able to eat the plants. You should be able to see the bottom of the tank at all times, so that you know exactly what’s going on in there. You also need to be sure that your water supply is clean. This means that you shouldn’t use tap water. It should be treated with chemicals to kill any bacteria that may be in it.
     

    Conclusion

    The most common nutrient deficiency in aquaponics is iron. Adding nutrients to the aquaponics system is mostly required in large-scale operations. This is because most aquaponics systems will do well on their own without requiring supplemental nutrients.

    Always monitor the pH levels of your nutrient solutions so your plants can absorb nutrients appropriately.

  • What Size Net Pots To Use

    What Size Net Pots To Use

    What size of net pots to use in your hydroponic system may be one question bothering your mind. Not too worry because we’ve got the answer for you here.

    Growing with net pot is one crucial part in your hydroponics. Net pots will help support your plant as well as keeping the grow medium from clogging your system.

    Net pots come in different sizes which means not all of them are made the same way. For this reason, it is important you select the appropriate size that will suit your plant’s growing needs. So, this is why we will be answering what size of net pots to use for your hydroponic system.

    What Are Net Pots?

    Net pots are mini plastic pots made to have a net framework and they are mostly used in hydroponic systems. They are used to support the different plants in a hydroponic system and they are made from a firm plastic mesh. They will also help with drainage and good airflow in your hydroponics system.

    You can use net pots with or without growing media. With growing media, you can use rockwool, Hydroton pebbles, coco peat, and even soil.

    Net pots will allow you to move or relocate your plants comfortably without causing any damages. These net pots are mostly reusable and can be used to grow different plants in a hydroponic system.

    What Are Net Pots

    What Size Net Pots To Use For Hydroponics

    The size of your net pot matters in hydroponics. if you get the wrong net pot size, it can hinder the growth of your plants. Various net pot sizes are available for purchase with different shapes and sizes.

    The major sizes you may come across are 2, 3, 3.75, 5, and 6 inches net pot size. In order to choose the accurate net pot size, the first and most important thing is to consider the size of the plant you will be growing. Also, take account of how the plants’ full size and weight will be when they reach harvest time.

    Small plants and leafy greens will fit into small net pots. While bigger or heavier plants will fit bigger net pots and the bigger net pot will provide a bigger base to support your plants. Bigger net pots will as well hold your grow medium.

    The net pot size for some plants such as pepper and squash is 4 to 6 inches net cup. While the net pot size for lettuce is 2 inch net cup. If you can obtain a 1 and a half inch net cup for lettuce, that will be great. Other small herbs can also use 2 inch net cups.

    GROWNEER 25 Packs 3 Inch Net Cups Slotted Mesh Wide Lip

    Use Narrow Net Pot Sizes

    You should choose net pot size that the holes are narrow rather than wide. This is so your grow medium does not slip through any of these holes and into your system. If too much grow medium slips through the holes, they start to reduce and your plant does not get enough anchor that can hold them steady.

    Therefore, choosing a narrow net pot cracks will not only hold your grow medium better, but it will also provide adequate base support to hold your plant steady.

    Use Net Pot With More Lips

    Some net pot comes with a couple of lips while others come with many lips. Always purchase net pots that have more lips or cracks. This will help hold your plants upright (especially heavy plants).

    If you make use of a net pot with few lips, when your plants become heavy they are more likely to tip over into your system.

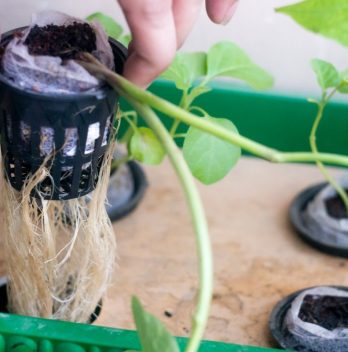
    The root ball of your plants will sit at the base of your net pots: while the roots will come out at the lips on the sides of your net pots. The net pots are usually hanged into the nutrient solution or they simply get misted by the water solution.

    Use Net Pot With More Lips

    However, if you’re using a NFT system where water will have to flow and pass the root, then your root should come out below the net cups. This is important for your plant to thrive when using the NFT system.

    Net Pot Lids

    When shopping for net pots, you should also add net pot lids to your list. Net pot lids are also important because they will help shield light from entering into your grow medium. Net pot lids are safe to use and they will not block light from reaching your plants.

    If light enters your grow medium that is already moist from nutrient solution, it can cause algae growth. So, to prevent this, use net pot lids.

    If you’re gardening outdoor, net pot lids will as well prevent debris and rain from entering your hydroponics system.

    How To Use Net Pot

    Using net pot is really easy. Follow this procedure to use your net pot to grow your plants:

    • First, you select the plant or seedling you wish to grow and choose the appropriate net pot size for them.
    • Next, you fill the bottom of the net cup with your preferred growing medium. You can fill the grow medium halfway or just a little halfway.
    • Then you can fit in your rockwool cube with the plant. Ensure your grow medium surrounds the plant so your plant can sit upright and prevent light from entering the sides.
    • Put your net pots inside your hydroponic system and watch your plant grow. As the root grows, they will grow out the net potholes.

    FAQ’s

    What size net pots do I need?

    Net pots are generally used for growing seedlings and small plants. They are the same size as the planting tray they are placed in. Most seedlings require a net pot that is no more than two inches deep. The deeper the pot, the better it will be able to support the root system of the plant. 

    When the seedling has reached about 6-8 inches tall, the net pot can be removed.

    Most garden centres sell plastic net pots. They come in a wide variety of sizes and colours, and they’re cheap

    How do you plant net pots?

    Planting a net pot is much easier than planting a regular container. The only thing you need to do is cut the pot in half lengthwise. Plant the halves in a hole in the ground and fill with soil. If you are not going to plant your net pots directly into the ground, you can use a special potting soil called “potting mix” or “soil mix”. You can find these in garden stores.
    Net pots work best when they are planted deep enough to hold a large amount of soil. This way, your roots won’t be able to go into the air and get tangled up with other plants’ roots. If you don’t plant your net pots deep enough, it’s possible that weeds could grow up through the holes in the bottom. In this case, try to put holes in the bottom of the net pots or place them on top of some sort of weed barrier.
    When using potting soil, make sure it’s a good quality soil.

    The soil should be moist but not soggy. If they dry out too much, it’ll cause root rot.

    Why net pots are used?

    Net pots have a very specific purpose, which is to create a micro-climate around the plants. Plants require specific conditions for their survival and growth. These conditions include temperature, moisture, light, humidity, air circulation, and air movement. When you have a large amount of plants inside your home or office, it is impossible to provide all these conditions at once. For this reason, it is necessary to use pots with a lid.

    These lids act as a container to keep the moisture in place and prevent evaporation. There are many different types of pots available on the market, but it is important to understand that not all pots work the same way. We will take a look at some of the most popular types of pots and how they work.

    How do net pots work?

    The first thing that you should know about net pots is that they are very similar to greenhouses. They are both used to create a controlled environment for the plants. However, the main difference is that net pots have a lid. The lid acts like a greenhouse, keeping the humidity and heat in place. The temperature inside the pot will be affected by the air conditioner and heating system. When the temperature rises, the moisture in the pot evaporates and escapes through the holes in the lid. This allows you to control the temperature and humidity around the plant. The lids are made of glass or plastic, which means that they can be placed in direct sunlight. However, the lids also have holes in them.

    What Size Net Pots To Use: Final Say

    What size of net pot to use in your hydroponic garden matters a lot. Ensure you always select the best quality net pots so they can last you for a long time as they can be reused.

    With that said, we hope you’re now able to decide how to choose the best net pot size for your various hydroponic plants.

  • Easiest Plants To Grow Hydroponically

    Easiest Plants To Grow Hydroponically

    Are you looking for the easiest plants to grow hydroponically? We’ve got the right answer for you here! We have listed 10 plants you can grow hydroponically, so read through to know your best pick.

    Growing hydroponically gives you the benefit of enjoying fresh crops and lovely house plants all year round. No matter your location or the season you’re in, you and your family can enjoy fresh yield from hydroponic indoor gardening.

    There are different varieties of plants that can be grown hydroponically, and they include vegetables, herbs, flowers, succulents, houseplants, and so on. So, go through our list of the easiest plants to grow hydroponically.

    10 Easiest Plants To Grow Hydroponically

    Most hydroponic growers especially beginners are usually interested in growing easy plants in their hydroponic garden so they can experience some early success. It’s a good thing to have a successful starting point when it comes to growing hydroponically. This will usually boost one’s interest and confidence.

    10 Easiest Plants To Grow Hydroponically

    So, here are the lists of some of the best hydroponics plants you can grow:

    1.    Hydroponic Lettuce

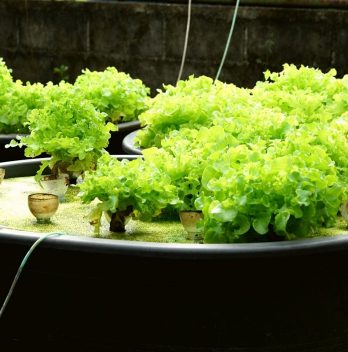
    One of the most popular and easiest plants that can be grown hydroponically is lettuce. They grow very rapidly and are they are so easy to care for. Lettuce loves water and requires less light, so it’s no surprise they are one of the most loved among hydroponic growers.

    2.    Spinach

    Spinach is another easy plant you can grow in your hydroponic garden. They are healthy leafy green veggies and they love cool conditions which makes hydroponic settings suitable for them.

    3.    Cucumbers

    Cucumbers are not left out on the easiest plants to grow hydroponically. Cucumber plants will grow in different hydroponic varieties such as ebb and flow, bubble buckets, and Dutch buckets. They can even grow well in a tower system. They can be grown by hobbyists and commercial growers.

    Cucumber plants are excellent vining crops and water-loving. Vining cucumbers require support as they grow and you can use a trellis. The vine variety will as well require room, especially vertical space.

    Growing Cucumbers Hydroponically

    However, if you don’t have enough space, you can go for the bushy variety. Also, you should choose a cucumber variety that is resistant to mildew as cucumbers are pretty vulnerable to the disease.

    4.    Tomatoes

    Tomatoes are another great option and they are grown at home and in a commercial greenhouse. Just ensure you supply support as your tomatoes begin to fruit and weigh more. They will grow well in drip systems and hydroponic buckets (also called bubble buckets).

    5.    Peppers

    Just like tomatoes and cucumbers, growing peppers is easy with hydroponics. all you need do is to ensure they receive adequate sunlight or supply them with good grow light.

    6.    Strawberries

    One of the most common fruits grown hydroponically is the strawberries fruits. They can be grown in a small garden and in a large-scale commercial hydroponic farm. Strawberries grow very rapidly giving you plenty of yield at a better quality rate. They are also less likely to give you any pest issues.

    AeroGarden Black Harvest Indoor Hydroponic Garden

    81DPs6WZXjL. AC SX569

    7.    Basil

    Basil herb will also grow easily in hydroponics. The fastest and easiest method of getting started with basil is to purchase basil seedlings and you can get them at any garden center around you. Then you go ahead to transplant the seedlings into your hydroponic system. Ensure you rinse off the soil carefully and thoroughly before transplanting.

    8.    Beans

    Beans will grow rapidly and require less maintenance to grow at the same time giving you abundant yield. You can grow either the bushy or viny variety. If you are concerned about space and the stress of adding support as they grow, then you should stick with the bushy variety.

    9. Carnation

    A common flower that can be grown hydroponically is the carnation flower. They can be grown in homes or in a commercial way. Their floral arrangement is so inviting and growing plenty of them in your hydroponics garden can be pretty lucrative.

    Growing Carnation Hydroponically

    10.    Watercress

    From the name, we can tell this plant is a water-loving plant. It is commonly known to be vegetables; however, their flowers are quite edible. If you want your watercress plant to transition into the flowering phase, you will require changing the nutrient to a flowering nutrient solution. Do this when the plant has grown halfway into its vegetative phase.

    Tips For Growing The Best Plants For Hydroponics

    Once you have decided the appropriate plants to grow hydroponically, you can follow these tips to guide you to grow appropriately:

      • Grow and supply your plants with good lightning.

      • The pH level of your nutrient solutions should be at the appropriate range so nutrients can be absorbed appropriately for plants growth.

      • Plants that have the same needs can be grouped and grown together. Plants such as tomatoes and tomatoes together or spinach and lettuce.

      • Always support heavy viny plants with trellis as their weight gets overwhelmed.

      • If you’re growing for cooking purposes, have in mind that a hydroponic system will produce a lot. So, ensure you plant only a couple of plants so the yield won’t be so excessive and there is minimal waste.

      • Ensure you carefully and thoroughly rinse off any soil to transplant any young plants or seedlings.

    •  

    FAQ’s

    What is the easiest plants to grow in hydroponics?

    When it comes to growing plants in hydroponics, you have a lot of choices. You can grow your plants with soil, rockwool or vermiculite. If you are just starting out and want to grow your first plant in hydroponics, you should consider growing tomatoes. They are easy to grow and there are many varieties of tomato plants that can grow well in hydroponics.

    1. Sweet Potatoes – grows quickly and requires no soil at all.
    2. Radishes – I think radishes will grow anywhere. They’re cheap to buy.
    3. Lettuce – You can get a small bag of lettuce seeds .for less than $
    4. Kale – grows like crazy.
    5. Peppers – I bought some peppers for $.99 each at Wal-Mart. I think they would be good in a hydroponic system.
    6. Parsley has been grown hydroponically for decades and is easy to grow. It is a hardy perennial that can be harvested all year long. Parsley can be grown as a cut flower or an annual vegetable.

    What plants cannot be grown hydroponically?

    It’s not easy to grow plants without soil. And, it’s even harder to grow them in a way that doesn’t require you to use potting soil or some kind of nutrient solution.
    Hydroponic gardening is a great way to grow plants in an environment that is more like the natural environment. If you have access to a greenhouse, or even a garage with a lot of sun and air circulation, you can use this method to grow a large number of plants. There are certain plants that cannot be grown hydroponically. The reason is that the roots will rot and die if the roots are not getting adequate water and oxygen.
    For starters, there are a few plants that simply don’t like the conditions inside a plastic or glass container. These include cucumbers, lettuce, and eggplants.

    Can tomatoes grow hydroponically?

    Tomatoes are very easy to grow and can be grown in most any type of container including plastic pots, so you don’t need to spend a lot of money to get started. There are several ways to start your own garden. You can buy a ready-made kit from a local nursery or you can build a grow box yourself. If you decide to build your own grow box, you can use a simple plastic bucket with a lid and some growing medium to start your tomato plants. The next step is to add the soil that your tomato plants will grow in. If you plan on growing several different types of tomatoes, then you may want to purchase a large container for your growing medium. This will allow you to grow a wide variety of tomatoes. Once your grow box is complete, you can plant your seedlings into it. You should water your seedlings after planting them in your hydroponic grow box.

    Final Say On Easiest Plants To Grow Hydroponically

    We have so many options of good plants for hydroponics. However, starting with the easiest plants will make things easier especially if you’re new to the world of hydroponics. This is because some plants require technical skills and knowledge while others are pretty easy.

    Once you have learned and perfected growing some easy plants with your hydroponics system, you can then proceed to expand and work on new plants.

    All in all, ensure you have fun while growing hydroponically because growing the hydroponic way is a fun thing to do.

  • Why Is My Lettuce Bitter?

    Why Is My Lettuce Bitter?

    Why is my lettuce bitter? This is one frequently asked question by different lettuce growers especially newbie that experience a bad tasting lettuce at the end of their harvest. We’ve got the answer for you here and possible solutions and prevention to go about bitter lettuce.

    The crispy juicy lettuce is a very easy plant to grow. However, the leave turning bitter is one common issue any growers may encounter. The good thing is there are definitely things you can do to avoid them turning bitter and we will enlighten you on this.

    So, let’s dive in to see why your lettuce is better and what to do to solve the problems.

    Bitter Lettuce

    The bittern lettuce is usually experienced with its leaves. There’s no denying that the lettuce leaves’ appearance always looks inviting and all: well, you may become disappointed when you have a bite from a lettuce salad or a wrap.

    Bitter Lettuce

    Why Is Lettuce Bitter?

    Heat is the most common reason for bitter lettuce but there are many other conditions that can predispose your lettuce to turn bitter. When you understand the reasons why lettuce may turn bitter, then you can make plans to prevent future occurrences.

    1.    Heat Stress

    Lettuce is a cool-season crop, however, that doesn’t mean you can’t grow them outside the cool season. Heat is one of the most common and leading causes why your lettuce is turning bitter. As the temperatures rise, the lettuce plant begins to mature and start producing flowers and seeds rather than leaves.

    This process is called bolting and it’s a natural unstoppable process that occurs when the temperature rises.

    2.    Water

    Lettuce leaves are water-loving plants which is why they are full of water! Those huge and succulent leaves require water to remain rigid, full, and tasty. Therefore, if your lettuce plants are watered less often, they can become bitter. When you begin to notice brown leaf edges, then that’s a sign of water deprivation.

    So, ensure you water your lettuce plants often and avoid their soil becoming too dry.

    Why Is Lettuce Bitter - Water

    3.    Nutrition

    Lettuce needs adequate nutrition to grow well.  The plant is a very fast-growing plant. Thus, it will require all the resources to grow smoothly and any slight deficiency will make the plant bolt. So, lack of nutrition will retard the growth of lettuce and make your lettuce leaves turn bad-tasting.

    Ensure you feed your lettuce plant with regular nutrition. However, don’t overdo it because too much fertilizer, especially excess nitrogen can also cause bitter tasting lettuce.

    4.    Bad Soil

    Another cause for bitter-tasting lettuce is bad soil. Lettuce plants need optimum draining soil and loose soil. This is because of the shallow and thin roots lettuce has. If the soil does not suit the lettuce plant, they will become stressed and begin to bolt.

    5.    Aster Yellows Phytoplasma Disease

    Aster yellows are one common lettuce disease that can cause lettuce to turn bitter. The lettuce inner leaves will begin to lose color and the outer leaves will look stunted. This can cause the entire lettuce plant to become weak and not useful.

    Aster Yellows Phytoplasma Disease

    6.    Lettuce Variety

    Lettuce plants belong to a wide range of species and there are over 100s of lettuce varieties and types. They have over 20, 000 other family members.

    We have many other lettuce varieties that are not used in homes and cannot find their way in our domestic lives. This type of lettuce variety is from the Lactuca virosa.

    The variety we consume is the Lactuca sativa. This type ranges from mild to sweet taste. However, their bitterness can still be activated if they are predisposed to conditions that will make them turn bitter.

    Bitter Lettuce Prevention

    Here are the following things you can do to prevent a bad-tasting lettuce:

    • Grow in Semi-Shade: Simply grow them in a semi-shade area and ensure you always keep them cool during hot seasons. You can also plant your lettuce under taller plants that will cover or shade your lettuce plants. You can plant them under tomatoes or crops that are trellised.
    • Healthy Soil: Maintain healthy soil and feed the soil with the appropriate nutrient. Add and cover the soil with some mulch to your soil especially hot season and during winter.

    Burpee Organic Blood Meal Fertilizer, 3 lb

    71do9eWazOL. AC SX569
    • Use Containers: when you grow your lettuce using containers, it allows you the comfort of simply moving them to a shaded place when needed.
    • Shade Cloth: you can purchase shade cloths and create some shade around your garden to block some sun.
    • Water Regularly: never deprive your lettuce plants of water as they will need all the moisture they can get. This is important especially during hot seasons.
    • Grow in Cooler Months: even though it’s possible to grow lettuce outside cooler months, growing them during cooler months will make your crop last longer.

    Bitter Lettuce: What To Do With It?

    If at the end of it all you end up with a bad tasting lettuce, here are some things you can do to relief the bitterness:

    • Run your lettuce leaves under cool water and put the head in a crisper immediately. Keep it in the crisper for 48 hours and bring it out rinse in cold water again. Then take away the outer leaves and cut the root and tips. The bitter taste should be gone and you can serve right away.
    • You can also cook your lettuce to get rid of the bitter taste and mix it with something sweet such as spinach or silverbeet.

    Note that lettuce leaves cannot be frozen or dried as they must be used immediately.

    So, rather than letting that bitter lettuce go to waste, you can simply revive it by following the above tips.

    FAQ’s

    Why does my lettuce plant taste bitter?

    There are a number of reasons your lettuce could be bitter.

    First, it may be too much or too little water. If you are not watering it daily, the plant needs more water. It may also be that the plant has not been getting enough light. If you are in a basement, you will need to provide additional light by using a light box, fluorescent lights, or other means. If you find that you are not able to get adequate light in your basement, you may want to consider relocating your lettuce plant outside, where you can provide adequate sunlight.

    How do you fix bitter lettuce?

    It’s one of the most common problems that crops face in our backyard, and if you’re like me, you’ve probably tried many different things to help with it. My usual method is to cut off the worst parts, but then I often end up throwing them out.

    You can add vinegar. I don’t mean just any old vinegary taste. I mean the kind of vinegar that makes a salad pop with flavor.

    Why is my hydroponic lettuce bitter?

    I’d bet that it’s because of something in the water. I think you may be looking for a chlorine filter or a carbon filter. Chlorine kills bacteria and will kill off the bacteria in the water.

    Bitter taste is often associated with the presence of oxalic acid in the plant. It’s produced as a defense against bacteria and fungi that are feeding on the plant.
    This can be caused by either over-watering or by over-fertilizing. If you fertilize with nitrogen-rich materials, then it will increase the concentration of oxalic acid. Keep the soil moist but not soggy; too much moisture can lead to root rot. I have a few pots of lettuce that have been growing for 3 weeks and they have started to get bitter. I have had the same soil mix, same lighting, and same water source for all 3 plants. The soil was changed weekly and everything else has remained constant.

    How do I make my lettuce not bitter?

    Lettuce is naturally bitter, which is why we eat it with some sort of dressing. The bitterness comes from oxalic acid, which is very soluble in water. In general, the more the leaf has been dried, the less bitter it will be.
    Some types of lettuce are less bitter than others. You can also rinse the leaves in a bowl of water to remove some of the bitterness. If you’re concerned about the amount of salt you’ll be adding to your salad, it’s best to add some lemon or lime juice to cut the bitterness before adding the salt. We usually recommend rinsing the lettuce in cold water for 30 seconds to 1 minute before dressing. A quick rinse should get rid of most of the bitterness. You can also use a salad spinner to dry the lettuce after washing.

    Final Say On Why Is My Lettuce Bitter?

    So, there you have it on why your lettuce is turning bitter. Follow our tips on preventing your lettuce from turning bad so you can enjoy a better tasteful lettuce meal.