Category: Hydroponics

  • How To Clean An Air Stone

    How To Clean An Air Stone

    You may be one grower that replaces your air stones frequently. But do you know you can clean your airs stones, reuse them, and save some little money? This is why we will be teaching you how to clean an air stone and renew its effectiveness.

    Air stones will help aerate your plant roots by creating bubbles in a hydroponic system. As these stones work hard to provide oxygen to your plants’ root, they may slowly lose their effectiveness. This may be as a result of the surface inside your tank getting clogged as time goes on. Thus, the need for cleaning.

    Even though air stones are cheap to purchase and most growers just replace them, you can actually clean them to rejuvenate their value. So, let’s dive in and discuss how to clean an air stone for your plants’ benefit.

    What Is Air stone?

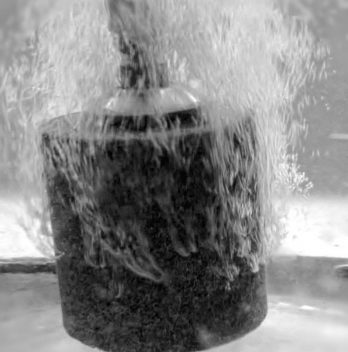
    Airstone is a piece of porous stone or lime wood. They help create bubbles in water and are used to aerate hydroponic tanks or fish tanks.

    The bubbles produced are pushed through the system with the help of an air pump and the bubbles allow oxygen to be dispersed throughout the system. The air stones are usually immersed in a water tank of the nutrient reservoir.

    What Is Air stone

    How To Clean An Air Stone & Restore Their Effectiveness

    Usually, air stones may start to lose their effectiveness around 6 weeks of use. However, this can differ depending on the mineral composition of your water. Cleaning your air stones not only removes dirt, but also disinfects them from bacteria, algae, and even dust.

    Even though cleaning your air stones may take some time, it is, however, a great way of extending its use. So, let’s take a look at how to clean an air stone in order to restore their good working conditions and perform like new.

    How To Clean Air Stones

    Step 1

    Turn off or disconnect your air stones and take them out of your tank. Go ahead and rinse the air stone in fresh or clean water. Then gently scrub off any excess build-up from the outer part and ensure you don’t scrub too hard.

    Step 2

    Next, allow your air stone to boil for ten minutes on low heat. Doing this will help take out internal dirt from the air stones at the same time sterilize the stone. After boiling, allow them to cool down and let them dry.

    VIVOSUN Air Stone 2PCS 4 X 2 Inch Large Air Stone for Aquarium and Hydroponics Air Pump

    81RGPOP9qGL. AC SX522

    Step 3

    When the air stones are dry, the next step is to soak them in a cleaning solution. Soak them in a mixed bleach and water of ration 1 to 3 respectively. Soak them for 24 hours or two days depending on dirty your air stones are.

    Bleaching can as well destroy any leftover bacteria that may be hiding deep inside the stones.

    Step 4

    The next step is to rinse off all the bleach. You can go ahead to attaching an airline from an air pump to the air stone and immerse it in clean water. This will further rinse off any residual bleach or even dirt.

    Step 5

    The next and final step is removing the air pump and allowing the air stone to dry. Then your air stone is ready to be reused.

    Other Methods Of Cleaning Air Stones

    Some people, especially aquarium owners, are usually skeptical about using bleach to clean their air stones because of the effect on aquariums. Therefore, there are other methods you can use in cleaning your air stones.

    1. You can use water and vinegar to soak your air stones. Using this method will take out dirt especially calcium lime deposits that is as a result of your reservoir having heavy mineral composition.

    2. Use hydrogen peroxide to soak your air stones overnight. Once you’ve done this, go ahead and wash thoroughly. Then blow air through the air stone till it is totally dried.

    3. Another cleaning agent is the denture-cleaning tablets. They are a dilute type of sodium hypochlorite bleach and they are safer than liquid bleach. So, get some clean water and put your air stone inside, and put as many denture-cleaning tablets. Allow your air stone to soak all night and wash using clean water and blow some air through the stone. Then you allow them dry.

    4. Another way on how to clean an air stone is to boil it for 5 minutes then let the air stone cool. When it’s cool, blow some air through the stone until it’s totally dry.

    5. The last method of cleaning the air stone involves washing and carefully scrubbing off the outer part that is dirty. This can usually be enough if only the outer part of the stone is dirty. But this method won’t kill microorganisms.

    The plastic tubing is another piece of equipment that needs to be cleaned for you to have a total air stone mop-up. Air stones use plastic tubing to connect to an air pump. You can use one of the above soaking methods to clean them.

    Benefits Of Cleaning Air Stone

    There are benefits to cleaning and reusing these air stones and they include:

    • Saves Cost: one obvious benefit of cleaning air stones rather than buying or replacing them is that it saves you cost.

    • Airstone Lifespan Extension: you can extend the usage of your air stone and reuse them several times.

    • Reduce Waste: cleaning and reusing your air stone rather than replacing them is a way of reducing wastage. Thus, you will be helping your community by reducing environmental wastage.

    Benefits Of Cleaning Air Stone

    FAQ’s

    How often should I clean your air stone?

    Every month. Air stones need to be cleaned regularly because they collect dust, lint and moisture from the air. These particles can make your air feel unpleasant.

    What’s the easiest way to clean my air stone?

    The easiest way to clean an air stone is to turn off the unit, take out the air stone and use a soft cloth to wipe it down. If the air stone is covered with dust, lint or moisture, simply wipe it down and allow it to dry. You can also use a damp cloth or sponge to clean the air stone. Just make sure that the water doesn’t drip onto the unit itself. If you don’t want to remove the air stone from your air conditioning system, you can also purchase an air stone cleaner that will help keep your air stone clean. These air stone cleaners come in different shapes and sizes and are designed to fit different types of air stones. Some of them even have cleaning attachments.

    Can you use hot water?

    The first thing that I do is give it a good wash with hot water. I do this by putting it into a sink full of hot water and swishing it around for a bit.

    Then I rinse it out. Next I put it into a dishwasher and run it through the washer. I have found that if I run the washer at high speed, which is about the highest setting, then the water doesn’t get too hot. After the washing is done I wipe it off with a rag and then dry it with a paper towel. Once it’s dried, I put a thin layer of silicone spray on it and let it sit there for about 15 minutes. Then I take a dry cloth and rub it down the outside of the stone. That seems to get all the dust off and make it look really good. The last thing I do is put it in my glass container and store it away for next time.

    How long do air stones last?

    Air-filled ball bearings are made of a rubber material that is compressed to create a tight seal. The compression of the air and the ball bearing creates a durable product. I’ve read that the plastic is very durable.

    My old set lasted me 8 years. I was using them daily. If you’re using them daily for a few months, then they’ll probably last.

    Final Say On How To Clean An Air Stone

    The best time to clean your air stone is when you notice your plants are stressed, which may result from low oxygenation. So, when you notice the performance of your air stone has reduced, then that’s a sign for cleaning.

    Sign to take note when your air stone is in despair is when some part of your system is covered in slime. Or when you notice some fibers settling on your grow medium which will cause blockage.

    So, get cleaning to rejuvenate your air stones.

  • Aeroponics Nutrient Solution Recipe

    Aeroponics Nutrient Solution Recipe

    If you’re wondering what the aeroponics nutrient solution recipe entails, then we’ve got all you need to know here. Aeroponic is an environmentally friendly way of growing plants.  It is just like a hydroponics system but plants here are literally grown in the air and the nutrient here are been misted over the plants.

    Aeroponics gardening makes use of a special way of feeding plants and the nutrient solution supplies the nutrient for the plant’s development.

    In this article, we will be discussing more on aeroponics nutrient solution recipes, how aeroponics works, and many more. So, continue reading to gain some knowledge.

    Aeroponic Farming System

    Just like hydroponics, aeroponics farming makes use of growing plants in a soilless environment. The plant roots are suspended in the air thus; this brings about the name ‘Aeroponic.’

    The aeroponic system is quite similar to the hydroponic system. However, the difference is the way nutrients and environmental conditions are delivered and controlled.

    Aeroponic Farming System

    In an aeroponics system, plants are cultivated in a closed space and the roots are sprayed or misted with a nutrient solution every given interval.

    Various plants such as vegetables, green, etc, can be grown in the aeroponic system and they will offer you bountiful yields.

    Aeroponics Nutrients

    The nutrient supplied in aeroponic plants is organic liquids and they include nitrogen, phosphorous, potassium, and so on. Easily assimilated by plants because they are in pure form. Therefore, nutrient absorption is faster and simpler.

    Aeroponics Nutrient Solution Recipe

    Growing various plants in aeroponics means you should be able to supply all the required materials needed for your plants to grow adequately. Part of the things to be provided is a nutrient solution.

    Different stages of plants require specific nutrient regimes. The nutrient solution you will be providing should have a complete structure of primary nutrients, secondary nutrients, and macro and micronutrients. All of these nutrients must be in the right proportion according to what your various plants require.

    AeroGarden Liquid Nutrients (1 Liter)

    The primary nutrient includes nitrogen, phosphorous, and potassium.

    The secondary nutrient includes magnesium, calcium, and sulfur.

    Macronutrients include iron, zinc, copper, boron, molybdenum, chloride, manganese, and so on.

    The correct pH is one determining factor in their absorption. So, let’s take a look at the ideal pH for the aeroponics nutrient solution.

    Ideal PH For Aeroponic Nutrient Solution

    Ideally, most plants will absorb nutrients efficiently when the pH is slightly acidic. While some other plants may prefer a bit of an acidic pH range. The most important thing is for you to have good information about the type of plant you will be growing.

    How Aeroponics Works

    The Aeroponics system utilizes a sprinkling method of feeding plants and plant roots are suspended in the air.

    The system has small nozzles which are made up of tiny sprinkler heads. This generates the mist for a short period.  Set the sprinkler to sprinkle nutrient solution every 10 or 15 minutes per day. This misting will engulf the plant roots where it hangs long enough for some of this nutrient to be assimilated.

    Once the mist stops, some of the nutrient solutions drip off to give the plant root a chance to receive oxygen. So they use this brief moment to take in oxygen until the next round of misting continues.

    Advantages Of Aeroponics

    You stand to gain lots of things growing with aeroponics. Below are some benefits of the aeroponic system:

    • Less Space With Abundant Yield: aeroponics farming offers you the ability to grow various plants in a limited space. You also enjoy bountiful yield in that little space. Achieve abundant yield in a limited space with a vertical garden.
    • No Nutrient Run-off: because the nutrients are usually in an enclosed space, nutrient run-off is reduced.
    • All Year Round Production: aeroponics makes use of soilless techniques and plants are grown indoors. Therefore, all environmental conditions such as sunlight, temperature, nutrients, etc, are controlled. It gives you total control whereby you can even predict crop timing and grow quality plants. This means no weather or climate change or disturbance and all your plants get to grow all year round. Thus, you enjoy all-year-round food production.
    • Safer And Environmentally Friendly: growing with aeroponics is very environment friendly and your plants are safe from contamination. This is because your setup is in an enclosed environment, thus protecting and eliminating any possible pollution. Therefore, it reduces the likelihood of using any type of herbicides or pesticides thereby offering you a more organic farm product.
    • Efficiency: the efficiency of the aeroponics system is 3 or more times greater than outdoor traditional farming. The design of an aeroponic system is to maximize the growth and production of plants.

    Downsides To Aeroponics

    Even though aeroponics offers lots of benefits one can’t resist, there are still some downsides to them.

    You need a bit of skill to run an aeroponics system efficiently. Take, for instance, the nutrient solution concentration. You need to sustain the nutrient concentration with accurate parameters. Any little malfunction can put your entire plant at risk.

    Downsides To Aeroponics

    Also, you need to ensure the misters always work at the specified time and they must not stop. If they stop for any reason like a power outage, your plants’ roots will dry out quickly. Now this will be bad for your plant if this happens.

    Another drawback is that your misters may suffer clogging from mineral deposits in water solutions. But to avoid this, ensure you clean your misters regularly.

    How Much is Hydroponic Nutrient Solution?

    The cost of hydroponic nutrient solutions can vary widely. Some brands have small bottles that cost around $10 to $20, while larger containers can cost upwards of $100 or more. When shopping for hydroponic nutrient solutions, you should remember that the cost can vary based on the specific nutrients it contains and the form it sells (e.g., liquid, powder, or tablets).

    It’s a good idea to compare prices from different manufacturers and retailers to find the best deal. You’ll also need to factor in the cost of other supplies and equipment, such as grow lights, a growing medium, and a container or system for the plants to grow in.

    What Nutrients For Hydroponic Vegetables?

    Hydroponic vegetables typically need a balanced nutrient solution that provides all the essential nutrients plants require to grow and thrive. These essential nutrients include:

    Nitrogen (N): necessary for leaf and stem growth

    Phosphorus (P): essential for root development and flowering

    Potassium (K): important for overall plant health and disease resistance

    Calcium (Ca): essential for cell division and the development of strong roots and stems

    Magnesium (Mg): necessary for chlorophyll synthesis and the proper functioning of enzymes

    Sulfur (S): important for the production of proteins and enzymes

    In addition to these primary nutrients, plants require trace elements like iron, zinc, copper, and manganese to support their growth and development. Most hydroponic nutrient solutions are formulated to provide all of these nutrients in the correct proportions. However, following the manufacturer’s instructions for mixing and applying the solution is important to ensure that your plants get the nutrients they need.

    How Do You Test for Hydroponic Nutrients?

    There are several ways to test for the presence and concentration of nutrients in a hydroponic solution. Try one of these methods!

    Conductivity Meter: This device measures the nutrient solution’s electrical conductivity (EC). The higher an EC value, the more nutrients are present. Low EC values can indicate a deficiency. 

    pH Meter: The pH of a nutrient solution can affect the availability of specific nutrients to plants. Most hydroponic plants prefer a slightly acidic pH range of 5.5 to 6.5. It is essential to regularly test the pH of the nutrient solution to ensure it falls within this range.

    Nutrient Testing Kits: These kits typically come with test tubes, reagents, and instructions for performing a series of chemical reactions to determine the presence and concentration of specific nutrients in a solution.

    You should regularly test the nutrient solution to ensure that your plants get the nutrients they need in the correct proportions. If you notice any deficiencies or imbalances, you may need to adjust the concentration of the nutrient solution or add supplements to correct the problem.

    What Are The Best Organic Hydroponic Nutrients?

    Several organic hydroponic nutrients can help your plants thrive. Some of the best are:

    Bone Meal

    Using bone meal in its liquid form is best for a hydroponic system. This organic fertilizer is an excellent calcium, nitrogen, and phosphorus source. However, there is a slight learning curve. Not all plants prefer a protein-rich supplement, and you’ll have to experiment with quantity to see what your plants prefer. 

    Guano

    This fertilizer consists mainly of insect and bat remains. It decomposes and builds up in a layer on the surface of caves from where it is extracted. Guano, especially bat guano, is extremely powerful. If your hydroponic plants need calcium and phosphorus, guano is a good choice. It also has significant amounts of potassium and nitrogen. 

    Blood Meal

    A mixture of blood meal and water makes a potent hydroponic fertilizer. Blood meal contains the essential nutrient nitrogen. Hydroponic plants need nitrogen for proper cell division and growth. 

    How Do You Mix Hydroponic Nutrients A and B?

    The specific instructions for mixing hydroponic nutrients A and B will depend on the particular product you are using. Here are some general steps for guidance:

    1. Determine the volume of nutrient solution you need. This will depend on the size of your hydroponic system and the number of plants you are growing. Most nutrient solutions come with mixing instructions that guide how much of each product to use based on the volume of water you are using.
    2. Gather your supplies. In addition to nutrient solutions A and B, you’ll need a clean container to mix the solution. A measuring cup or scale to measure will help you measure the nutrients. Use a clean spoon or fork to stir the solution. 
    3. Begin by adding the water. Fill your mixing container with the appropriate volume of clean, pH-balanced water.
    4. Add nutrient solution A. Follow the manufacturer’s instructions for the amount of nutrient solution A you need to add to the water. Pour the solution into the water and stir to mix it thoroughly.
    5. Add nutrient solution B. Follow the same steps you did for nutrient solution A.
    6. Test the solution. Use a conductivity or pH meter to test the nutrient solution to ensure it is within the recommended range for your plants. If necessary, adjust the concentration of the solution by adding more of one of the nutrients or pH-adjusting solution.

    It’s important to carefully follow the manufacturer’s instructions for mixing the nutrient solution to ensure that your plants get the right balance of nutrients. Different plants have different nutrient requirements, so it’s a good idea to research the specific needs of your plants and adjust the nutrient solution accordingly.

    How Long Can You Store Hydroponic Nutrients?

    Hydroponic nutrients don’t go bad, but they do lose effectiveness. The shelf life of hydroponic nutrients varies depending on the specific product and how it is stored. 

    Generally, you can store hydroponic nutrients in a cool, dry place away from direct sunlight for several years before seeing a decrease in effectiveness. Pick products with an expiration date far off and check the storing instructions provided by the manufacturer. 

    Final Say On Aeroponics Nutrient Solution Recipe

    The Aeroponics system is a great way of farming and there are lots of benefits to this system. They are quite similar to hydroponic techniques; however, there are a few differences between them.

    Supplying your aeroponics plants with the appropriate nutrient solution recipe is crucial to their growth. Also, various plants of different stages require various nutrient regimes. Therefore, ensure you have good information on the type of plant you’re growing. Also, obtain the right nutrient amount for your plant growing needs.

    FAQ’s

    How do you make nutrient water for aeroponics?

    You have to get a nutrient solution. There are many brands available from hydroponic supply stores, but you can also buy one that is specifically designed for aeroponics. The general principle is the same as any other hydroponic solution, so I’ll focus on the differences between the two types. Aeroponic solutions use water as the carrier fluid instead of air.

    It’s not quite as simple as that, though, because it must be treated differently than regular nutrient solutions. For instance, the amount of oxygen in aeroponics is very important. It’s necessary for the plant to grow well, and there is a range of concentrations within which plants can survive. Water with too little oxygen will be stagnant and won’t move around the roots. Too much oxygen will cause stress to the roots and leaves. Aeroponic nutrient solutions are typically more concentrated than regular solutions. A typical aeroponic solution will have a 10:1 ratio of water to nutrients, while a standard hydroponic solution will be closer to a 1:1 ratio. That means the amount of liquid you need to use in an aeroponic system is less than the amount required by a regular system. Aeroponic nutrient solutions also have a different formula than regular hydroponic solutions.

    What is the best nutrients for aeroponics?

    Aeroponic nutrient solutions are a mix of fertilizers, chelates, and micronutrients that are fed to plants through an air mist. Aeroponics is a form of hydroponic gardening that can be used with either soil or rockwool media. The aeroponics nutrient solution feeds the plant with nutrients and oxygen, while avoiding contact with dirt and water, which are both needed by soil-based plants.

    Nitrogen is one of the most important elements to be considered when building your own aeroponic nutrient solution. Nitrogen comes in two forms: Inorganic Nitrogen – Inorganic nitrogen is the most common type of nitrogen used in aeroponic systems. It comes in the form of ammonium nitrate and urea.

    Is aeroponics better than aquaponics?

    Aeroponics and aquaponics are two ways of growing plants in water. Aquaponics seems like a better way to grow plants, so I wanted to learn more about it.

    Aeroponics is a way to grow plants using air instead of soil. There are many types of Aeroponics systems, but the most common ones are called “vertical farms.” These are towers that hold the water, and a misting system that sprays nutrient-rich water on the plants as they grow. The water is recirculated through the tower. How Does Aeroponics Work? This is how it works: The plants are grown in trays, which contain holes that allow air to flow through the soil. The plants use this air as oxygen, and also absorb the nutrients. This means they don’t need soil, just water.

    What are the benefits of aeroponics?

    Aeroponics is a system that is used to grow plants in water. Aeroponic systems use the same principles as hydroponics, but instead of using soil to hold water and nutrients, it uses air to do so. The benefits of aeroponics over hydroponics are numerous. Aeroponics is more efficient than hydroponics because it uses far less water than hydroponics. A hydroponics system requires about 40 gallons of water per week. An aeroponics system only requires about 8 gallons of water per week. The use of air to hold nutrients means that there is no need for soil. This reduces the risk of mold, mildew and other contaminates. In fact, an aeroponics system can be run with very little maintenance. Hydroponic systems require regular cleaning. This includes the use of soaps, cleaners and a lot of time to keep the system clean.

  • What Are Rapid Rooters Made Of?

    What Are Rapid Rooters Made Of?

    Rapid rooters are great for germinating seeds and plant cloning. They are also perfect to use as a growing medium in your different hydroponic systems. But do you know what rapid rooters are made of? Well, let’s discuss this.

    Rapid rooter is a variety of starter plug and it is loved by both traditional growers and hydroponic gardeners. Using rapid rooters in your hydroponic garden will give you ease to gardening. They will give your seeds or plants an excellent germination rate.

    So, here is what you need to know about what rapid rooters are made of. We will also guide you on how to use them.

    What Are Rapid Rooters Made Of?

    So, what are rapid rooters made of? Rapid rooter can be composed of sphagnum peat moss or tree barks. This peat moss is composed of all-natural soil-less decomposed organic materials which are mostly sphagnum peat.

    Therefore, rapid rooters are made up of composted materials. This composted material has great absorbing capacity and it does not compact easily.

    Rapid Rooters Are Made Of

    Rapid rooters are very efficient and are made to supply adequate air to water ratio especially to your plant roots. The excellent air to water ratio is thanks to the peat moss it’s made of. So, this helps enhances the growth of roots and development of plants generally.

    Why Use Rapid Rooter Plugs?

    You stand to gain a lot using rapid rooter plugs for your indoor gardening. It will make your growing process easy and it also has an excellent absorption rate.

    Rapid rooter plugs are great for starting seeds which you can transplant into your hydroponics or outdoor soil afterward.  You can as well use it for cloning plants cuttings and also as a growing medium in your hydroponics system.

    They are not made of nutrients, therefore no worries about any nutrient interference when you make use of them in your garden. However, they need to be soaked before use in a balanced pH nutrient solution. Doing this will encourage better seedlings or plant development.

    How To Use Rapid Rooters

    It’s pretty easy to use rapid rooters and we will show you how.

    General Hydroponics Rapid Rooter Plant Starters, 50 Plugs

    71ATTw7BhjL. AC SX522

    Step 1- Soaking

    Soaking your rapid rooters in distilled water to re-hydrate them is the first step. You can soak for a couple of hours or up to 24 hours. Once you’re done soaking, the rooter plugs are ready to be used.

    Step 2- Plant your seeds

    The next thing to do is to put the rooter plugs into your seed tray or grow tray. Put some seeds into the center holes and if there’s no hole, gently tear the tip of the plug and place your seeds. You should plant more than one seed to enhance the possibility of successful germination.

    Once again, tear the tip of the plug and cover or place it over the seeds. This is to give the seed a dark environment which is required for its germination.

    Step 3- Water Your Grow Tray

    Put about 16 ounces of water in your seed tray every two or three days or as need be. The rapid rooter plugs will wick up water to remain moist.

    Step 4- Supply with low-intensity light

    Next, go ahead and cover the grow tray with a dome to retain the moisture and warm environment.

    Then supply them with some low-intensity grow lights such as fluorescent, LED lights, and so on. Remember to always keep your plugs moist by adding water to the grow tray when needed.

    Step 5- Germination

    Make use of a heating pad or mat to provide some extra heat to your seeds. This is done because seeds tend to germinate better when supplied with some little heat.

    After a couple of days, your seeds will begin to germinate and emerge out of the hole reaching for light. Once your seedlings grow to a certain stage, you can increase the intensity of light. This will help prepare them for their vegetative stage.

    Once you notice some good amount of root system emerging through the bottom of the rapid rooter plug, that’s a sign it’s ready to be transplanted. So, your seedlings are ready to be transplanted into your hydroponics system or traditional outdoor garden.

    When your seedlings are transplanted into your hydroponic system, supply them with a low dose of nutrient solution. Then gradually increase their nutrient dose to gear them for their subsequent plant’s stages.

    How To Use Rapid Rooters - Germination

    Storing Rapid Rooter Plugs

    Your rapid rooter plugs need to be stored properly to prevent them from going bad. Inappropriate storage of rapid rooter plugs can cause pathogens, mold, and fungi infestation. When you notice this infestation, there’s nothing that can be done. So they must be disposed of properly.

    The right way to store your rapid rooters’ plug is in an airtight container such as Ziploc bags. One other occurrence you may notice when you open your rapid rooter package is to find them very dry. They have not turned bad in this case. You can fix them by simply immerse them in some water to re-hydrate them. Also, apply nutrients to them.

    FAQ’s

    Are Rapid Rooter plugs organic?

    Rapid Rooter Plugs are not organic. They are made with materials that are commonly found in our environment. Rapid Rooter plugs are made from natural products.

    Are rapid rooters reusable?

    Rapid rooting is used to quickly and easily root cuttings and seedlings in containers. It speeds up the process of root formation. After rooting, the plant can be transferred into its final container or planted directly in the garden.

    If you’re using plastic plugs, you must remove all of the plug from the pot and then reuse it on another plant. The plastic plugs on Amazon are really cheap, they can be reused on many plants. When you put it in the pot, the soil is held in place.

    What pH do you soak rapid rooters in?

    This is what we used to soak them in and what most of the nurseries use. However, some people have had success soaking them in a different pH than 6.

    How do you grow seeds from a plug?

    It is best to grow plants from seed directly in the soil. There are exceptions, such as seedlings that need to be potted up before they can go outside. But generally, it’s easier to plant seeds in soil than to plant plugs in soil.
    If you want to plant a plug in soil, you’ll need to take the plug out of its pot, place it in a container of soil, and water well.

    Can I put Rapid Rooter in soil?

    Yes, you can use it in the soil. You will need to do a little preparation before applying this product to the soil. How long does it take for the root to start growing? When it is applied, the root will start growing within one to two hours. The roots will start growing very rapidly and will start to grow into the soil. After 2-4 weeks, the root system will be fully developed and it will not require further maintenance.

    How do I apply Rapid Rooter? Apply Rapid Rooter to the soil with a trowel or shovel. Spread it on top of the soil using a hand spreader. Mix it with the soil using a hand spreader. How often should I apply Rapid Rooter? Apply Rapid Rooter at least once a year. The best time to apply this product is in spring and fall. It is recommended that you apply the product twice during the season. If you are applying it in spring, apply it in March. If you are applying it in fall, apply it in September.

    Conclusion On What Are Rapid Rooters Made Of?

    Rapid rooters plugs are made of sponge-like materials and are also composed of entirely natural soil-less organic grow plugs. They are perfect for seed germination and plant cuttings propagation. You can as well use them for your hydroponics system as a growing medium.

    Using rapid rooter in your Garden will make things easier because they will easily take in water and nutrient solutions. They will also provide the root of your plant with good air circulation. Therefore, they will encourage a healthy root system, especially in your seedlings. So, this will turn into offer great harvest and profitable one for your garden.

  • Drip Rings Hydroponics

    Drip Rings Hydroponics

    In both hydroponics and aquaponics, moisture and nutrient solution needs to get to the right place for your plant to grow optimally. Using drip rings in your hydroponics or aquaponics is a great way of conveying water or nutrient to your plants.

    Drip rings hydroponics will deliver the nutrients to your plant root thereby maintaining adequate moisture level to your root zone. Your grow media are not left out as well as they will also take in and retain some good moisture that will be available for your pants’ use.

    Therefore, there’s no worrying or issues of dryness or in your hydroponics plants or even grow mediums. We are all about easy gardening and we will be teaching you how to make your drip rings hydroponics. We will also be recommending some drip rings you can purchase, so read on for more info.

    Hydroponic Drip Ring

    Hydroponics drip rings is a round-shaped ring used in delivering water and nutrient to grow mediums and plants roots. The drip rings hydroponics has holes that have been strategically poked to emits water and nutrient content directly into your plant and grow media. It is also fitted with a half-inch water inlet that you can use to plug any watering configuration.

    Therefore, it is an irrigation system that assists in sustaining an evenly consistent moisture environment in the root zone. You can use these drip rings for irrigating soil, peat, as well as hydroponic media.

    Hydroponic Drip Ring

    The hydroponics drip rings can be used in both indoor and outdoor gardens and they will make a great irrigation system for your garden.

    DIY Drip Rings Hydroponics

    It is pretty easy to make your DIY drip rings. We have made things easy for you by giving you a step-by-step way of making your drip ring.

    Materials

    • Wires (small and big wires)
    • Clips to holding
    • Plastic or rubber tubing
    • Pairs of pliers for bending wires
    • T fittings for connecting your drip ring
    • PVC cutter, a poker, or any cutting tool to make holes around your drip lines

    All these materials can be obtained from your local hydroponic store or online shopping sites.

    Steps On How To DIY Drip Ring Hydroponics

    Follow these steps to begin your DIY ring setup:

    Step 1

    The first step is to cut the tube and connect the two ends with the T fittings. You will need to cut the tubing according to the size of your plant bed or the individual plant area you wish to cover.

    Step 2

    Drill some holes around the drip ring. You can drill 5 or more holes depending on the length of your tube ring.

    Step 3

    Then your drip ring is ready to be positioned on your plant bed or individual plant area. You can use the T fitting for your hydroponic nutrient water inlet.

    Ensure you clean your hydroponics drip rings between each growing cycle.

    Some Recommended Drip Rings Hydroponics

    If you don’t want to go through the stress of the DIY process, you can simply purchase readymade drip rings for your hydroponics garden. Here is some recommended drip ring you can go for:

    1.    HYDROFLOW HGC748086 Irrigation Fitting Rain Ring Drip Emitter

    The hydroflow rain ring drip emitter is a convenient irrigation ring that can be used in the soil as well as hydroponics. They are durable and suitable for both indoors and outdoors use.

    The ring has specific holes that will allow water nutrients to rain over your plants and it will totally cover your hydroponic growing media. Therefore, it can be used for any type of growing media.

    The hydroflow rain drip emitter is very easy to clean between every grow cycle. The parts will come apart easily for cleaning and inspection. When it’s time to clean, just soak and rinse it with any cleaning solutions such as citric acid, peroxide, or any soft bleaching water mixture.

    It has a half-inch water inlet that can be easily plugged into any watering design. It comes with 3 removable stakes that will hold the ring in the perfect spot and it can be placed at any desirable watering height.

    2.    Bloom Brothers GGWR06 Inch Hydro Halo Water

    The bloom brothers hydro halo is another effective drip ring you can use in your hydroponic garden. It is suitable for all growing media and can be used for both indoor hydroponics and outdoor purpose.

    It features 3 stand removable stakes that help keeps the drip ring in one position. If you want, you can use the drip ring without the stakes.

    It is pretty durable thus, can be used for years and it’s easy to clean between every grow cycle.

    71bFqkjYjIL. AC SL1500

    3.    HydroHat 6″ Drip Ring Plant Watering System

    The HydroHat drip ring plant watering system is also a good option to go for. It will evenly emit water and nutrient solution around your plant base.

    This drip ring can be used for all types of grow media and it’s suitable for both indoor and outdoor gardening purposes. It is also long-lasting and quite easy to clean.

    41jpfGivRaL. AC

    Final Say On Drip Rings Hydroponics

    There’s nothing major about constructing your drip rings. Building a drip ring for your hydroponic garden is pretty easy and you can get it done with a couple of parts. Just follow our steps on DIY drip rings.

    However, if you don’t want to go through the stress of building your drip rings, you can simply go for one of our recommended drip rings.

    All in all, making use of drip rings hydroponics will offer your hydroponics plants lots of benefits that will ensure your plants grow optimally.

    Read more about Drip Irrigation For Tomatoes In Containers.

  • Growing Spinach Indoors Hydroponics

    Growing Spinach Indoors Hydroponics

    Let’s talk about growing spinach indoors with hydroponics. The spinach veg is an excellent food loaded with many nutritional benefits. Therefore, it will be a great addition to your garden having these fresh leafy greens and they will grow so well in hydroponics.

    The spinach growing season is usually restricted to spring and fall. But with growing spinach hydroponically, you get to enjoy your spinach all year round.

    We are all about easy indoor gardening and we have outlined all you need to know about growing spinach indoors hydroponics.

    Spinach Hydroponics

    Growing spinach in hydroponics is very rewarding. You get to enjoy plucking your fresh leafy greens from your indoor garden rather than buying from the grocery stores.

    Here is a guide on how you can go about growing spinach in your hydroponics, so read on to learn more.

    Tips To Growing Spinach Indoors Hydroponics

    Let’s look at how you can germinate hydroponics spinach from seeds. So, the first thing is to germinate your seeds using rapid rooter plugs. Before germinating, always soak the seed plugs in water. Also, ensure you only put a couple of seeds into the plugs to get a successful result.

    You can sow about 4 or 5 seeds in each rapid rooter plug. To enjoy a continuous year-round harvest, you can continue to sow new seeds every couple of weeks.

    Spinach Hydroponics

    Unlike other leafy greens such as lettuce, basil, etc, it can take up to 3 weeks longer for your spinach seeds to germinate. The ideal temperature for your spinach seed to grow optimally is around 45 to 75 degrees Fahrenheit. Also, give them a light duration of about 12 to 14 hours per day.

    Avoid using a heating mat or pad because spinach is a cool-weather crop and raising their temperature can cause poor germination.

    You will need to pinch off the heads of several plants once the seedlings begin to sprout above the starter plugs. Ensure you pinch and not pull so you don’t disturb the root system. Only the healthiest or strongest seedlings should be left to continue their growing process.

    Once you notice the root emerging out of the starter cube, you can now transfer your spinach seedlings into your hydroponic system. Then you should begin your spinach growth on a one-quarter diluted solution before you increase the strength of your solution slowly.

    Hydroponic System For Growing Spinach

    We have various types of hydroponics systems and many of them can work for growing indoor hydroponics spinach.

    The best types of hydroponics to grow with spinach include nutrient film technique (NFT), raft, and deep water culture (DWC).

    iDOO Indoor Herb Garden Kit, 12 Pods Hydroponics Growing System with LED Grow Light

    817 zhu+feL. AC SX522

    Spinach plants usually have shallow roots, therefore, your hydroponic systems do not need to be so deep. Nevertheless, one of the easiest ways to get started with growing spinach hydroponically is by using the deep water culture system (DWC).

    Light Duration For Hydroponic Spinach

    Spinach is a low to moderate light duration requiring plant and they don’t need too much intense light. You can supply your hydroponic spinach plant with about 10 to 14 hours of light a day.

    There are many different grow light options you can go for when it comes to growing spinach indoors with hydroponics. One great choice is the fluorescent grow light. This is because of its minimal heat emission, moderate power consumption, and affordability.

    Nutrient and PH Requirement For Spinach Hydroponic

    Clearly, we want our spinach to always grow bountifully in its vegetative stage. To achieve this, you need to provide your spinach plant with NPK nutrients with a high nitrogen ratio. This same nutrient scheme will encourage only the vegetative phase and it can be used up until the harvest period.

    Therefore, nutrients high in nitrogen, as well as phosphorous, will enhance the growth of your spinach. The appropriate pH range for spinach is around 5.5 to 6.5.

    Temperature Requirements For Spinach

    Spinach does not require too high a temperature as they are cool weather crops. The appropriate temperature range for spinach is around 45 to 65 degrees Fahrenheit.

    Temperature Requirements For Spinach

    Ensure your hydroponic spinach temperature does not 70 degrees. If it gets to 70 degrees, it may lead to plant bolting. Bolting is when your plant starts entering into the flowering stage which usually leads to bitter-tasting spinach.

    Hydroponic Spinach Spacing Requirement

    Because spinach is a shallow-rooted plant, it does not need a deep grow bed. So, you can give your spinach plant about 4 to 5 inches of space apart.

    Harvest Time Duration For Spinach Hydroponics

    Spinach plants should attain their full maturity around 35 to 40 days. Just like the lettuce cut and come again, you can simply harvest a small portion of your spinach. You can as well harvest the whole plant.

    Benefits Of Growing Hydroponics Spinach

    When you grow spinach hydroponically, you enjoy lots of benefits, and below are some of these benefits:

    1. Loaded With Great Nutrients: The leafy spinach is an incredibly healthy food that can be added to your food recipes. It is loaded with iron, vitamins, and folate. It is also great nutrition for blood health and bones.
    2. Easy To Garden With: Growing spinach in hydroponics is one easy plant to garden with. Your plants will be less prone to soil-borne disease and have no stress of weeding.
    3. All-year-round Supply: Unlike when you grow spinach in an outdoor traditional garden, you may be restricted to growing spinach only during spring. But with growing spinach indoors hydroponics, you enjoy all year round freshly spinach supply.
    4. Rapid Growth: Growing spinach with hydroponics encourages faster growth and a healthy abundant yield.

    FAQ’s

    Can spinach be grown hydroponically?

    Yes. You will find that there are many different methods to choose from and you can even mix and match them to suit your needs. As long as there is adequate oxygen, water, nutrients and light, your plants will thrive.

    It is very easy to grow spinach in a hydroponic system. Most people use the soilless mix (hydroton) with rockwool or vermiculite for growing. The plants need a lot of light and need to be fertilized regularly. You should know the amount of water you are giving the plant by the size of the container. For example, a large pot will require more water than a smaller one. You can also check the potting soil for moisture content. If it is dry, you can add water.

    Can you grow spinach without fancy equipment?

    Yes, you can. The first time I tried it, I used a plastic pot with holes drilled in it, a plastic cup for water and a piece of cloth as a growing medium. It worked pretty well. Here’s what I did: I had a 10-inch pot with holes drilled in it, so I put two pots side by side, about 2 inches apart. I put the pot that was to grow spinach in the second one.

    I put the pot with the plastic cup on top of the spinach pot, and put the plastic cup right over the holes in the spinach pot. Then, I put a small plastic cup with water in it next to the spinach pot. The plastic cup was a bit bigger than the pot, so I could put a few seeds in it and put the pot right over them. I put a little bit of soil in the bottom of the plastic pot, so that the roots wouldn’t get dried out. Then, I put some seeds in the plastic cup, and put the pot right over the seeds. When the seeds germinate, they’ll grow up through the holes in the bottom of the spinach pot and into the water. You can use any kind of seed, but I found that spinach seeds germinated the fastest.

    In a couple days, the plants will be big enough to transplant into their permanent pots. I put the little seedlings in a bigger pot, and then planted them outside in my garden.

    Do all lettuces need the same amount of light in a hydroponic system?

    The amount of light needed for spinach varies quite a bit depending on the variety of spinach that’s being grown.

    This means that if you want to have the very best crop you should look into the best types of grow lights for the type of lettuce that you are growing.

    Final Say

    As we can see, there are awesome benefits to growing spinach indoors with hydroponics. Simply follow our tips on how to successfully grow your spinach in the comfort of your home and enjoy fresh green spinach.

    Remember; keep your spinach seed moist when germinating. Transplant them into your hydroponics when the roots have sprouted out of the germinating cubes. Start with moderate nutrients and gradually raise the nutrient strength as they develop. Also, supply spinach with low light intensity and a short duration of about 12 hours daily.

  • How Often Should I Flood My Ebb And Flow

    How Often Should I Flood My Ebb And Flow

    Ebb and flow also known as flood and drain have some watering schedule rules to follow.  How often you should flood your ebb and flow system will depend on different factors. So, this is why we will be enlightening you on this.

    The important thing is to flood your plants before your grow media dries out. So, you flood your plant for a particular time and drain them after the flooding time has elapsed.

    Therefore, the watering schedule of your ebb and flow system will require adequate monitoring so your plants do not drown or dry out. So, let’s dive in to know how often you should flood your ebb and flow system.

    Ebb And Flow System

    Ebb and flow or flood and drain system is a type of hydroponic system that makes use of the intermittent supply of nutrient water solution which flows over the roots of the plants.

    The nutrient solution flows also across the inert grow medium used in the ebb and flow. This grow medium ensures to retain some water for the use of plants for some time until the system is flooded again.

    The idea behind this versatile hydroponic system involves the movement of water across the grow tray from time to time. This water is rich in nutrients required for plants growth. The system has a pump that pumps the nutrient-filled solution from the reservoir below.

    Gravity is used to return the nutrient-filled water back into the reservoir where it flows back up to be reused.

    As the nutrient solution is being pumped, it moves up reaching the grow tray or container. This nutrient solution now drenches the root of the plants until they reach the water limit.

    Usually, the ebb and flow makes use of a timer that controls the water flow which goes on or off. This way, the flooding schedule is monitored. As the timer goes on, it pumps nutrient-filled water above the plants and when the timer goes off, the pump is stopped.

    However, you still need to know how long the timer should be set to know how often you should flood your ebb and flow. So let’s look into this.

    How Often Should I Flood My Ebb And Flow?

    When we talk about how often you should flood your ebb and flow, what we mean is how many times should the nutrient water flow through the plants. This will depend on the factors we are going to be looking at and this will help you deduce how to plan your hydroponics system watering schedule.

    Then once you’ve observed your plants’ response to the watering schedule you give them, you can be sure of a perfect flood and draining cycles.

    When to Flood My Ebb And Flow

    Ebb & Flow Hydroponics Tips – Factors To Consider

    1.    Size Of Plant

    The size of your plant is one determinant of how often you should flood your ebb and flow hydroponic system. The bigger the plant size, the more frequency is required to flood your system. This is because bigger plants have more stomata they use to transpire or give off water into the atmosphere.

    Therefore, smaller plants will require less flooding. You should also increase the flooding frequency as your plants grow and get bigger.

    2.    Grow Media

    There are various growing mediums that can be used in flood and drain hydroponic systems. We have Rockwool, coconut coir, vermiculite, expandable clay pebbles, and so on. But you should know that each of these grow media differs in terms of water intake and water retention.

    Grow media such as Rockwool can absorb and retain adequate moisture, thus requires minimal flood and drain cycles. However, grow media such as expandable clay pebbles requires more time to be flooded because of their slow water absorbing capacity.

    3.    Temperature

    The heat produced by sunlight or the type of grow light you have can hasten up evaporation. Domestic heating systems and some other factors may bring about a hot environment and can predispose your system to water loss. This will tell you how much to flood your ebb and flow hydroponic system.

    Also, as the season changes for outdoor ebb and flow, you will need to adjust the flooding times to suit seasonal variations.

    BN-LINK Digital Heat Mat Thermostat Controller for Seed Germination

    71n290lSosL. AC SX522

    4.    Hydroponic System Size

    The size of your hydroponic system is another factor to consider when deciding your system’s flood and drain cycles. A bigger and deeper system requires lesser flood and drain cycles. On the other hand, the shallow and smaller system requires more flood and drain cycles.

    5.    Type Of Plants

    Some plants are water-loving thus requires more watering schedule while some are less water requiring. This is why you need to learn about the type of plant you will be growing. Get to know how much watering they prefer.

    6.    Light

    Light plays a role in the transpiration rate of your plants. Just as we mentioned earlier, the type of grow light used in your flood and drain hydroponic garden will contribute to the watering schedule. Therefore, in order to evaluate the flood and drain timing, consider the grow light distance to plants, power of grow light, and light duration.

    A stronger light, longer light duration, as well as a closer light distance will require more flooding cycles. This will help cover up for the lost water through the stomata in the leaves.

    7.    Humidity

    Humid environments contain saturated moisture thus, your flood and drain cycles should be minimal. On the other hand, dry environments increase transpiration in plants more. Thus, you should flood and drain your system more often.

    Ebb & Flow Hydroponics Tips - Humidity

    FAQ’s

    How often should you flood and drain?

    If you plan on using 100 gallons, you will need to fill the tank and let it sit for at least 24 hours. I would recommend doing this once a week. You will need to refill the tank with fresh water at least every other day. If you live in a humid area, you may want to add a dehumidifier to help dry out your plants. For the most part, you don’t want to keep water sitting in the system for extended periods of time. This can cause nutrient depletion and algae growth.

    What plants can be grown in a Ebb and Flow system?

    With the Ebb and Flow system, you can grow a variety of plants from herbs to fruit and veggies.
    It is a great option for growing small fruits and veggies like lettuce, strawberries, and peppers. You can even grow tomatoes, kale and cucumbers in an Ebb and Flow.
    Ebb and Flow is a technique where the growing medium is moved around the plants in a controlled fashion, alternating between dry and wet. In this way the roots are kept moist and healthy and can grow to their full potential. The flow and ebb system is a very efficient way to water your garden without the use of soil.

    What is the best medium for flood and drain?

    The best medium for flood and drain is usually a sand-based mixture, such as: Cemented sand Diatomite Clay-based media. You can use clay pebbles as well:

    How fast does hydroponic water flow?

    The flow is controlled by your pump. You could have a 1GPM (gallon per minute) pump, and you can use a 0.5GPM (half gallon per minute) pump, too. If you’re going to use an air stone, it’s important that you don’t put too much pressure on the air stone. If you do, the stone will crack and you’ll have to replace it. If you put more than 1 psi (pounds per square inch) on the stone, it will crack. So use a reasonable amount of air pressure to get the most out of your pump. I wouldn’t use an air stone at all unless you are using a very high-powered pump like a 1HP (horsepower) or 2HP pump.

    How do you control water flow in hydroponics?

    There are several ways to control the amount of water that flows through your system. The easiest way is to use a pressure regulator, and set the flow rate accordingly. You can also attach a pump to the output of your main supply line, and turn it on or off. This is less convenient, but more reliable.

    Conclusion On How Often Should I Food My Ebb And Flow

    Deciding on the appropriate watering cycles for your flood and drain hydroponic system is an important point to know. The goal is to prevent your plants and grow media from drying out completely or drowning.

    You should follow our tips above to help you decide how often you should flood your ebb and flow hydroponics system.

  • 3 Tier Plant Stand With Grow Lights

    3 Tier Plant Stand With Grow Lights

    Using 3 tier plant stand with grow lights is a good way of growing plants in a vertical manner especially if you have issues with space. This will give you the access and advantage to growing more plants to give you more yields.

    Also, if your fragile seedlings or clones are not so ready to face the harsh outdoor conditions, you can simply use a suitable plant stand with grow lights.

    In this post, we will be talking about how you can use 3 tier plant stand with grow lights. We will also give you some recommend stand you can purchase for your growing plants. So, let’s begin.

    Using Grow Light Shelves

    Grow light stand will help you withholding your grow light as well as some other hydroponic equipment. They will basically help with the arrangement of your plants.

    When considering using grow light shelves for your indoor growing plants, ensure you have the right size of length that fits the shelves. Although, it’s not much of a big deal if you have the length a bit longer. This is just to allow your growth set up will look well arranged.

    Using Grow Light Shelves

    So, the horizontal length of your shelve should be almost the same length as the shelve. This means if you have your shelve to be 4 feet long, your grow light length should be within that range.

    Also, the compartments of your shelves should have holes where you can easily hang your grow light.

    How To Set Up Growing Shelf

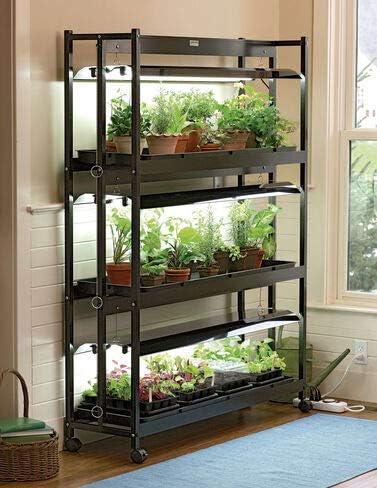
    You can either purchase a complete tier plant shelf with grow lights or simply build a DIY grow shelf stand.

    To build your own setup, simply purchase the grow lights, grow trays, and the shelving unit. Then you go ahead to attaching the grow lights on each shelf tier.

    Depending on how many grow light tiers you have, go ahead and set them up with your grow lights. Also, depending on how much light intensity your plants require, you can set up one or even two grow lights for each stand.

    Each tier of your shelf should open lines where you can attach your grow lights. Your grow light should have a chain or wire rack that you can use to hang over each tier and hook it up with your grow light. The hook will allow you to move your grow lights up and down.

    Moving your grow light up and down will allow you to set up the appropriate height of your grow and plant distance. You can always adjust the light anytime especially to suit the stage your plant is. Go ahead and put your growing tray on each tier and adjust your grow light appropriately.

    For starting seeds, your grow lights should be positioned close for about a week. For this reason, you should go with low emitting heat grow lights such as fluorescent lights.

    Some Recommended 3 Tier Plant Stand With Grow Lights

    Readymade grows light shelves will save you the stress of building your light shelving. So, here is some recommended 3 tier plant stand with grow lights:

    1.    Gardener’s Supply Company Indoor Grow Light, 3-Tier Stand Sunlite Light Garden

    The Gardener’s supply Sunlite garden 3 tier grow light stand features indoor grow light with plant trays for your plants. You can start your seeds and grow your plants with this 3 tier stand. It is pretty easy to assemble and it comes with clear instructions to guide you through the assembling.

    They offer a brighter light for your plant growing needs. You also get the pleasure of moving the grow light up and down for you to get the right grow light distance. The fixtures also come with a pull chain for easy height adjustments.

    This 3 tier plant stand arrangement will look so decorative in your living room or anywhere indoors. You can grow your seeds with this stand as well as growing herbs and houseplants. You can also try other plants like orchids with this 3 tier grow light stand.

    Overall, this is a great 3 tier plant stand with grow lights that will serve as an excellent starting point for your seeds or plant propagation.

    2.    Gardener’s Supply Company LED Grow Light Stand, Heavy Duty 3-Tier

    The Gardner’s supply LED grow light stand is another nicely built 3 tier stand. It is made of heavy-duty steel which makes it durable. It is well painted and the holes are well lined up.

    This stand is also pretty easy to set up without the need for professional help all you need to do is just go through the instructions. It also comes with nice trays for growing plants and the shelves are water-tight.

    The LED grow light is a full spectrum that will assist your plants through different grow life cycles. The bulbs are long-lasting and can last up to 50,000 hours of use.

    You can grow various plants such as basil, lettuce, parsley, sweet peppers, etc under the stand grow light. They are also ideal for growing flowers and other plants.

    51heP8L1q1L. AC

    It also has adjustable light features that allow you to raise or bring down the lights for your plants’ comfort. Their lights are also low emitting heat.

    This 3 tier stand also has a rolling caster that allows you to easily push or move anywhere around your home.

    However, this 3 tier plant stand with grow lights is at a high price but you can enjoy the price of the money spent.

    FAQ’s

    How beneficial are grow lights shelves?

    A grow light shelf is basically a box with a lid that you can place over your grow light. The box is made from either acrylic or metal and can be placed over your grow light. You can use a grow light shelf to help control the temperature of your plants, which means you can control the amount of light your plants receive. It will also help to keep the light on a constant level, which makes it easier to control. The grow light shelf will help to save space as you don’t need to put the grow light directly over your plants. If you don’t have a grow light shelf, your plants could end up receiving different amounts of light at different times.  You can use the grow light shelf to create a greenhouse effect.

    How do you make a plant shelf with lights?

    The following instructions are for hanging a plant shelf with light fixtures. This is an easy project that you can do yourself in about one day or less. Supplies: – 1 sheet of plywood cut to size – Drill bit – Screws – Wood glue – Paint – Plants Step 1: Cut two pieces of plywood of equal length. Step 2: Drill Holes for Screws Drill holes into each of the four corners of your plywood. The holes should be about 1 1/2 inches from the edge of the plywood. Step 3: Attach the Plywood to the Shelf Attach the plywood to the shelf using wood glue and screws. Make sure that the plywood is level when you are attaching it to the shelf. This is an important step because you will want to ensure that your lights will hang straight. Step 4: Drill holes in the light fixtures where the light bulbs will go. Step 5: Apply paint to your plant shelf and light fixtures. Step 6: Enjoy!

    How many grow lights per shelf?

    The total number of grow lights per shelf is determined by the length of the grow light fixture and the spacing between the grow lights. You can have 4 grow plants per shelf. Each grow light fixture can support up to 6 plants.

    What color grow light is best for seedlings?

    Greenhouse or cold frame seedlings should be grown under fluorescent lights. A grow light is a high-powered light bulb that has been specially designed to grow plants and seedlings. Grow lights are designed to mimic the natural light cycle of the sun, with wavelengths and intensities that are suitable for plant growth. There are two types of grow lights: metal halide and fluorescent.

    Final Say On 3 Tier Plant Stand With Grow Lights

    It’s really quite great having a 3 tier plant stand with grow lights because of its versatility. It offers you the benefit of growing in a vertical manner with a managed space.

    You also get to grow various plants including seedlings, clones, and other types of plants indoors.