Category: Hydroponics

  • Raising Salmon At Home

    Raising Salmon At Home

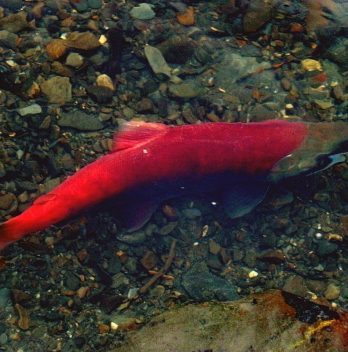
    Salmon is one of the most consumed foods and the most imported seafood in the US. Getting started with raising salmon at home is not so complicated with the right knowledge and we will enlighten you on this.

    You can raise salmon fish at home or in your backyard pond. Therefore, this will be an amazing way of obtaining fresh and locally made salmon fish for consumption or simply raising them as pets.

    Materials Needed for Raising Salmon at Home

    The following materials are required to get started with raising salmon at home:

    • Fish tanks or aquarium
    • Incubation tray
    • Styrofoam
    • Water
    • Salmon eggs

    Tetra Aquarium 20 Gallon Fish Tank Kit

    71 1y5AeZML. AC SX679

    How to Raise Salmon at Home

    Home fish farming is an awesome experience. One of the best ways of raising salmon at home is through the use of closed containment. Raising salmon in a solid closed tank or containment will mainly protect the eggs from pathogens or diseases.

    Another benefit of raising salmon from tanks at home is there will be fewer needs for chemicals. Therefore, you enjoy your salmon fish fresh, safe, and healthier. So, here are the tips to guide you in raising salmon fish at home.

    Stages

    1.    Incubation Stage

    Growing salmon can take up to two years from the egg stage. The stages begin with the egg and they are placed in the incubation tank. Ensure you rinse the tank with water before placing your salmon eggs. You can also clean the front of the tank or aquarium to have a clear vision.

    The eggs are in the incubation trays for about 6 to 8 weeks. The tank can be covered with Styrofoam to prevent light from entering allowing the egg to incubate. Put some gravel or rocks in the tank as the eggs will live under the rocks feeding on their yolk. As the eggs of salmon are allowed to hatch, ensure you monitor them as the eggs progress.

    The eggs will hatch and turn into alevin and are at the alevin stage for 30 to 50 days. They prefer to be in the dark at the alevin stage.

    Incubation Stage

    Also, make sure you remove the eggs shells and less active eggs or dead eggs as they hatch daily. The alevin now develops into young fish called fry. You can then remove the Styrofoam after they are done hatching.

    Read more about the 5 Best Hydroponic Kits You Can Find

    2.    Fry System

    The young fish are now moved into the fry tank for a period of 6 to 7 months. In the frying system or tank, the fry is then ready for its first feeding.

    3.    Feeding Stage

    When the fish has fed on their egg sac, you can now proceed to drop food in its tank. The fry is fed with commercial fish feeds which are made to fit the life stages of the various fish sizes. The fish feed sizes range from crumbs to pellet sizes.

    4.    Fingerlings Tank

    They are then transferred into the fingerlings tank for 5 months.

    5.    Smoltification Stage

    As the fish grow in size and reach about 40 grams, smoltification is induced. Notification is an advanced series in which the fish undergo a biochemical, physiological, and morphological transformation.

    When smoltification has taken place, the fish are known as smolt. Salmon smolt is preferred in aquaculture or aquaponics reason being they grow faster.

    Smoltification Stage

    6.    Fish Sampling

    A sampling of the salmon fish is carried out every two months to keep a good eye on their performance rate. When the fish reach 700 grams to 800 grams, they can now be moved to the grow-out tanks.

    7.    Growout tank

    They are now about a year old and transferred to the grow-out tank. Sampling is again done every two months and they can spend 12 months or more here based on the target size you want.

    8.    Harvest

    When your salmon fish has grown to the preferred target size of about 10 to 12 pounds, you can proceed to harvest.

    Learn about Where To Buy Fish For Aquaponics System

    How Much is Farm-Raised Salmon?

    The price of farm-raised salmon greatly varies. Several factors influence this. These include the farm location, the size and quality of the fish, and the time of the year. 

    Generally, farm-raised salmon tends to be less expensive than wild-caught salmon. In 2021, the US average price of farm-raised salmon was between $7 – $12 per pound. Prices can be higher or lower depending on the specific type of salmon purchased. 

    You should always shop around to see where you can get the best deals. Buying in bulk and directly dealing with farmers can also save you money.

    Does Farm-Raised Salmon Have Bones? 

    Like wild-caught salmon, farm-raised salmon can have bones. However, the fillets you buy in-store usually have no bones. The bones in farm-raised salmon also tend to be smaller and softer than those in wild-caught salmon. You’ll have an easier time removing them. 

    If you find bones in your salmon, you can remove them with sterile tweezers or nose pliers. Gently pull the visible bones or simply remove them as you would with any other type of fish. 

    Where is The Best Farm-Raised Salmon From?

    The quality of farm-raised salmon varies depending on the specific farming practices used. You should always research the farm or producer before purchasing farm-raised salmon. 

    Many countries and regions around the world produce high-quality salmon. The top producers are: 

    Norway

    This country is one of the world’s largest producers of farm-raised salmon. Norway is known for its high-quality fish and sustainable farming practices. 

    Chile

    Another major producer of farm-raised salmon in Chile. High-quality fish and low production costs go hand in hand in this country. 

    Scotland

    This country produces high-quality fish through sustainable farming projects. It’s a smaller producer of farm-raised salmon, but it makes this list nonetheless!

    Canada

    Several large-scale fish farming operations are located on Canada’s Atlantic Pacific coasts. This country is a major producer of farm-raised salmon. 

    Is Outback Steakhouse Salmon Farm-Raised?

    Outback Steakhouse is part of the Bloomin’ Brands group of restaurants. This group has committed to sourcing seafood from sustainable sources and working with suppliers using responsible fishing practices. However, it is unclear whether Outback Steakhouse serves farm-raised or wild-caught salmon. The restaurant chain does not disclose information about the sources of its seafood on its website or its menus.

    If you prefer one type of salmon over the other, you should ask the restaurant chain head or staff for more information before ordering. You can also consider looking for other menu items made with sustainably sourced seafood or asking the staff for recommendations.

    Is Egg Harbor Salmon Farm-Raised?

    Egg Harbor salmon is GMO- and antibiotic-free. It is sourced from the Faroe Islands. Salmon on these farms are responsibly raised in the North Atlantic Ocean. 

    Is Canadian Salmon Farm-Raised?

    Some of the salmon produced in Canada is farm-raised. Canada is a big producer of farm-raised salmon and has several large-scale fish farming operations. However, not all salmon produced in Canada is farm-raised. Many fish are wild-caught in the oceans off the coast of this country. 

    You should always check the label or ask the supplier if you’re uncertain about the source of salmon before purchasing it. You can also look for sustainably sourced seafood certified by organizations like the Marine Stewardship Council (MSC) or the Aquaculture Stewardship Council (ASC). These certifications indicate that the product was produced responsibly and sustainably. 

    How Much Salmon is Farm-Raised?

    Farm-raised salmon is a significant source of seafood worldwide. According to the United Nations Food and Agriculture Organization (FAO), about 70% of the global production of salmon is farm-raised.

    The production of farm-raised salmon has increased significantly in recent decades, as demand for seafood has grown and wild-caught fish stocks have come under pressure. Farm-raised salmon can be produced in various locations, including coastal areas, inland areas, and offshore platforms.

    Additional Note on Raising Salmon at Home

    Ensure you keep the tank or aquarium at a convenient temperature that is suitable for your salmon fish. They are cold water-loving fish. So, you can make use of a refrigerating unit with a device capable of keeping track of and controlling the temperature of the tank.

    Maintain a temperature of 45 degrees Fahrenheit. Note that temperatures above 55 degrees Fahrenheit can terminate the life of your salmon fish. Therefore, always keep an eye on the temperature daily.

    There should also be an aerator so your tank can have an adequate oxygen supply. Always filter the water to reduce ammonia because too much ammonium can kill your salmon fish.

    FAQ’s

    Can salmon be kept as pets?

    What about the health of salmon? Salmon are not suitable for pet keeping. They are cold blooded and have a low tolerance for stress. They should be kept in temperatures between 26-29°C. This is because they have a higher metabolic rate than other fish species. When their body temperature drops, they start to shiver and their metabolism increases. This causes a rapid increase in metabolism and the production of lactic acid. The accumulation of lactic acid causes a lack of oxygen in the blood and eventually leads to death. If you keep salmon as a pet, you should also have some experience with fish keeping.

    How do you make a salmon farm?

    e are going to break down the process into three parts: planning, building and operating. To start planning your salmon farm you need to look at your specific needs and what your budget will be. You also want to take into consideration how many fish you want to produce and how large they will be.

    The more salmon that are produced the more space you will have to build your facility. You may also consider how big the fish will get. 

    The second step is to build the facility. You will need to decide on the location of your farm. You will need to make sure that the area is safe for the fish and the equipment.

    You may want to look into the possibility of having a power source. This can be very important if you need to provide electrical service to the farm. You may also want to look into purchasing your own generators. These are very important when you start producing fish because the electricity may not always be available. Finally you need to consider how you will operate your farm. You will need to make sure that you have enough room to store all of the equipment and supplies that you will need. You will also need to make sure that your facilities are up to code, and that you have enough staff to run the farm. You will also need to make sure that you have enough water to keep the fish alive.

    How long does it take a salmon to grow?

    Salmon are anadromous fish, meaning they spawn in fresh water and live in the ocean. Salmon typically grow very fast during their first year, and then grow very slowly during their second year. 

    The average length of a salmon at age one is 2-3 inches long and at age two is 3-4 inches long. After age three, most salmon begin to grow more slowly, with growth rates similar to other fish species.

    Why is salmon farming good?

    The most important reason why we are in favour of the salmon farming industry is because it has brought about a sustainable future for wild fish stocks. It has allowed for an increase in salmon production, whilst at the same time ensuring that there is no over-fishing of wild stocks. This has led to more and more wild stocks being left to grow naturally in their natural environment, rather than being fished out and wiped from the face of the Earth.

    The most famous example of this is probably the Fraser River sockeye salmon, which was once in such danger of extinction that its population was reduced to less than 10 fish. However, with the help of the salmon farming industry, it now numbers in excess of 100,000 fish, and has been left to grow naturally without being fished out.
  • Deep Water Culture System Designs

    Deep Water Culture System Designs

    Deep water culture system is one common type of hydroponics system among hydroponic growers. The design is not so difficult and the materials needed are accessible and won’t cost you much stress. So, this article attempts to give you some information about deep water culture system designs.

    So, let’s dive in to gain some knowledge.

    Deep Water Culture System Designs Setup

    Deep water culture system designs are pretty easy to set up. What it takes to construct this system is so easy and it will be worth any hydroponics grower time. Now if you love to learn and create new things by putting them together, designing a deep water culture system will interest you.

    Let’s take a look at the materials used in constructing deep water system designs and the various types you can go for. All these materials can be purchased on Amazon, a local hydroponics supply store, or home depot.

    Materials Needed For DIY DWC System

    • Gallon buckets
    • Net poles for holding plants
    • Air pump and airstones for tank oxygenation
    • Airline tubing
    • Nutrient solution
    • pH control kit
    • Growing media to be filled inside the net poles

    Deep Water Culture (DWC) Hydroponic Bubbler Bucket Kit

    Types of Deep Water Culture System Designs

    1. Traditional Method: Attach the pump to the airline tubing and link the tubing to the airstone. Now put the airstone in the bucket and fill up the container with water. Do the necessary pH adjustments and put in your nutrients and begin seeding. As your plants begin to sprout and germinate, the roots will begin to touch the water. Your plants will receive adequate nutrients and water and they begin to enjoy optimal growth.

    2. Recirculating Deep Water Culture System: the recirculating DWC is great for both beginners and large scale. This method consists of several individual buckets or containers. These buckets are all linked to a central reservoir which circulates to feeds the plants in each bucket and returns to its reservoir. Make sure you calibrate each bucket and always monitor the pH and adjust accordingly.

    3. Bubbleponics: the bubbleponics is similar to the common deep water culture system. However, it is only perfect for small plants that their root system isn’t long enough to reach the nutrient reservoir. This system makes use of a water pump which is placed inside the reservoir. Oxygenated water is pumped towards the net cups where it can reach the roots of the plants. It flows along with the growing medium to wicks up water and later returns into the reservoir tank.

    Bubbleponics

    4. Kratky Method: the Kratky method is similar to the regular DWC but it just doesn’t make use of a water pump. The design of the Kratky method is set up in a way that there is a gap between the surface of the nutrient mix and plant roots. Half of the roots are submerged in the nutrient mix and the other half is left hanging in the air. The roots of the plants adapt and grow longer downwards as the water level drops.

    Deep Water Culture Requirements: How It Works

    • Nutrients: the nutrients in your DWC system will need to be monitored closely to maintain pH balance. The pH level should be between 5.5 to 6.5.
    • Aeration: air circulation is essential in the DWC system because plants require oxygen for optimal growth. Thus, air pumps are very important in the deep water culture system. The size of the tank will determine the size and strength of the pump. We recommend you use an air pump of 2 outlets or more. This way, you can attach air stones separately and this will deliver oxygen adequately. Keep the air pumps running at all times to maintain a well-aerated solution. Failure to do this can cause your plants to die quickly.
    • Reservoir: your reservoir can be a dark container. Make sure light doesn’t enter the reservoir to prevent algae growth. The algae growth can decrease air circulation to your root. We recommend you cover the top of your reservoir tank with a reflective material. This will reflect light away from your reservoir tank preventing your tank from light and heat.

    FAQ’s

    What are the most common deep water culture designs?

    The most commonly used type of grow box is the so called “deep water culture” or DWC hydroponic systems. These are very popular because they can be set up and run with minimal technical skills, they are very efficient in terms of light and space utilization and they are easy to maintain. They also provide a great variety of different plants in a very simple way.

    Pros: Very cheap and easy to setup and run.

    However, the disadvantage of these systems is that they are not very efficient in terms of light and space utilization.

    How does DWC hydroponics work?

    DWC uses a series of small chambers that are used to house plants and to provide them with the nutrients they need to grow. The chambers are connected to each other by a network of tubes, which is the way in which water passes through the system. The roots of the plants are suspended in a nutrient solution, which is pumped from one chamber to another, depending on the plant’s needs.

    DWC is a complete hydroponic system that allows you to grow your own plants without soil, water or electricity. The roots of the plant are in contact with a nutrient-rich liquid while the leaves receive light from an LED lamp. DWC uses the principle of nutrient recycling. It works by first filtering and recycling nutrients from the plant’s roots through a perforated plate into a nutrient solution.

    The plant absorbs the nutrients and grows. When the plant needs more nutrients, it is harvested and the process is repeated. DWC has the potential to produce food for a family of four on a single acre of land with no water or electricity. The benefits of growing your own food are numerous. You will save money, have better quality food and know exactly where your food comes from. Plus, you can grow your own food in a very safe way.

    DWC can be used to grow crops in space, as well as to provide plants with the essential nutrients they require for growth.

    Is it becoming popular?

    Hydroponic DWC gardening is one of the fastest growing trends in the world today. It’s not just for green thumbs anymore, it’s for anyone with a green thumb and an open mind! You can grow your own fruits, vegetables, herbs, even flowers. Hydroponics systems have been around for a long time but they were only used by the military and NASA. Hydroponics is a way to grow plants without soil.

    IS there an obvious best design?

    No. This is a difficult question because they are not the same. Both have their benefits and disadvantages. You need to think about what you want from your plants and choose accordingly.

    DWC Hydroponics

    As we have mentioned, deep water culture system designs are easy to construct and it offers a maximum yield of crops.  However, always have in mind that aeration is the key in deep water culture system designs.

    So, you can try any types of these DWC systems and enjoy greater yield.

  • Best pH For Hydroponic Tomatoes

    Best pH For Hydroponic Tomatoes

    The question we are going to answer in this article is: what is the best pH for hydroponic tomatoes?

    Growing in hydroponics has different requirements to maintain a steady and rewarding process. pH is one key factor in hydroponics and we are going to be talking about the best pH for hydroponic tomatoes. So, read on to learn.

    Some Info About Hydroponics pH

    In hydroponics, pH is very crucial in gratifying you with successful hydroponics farming. Even if you maintain other requirements such as lighting, temperature, aeration, nutrient, humidity, plant spacing, good growing medium, and humidity: if you fail to maintain the correct nutrient solution pH range, your plants will malfunction.

    A consensus among farmers has agreed that the most appropriate pH for hydroponics should be slightly acidic which is 5.5 to 6.5 ranges.

    Some Info About Hydroponics pH

    Best pH for Hydroponic Tomatoes

    The best pH for your growing hydroponic tomatoes for water should range from 5.0 to 6.8 for adequate nutrient take up. While the best pH nutrient solution for hydroponic tomatoes should range from 5.5 to 6.0.

    Ensure you always test the pH levels of your nutrients solutions with good testing kits so your hydroponics tomatoes are always in the right pH range.

    Why pH is Important for Hydroponic Tomatoes

    The pH in hydroponics tomatoes is very important to aid nutrient absorption. The rate at which nutrients are absorbed in hydroponics plants varies with different pH levels. You need to create the appropriate environments which will support the absorption of essential nutrients by plant roots and maintaining the right pH is the way to go.

    If you fail to provide the right pH for your hydroponics tomato plants, they stand a chance of nutrient lockout. This means your tomatoes will starve even if you are providing them with adequate nutrients. They just won’t absorb them.

    Measuring pH Levels In Hydroponic

    As we have made it clear that the pH of your nutrient solution is a crucial factor, keeping track of it is important. Therefore, ensure you always test your nutrient solution pH after adding nutrients or adjusters.

    Some great measuring tools are the pH testing solution, pH test strips, and digital pH meter.

    Adjusting pH Levels In Hydroponics Tomatoes

    Keeping track of pH and adjudging appropriately will guarantee the availability of nutrients to your hydroponics tomatoes. Anytime you realize your pH test levels are out of range, that’s a sign your hydroponics needs appropriate adjustments.

    However, we recommend you allow a bit of pH level falls out. This is because most plants do not like abrupt changes in their growing environment like an abrupt change in a pH nutrient solution. It can cause stress to your plants. We recommend you allow your plant to adjust a forgiving perspective to slight pH changes.

    Availability of Nutrients For pH Requirements In Hydroponic Tomatoes

    Some nutrients can be influenced differently by changes in pH levels than other nutrients. Nutrients such as sulfur, nitrogen, phosphorous, potassium, and others are made available across a different range of pH scale.

    Any deficiency in most of these nutrients can affect your hydroponics tomatoes crop yields. Too low pH levels will bring about excessive nutrient uptake and availability which can cause some disorder. Also, too high pH levels will bring about impediments to nutrient uptake and availability.

    General Hydroponics pH Control Kit for a Balanced Nutrient Solution

    81Pm5DEtpTL. AC SX679

    Causes Of Change In Hydroponic Tomatoes pH

    Different factors can cause your hydroponics tomatoes pH to change. They include:

    • Organic Factors: organic factors such as algae and bacteria can cause slight changes in your hydroponics tomatoes. The solution you need to take is by maintaining a slightly acidic solution. Another way is by keeping the roots of plants clean and getting rid of any dead root materials.
    • Gallon per Plant: another factor that can cause the pH of your solution to change is if the amount of solution falls below 1 gallon per plant. This will cause changes in the concentration of your plants’ solution thereby causing a change in pH. Topping up your reservoir with the appropriate amount of water will solve this problem.
    • Grow Media: the type of growing media you use for your hydroponic tomatoes matters. Some grow media can react with your solution, causing a pH imbalance. Grow media such as gravel, river rock, and unprepared Rockwool may interfere with the pH level of your system. The solution is to soak your inorganic grow media in pH-adjusted water before use and you’re good to go.
    Causes Of Change In Hydroponic Tomatoes pH

    FAQ’s

    What is the best pH level for hydroponics?

    The best pH level for hydroponics depends on many factors, such as what kind of plant you are growing, and what nutrients you are using. There are many different ways to measure pH, but in hydroponics, we mostly use the ph scale.
    1.The ph scale is a logarithmic scale that measures the concentration of hydrogen ions in water. This scale has 7 levels: ph 1 is acidic, ph 7 is basic, and all numbers in between are neutral. In the following table, you can see what the numbers mean
    1 Neutral pH
    2 Slightly alkaline pH
    3 Neutral pH
    4 Slightly alkaline pH
    5 Neutral pH
    6 Slightly alkaline pH 7 Basic pH 8 Extremely alkaline pH
    The ideal ph level for growing plants varies depending on the nutrients used. For example, some nutrients will be more beneficial at an acidic pH, while others will be more beneficial at a slightly alkaline pH.
    The best level for hydroponics is between 5.5 and 6.

    What’s the best pH for tomatoes?

    Tomatoes need at least a pH of 2.2 to be edible, and ideally about 3.6 to be sweet. Most home gardens will have an acidity around 4.5, which is fine for eating. If you want more acidity, you can add lime to your soil, but it will reduce the calcium that plants need to grow. The pH of a tomato can also vary from plant to plant.

    If your soil is more acidic than that, you can add lime (calcium hydroxide) to it. On the other hand, if your soil is more alkaline than that, you can add sulfur or gypsum (calcium sulfate). But be aware that if you add too much of either, it will lead to nutrient deficiencies in your plants.

    If you’re not sure what your soil pH is, test it with a soil pH tester.

    Do nutrients raise or lower pH?

    There are three main groups of nutrients that affect pH: The inorganic ions (e.g., H+ and K+), which contribute positively to pH. The ratio of these ions to the total nutrient solution is called the ionic strength, and high ionic strengths cause acidity. Proteins, which contribute negatively to pH. The most important proteins for buffering in soil are legumes (clovers, vetches, etc.).
    Soils with high protein content have a lower pH. Organic matter, which contributes positively to pH.
    To increase or decrease the pH of my soil, you can use organic and inorganic acidifying agents to alter pH. Organic acids such as acetic acid and phosphoric acid have low concentrations of H+ and are slow acting. Inorganic acids such as hydrochloric acid and sulfuric acid have high concentrations of H+ and are rapid acting.

    How does the pH of soil affect plant growth?

    The pH of the soil affects how quickly plants take up nutrients. A higher pH will reduce the rate of nutrient uptake by plants. This is because there are fewer hydrogen ions in the soil solution, making it more difficult for the plants to absorb nutrients.

    Conclusion

    We have concluded that the best pH for hydroponic tomatoes ranges from 5.5 to 6.5 for optimal nutrient uptakes. Ensure you always keep track of your pH levels and adjust accordingly.

    Follow our guidelines on pH hydroponic tomatoes and you will enjoy a rewarding process. We do wish you a smooth hydroponic tomatoes garden.

  • Killing Fungus Gnats In Hydroponics

    Killing Fungus Gnats In Hydroponics

    One of the most common annoying pests that can frustrate your hydroponic garden is fungus gnats. If you are looking for solutions to killing fungus gnats in your hydroponics garden, we have the answer for you here.

    These repugnant pests are usually seen flying around hydroponic gardens be it in an indoor garden, houseplants, or greenhouse. They can reproduce so rapidly and the females are capable of laying up to a thousand eggs. They are also known as fungus gnats because they can infect your plants with fungal disease.

    Both the adult gnats and their larvae are perilous to the health of your plants. Therefore, getting rid of these troublesome flies is crucial to avoid infestation of your garden.

    What are Fungus Gnats

    Fungus gnats are flying pests that can infect your garden with fungal infection. A female gnat can lay hundreds of eggs at a time and they love to lay eggs in damp or algae environments. They can be found flying and walking about on your grow medium and the base of your plants.

    Adult fungus gnats will lay eggs that will cause havoc to your garden. It is their larvae that will feast on your plant roots system and eat away and exposing your plant root to pathogens. Gnat larvae will chew deep into your plant root in turn cause stunted growth, loss of foliage, and discoloration of leaves.

    Fungus gnats are common pests to plants such as cucumbers, peppers, mushrooms, wheat, clover, lettuce, soybeans, alfalfa, Potato, and corn.

    A garden that is seriously infested with gnats will display symptoms of nutrient deficiency because the root system has been impaired.

    Killing Fungus Gnats In Hydroponics

    Taking control of the situation is very important when your garden starts to experience fungus gnat invasion. So, here are the various methods you can use in killing fungus gnats in your hydroponics garden:

    Biological Method Of Killing Gnats

    • Hydrogen Peroxide: an effective way in killing fungus gnats in your hydroponics garden is to use 3 percent hydrogen peroxide. Dilute 3 percent hydrogen peroxide with water. Make use of 2 tablespoons for one gallon. We recommend you start by using a little portion for the first one or two weeks then increase the portion afterward. Even though hydrogen peroxide is very effective, it can burn your plants. Therefore, use them with care. However, we recommend you other methods before you settle for hydrogen peroxide. If other methods fail, then you can try using them.
    • Commercial Products: there are several commercial products to use to killing fungus gnats in your hydroponics garden. They are pretty effective just make sure you follow instructions and your hydroponic garden will be good to go.

    Bonide (BND951) – Systemic House Plant Insect Control, 0.22% Imidacloprid

    712Je 7cwhL. AC SY879

    Natural Method Of Killing Fungus Gnats

    • Sticky traps: sticky traps can be used to catch and kill fungus gnats. If you can kill them, you have the chance of preventing them from laying eggs, thus reducing hydroponic garden infestation.
    • Vinegar: put some vinegar inside a jar. Fungus gnats are usually attracted to the sweet-smelling vinegar. You can cover the vinegar jar with a thin cover and puncture a hole or two. They will fly through the jar holes to reach the sweet-smelling vinegar and eventually drown.

    Preventing Fungus Gnats Problems In Hydroponics

    Preventing the future occurrence of fungus gnats will go a long way to keeping your hydroponic garden healthy. Here are the ways you can prevent fungus gnat infestation:

    • Shut all doors and windows in your hydroponic garden. Fungus gnats can gain access to your indoor hydroponic garden by simply flying in through your windows or doors.
    • Double-check any new plants (be it clones or transplanted plants) you may want to introduce to your hydroponics garden. A single fungus gnat eggs infected plant can wreak havoc to your hydroponic garden.
    • Between watering, allow the upper part of your plant to dry out before you water again. Therefore, you should maintain a dry environment at the top part of your growing medium. This will discourage fungus gnats from laying their eggs as they like damp areas.
    • Remove any access to fungus gnat food source by getting rid of any dead plant matter or algae.
    Preventing Fungus Gnats Problems in Hydroponics

    FAQ’s

    How do you kill fungus gnats in DWC?

    The best way to kill the gnats is to spray them with a solution of bleach and water. I have been using a solution of one part bleach, three parts water for years, but recently started adding a few drops of dish soap as well.

    How do you keep gnats out of hydroponics?

    The only thing you need is something to cover the top of the tank with. If you have a larger tank you can use a fan to blow the air out the sides. I have used a “gnat trap” on my last two grow’s. It is a piece of plastic tubing about 3 inches in diameter. It’s placed at the bottom of the tank.

    Where do fungus gnats come from?

    Fungus gnats (Diptera: Tephritidae) are common pests of flowers, crops, and trees in many parts of the world. They are among the most common insects found on plants. The most common species are the European red mite (Panonychus ulmi), the American red mite (Panonychus citri), and the Asian citrus psyllid (Diaphorina citri).

    These three species are considered to be the most important insect pests of citrus fruit. All species of fungus gnats are blood-sucking parasites of living plants. Females lay their eggs in the soil or on decaying organic matter near plant roots, and larvae emerge as adults in two to four weeks. Adults feed on a variety of plants, including trees, fruit, and vegetables. They can be difficult to control because they are often very abundant in infested areas and will breed rapidly under favorable conditions. A wide range of pesticides may be used to control these pests. Commonly used products include insecticides such as organophosphates, carbamates, pyrethroids, and chlorinated hydrocarbons.

    How do I know if my plants have fungus gnats?

    Many people don’t realize that the common housefly is a fungus gnat, which has a similar appearance. Here’s a great way to find out: If you see flies buzzing around your garden or in your home, then it’s probably a fungus gnat. In fact, many people are more familiar with this pest than they are with the housefly. They’re small and brown, and they have two long legs. And most importantly, they bite!

    Here’s another fun fact: The housefly will eat fungus gnats. When you see them flying around your garden, you can usually hear them chirping. But you’ll also notice that the housefly is more attracted to fungus gnats than it is to other insects. This means that when you see the housefly fluttering around your garden, it’s probably trying to help out by eating fungus gnats!

    How do you get rid of fungus gnats naturally?

    You can try using sprays and traps to bleach and alcohol. What really works to spray a diluted mixture of soap and water. It kills them before they have a chance to reproduce.

    Additional Information

    It is pretty common to have fungus gnats issues among hydroponic growers. Therefore, the key to beating this problem is to act fast as they can be easily controlled.

    The victim that suffers from fungus gnat is mostly indoor gardeners, be it home or greenhouse. Outdoor garden fungus gnat issues are usually controlled by seasonal weather changes and natural predators that feed on them.

    Ensure you follow our preventive measure tips to avoid fungus gnat infestation in your hydroponic garden.

  • Recommended Growstones For Aquaponics

    Recommended Growstones For Aquaponics

    You need to know not all hydroponic growing media are suitable for aquaponics. So, one of the most appropriate growing media for your aquaponics is growstones. We will be discussing more growstones for aquaponics so read on to find out.

    Growstones are great bio-filters for growing fish and veggies in your aquaponics garden. They have excellent physical integrity and you will enjoy a smooth, clean and healthy aquaponics system.

     What Are Growstones?

    Growstones are growing media used in supporting soil-free plants in hydroponics or aquaponics. Growstones also known as hydro stones are the best growing media for your aquaponics system.

    They are basically made from glass and they come in various sizes. Growstones are lightweight and porous.

    They are good replacements for other grow media such as perlite, and if you know perlites, you should know it’s a mined mineral. Perlite is very easy to break and turn into a fine powder which is why growstones is a more reliable alternative for your aquaponics.

     What are Growstones

    Growstones are a highly sustainable renewable resource and they can also replace clay pebbles. They can be used in aquaponics as well as all types of hydroponics.

    What Growstones Has To Offer Your Aquaponics System

    The benefits growstones offers your aquaponics gardens are as follows:

    • Growstones are reusable.
    • They will supply your aquaponics plants with good aeration. Even if you overwater your aquaponics plants, you don’t need to worry about root rot because of its top-notch aeration abilities. So be rest assured of a healthier root system with growstones.
    • Using fewer growstones than when you use perlite or other grow medium for your aquaponics will even give you better results.
    • Growstones have an excellent surface area which gives room for bacteria that helps convert ammonia from fish waste to nitrates to be used by the plants.

    • Growstones have excellent moisture retention. They can wick water up to 3 to 4 inches above the growing medium.
    • They will not break down or decompose into water or your system and they will maintain their physical integrity at all times. Thus, the fish reservoir tank will always remain clean throughout.
    • Growstones will give a neutral pH if presoaked for a couple of days before use.
    • Even though they are made from glass, growstones will not injure or cut you when you handle them. Also, even if growstones break, they won’t harm you.

    Recommended Growstones For Aquaponics

    Here are some growstones we recommend for your aquaponics system:

    1.    Growstone 950HY33CF, 9-Liter Hydro Stones

    The Growstone 950HY33CF is a Gs-1 hydro stone made from recycled glass. It is a great choice for the aquaponics system, hydroponics system, as well as traditional soil mix.

    It has all the properties that a growstones will offer such as optimum aeration, good drainage, and it’s a clean grow medium. This growstone will also decrease over-watering that can predispose your plant to root rot thus offering your plants a healthy and clean environment.

    They are great for your aquaponics plants root as they will improve nutrient absorption that will improve healthy plant growth.

    It also has a great surface area that encourages nitrifying bacteria that converts the fish waste to plant nutrients.

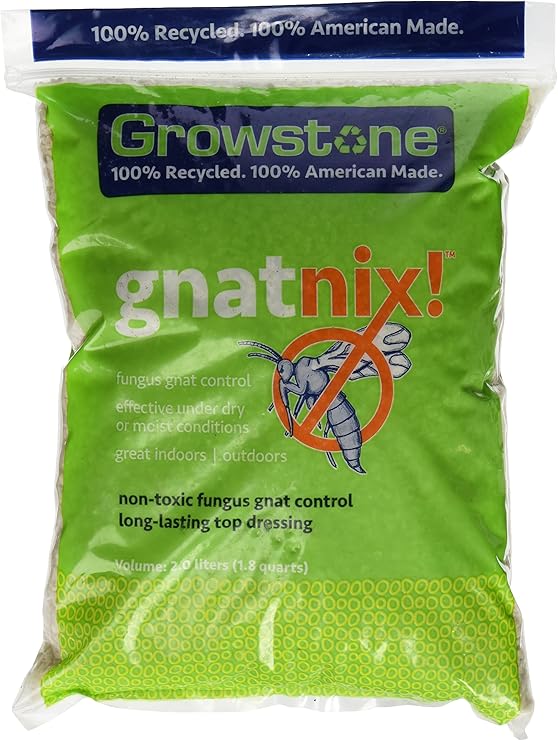
    2.    Growstone 750GC2L12 Gnat Nix Control, 2-Liter

    Growstone Gnat Nix control is another recommended medium you can use for your aquaponics or hydroponics system.

    We particularly appreciate this growstone gnat nix control because it will offer an additional gnat control for your aquaponics garden. We do know that gnats are a common pest most soilless growers’ encounter. It will also help reduce over or under watering that can cause root rot. Therefore, your plants can grow healthily.

    They are great for moisture absorption, drainage, and oxygenation. All these excellent qualities will improve your aquaponics plant development and result in greater yields.

    91UmHpGkI1L. AC SY741

    3.    Growstone 100516218 Mix This Soil Aerator Bag 9ltr, 9-Liter

    This growstone mix has been carefully mixed to suit both your hydroponics and aquaponics. It will also suit your fish as they have a good surface area that aids bacteria in converting ammonia to nitrates for plant use.

    It can replace clay pebbles or perlite and it’s 100 percent made from recycled glass. Promotion of moisture absorption, good drainage, and aeration. They will also improve nutrient absorption which will help in your aquaponics plant growth.

    It will also improve aeration and drainage in traditional soil, coco coir, peat, or compost.

    91aku9uQ6gL. AC SY879

    FAQ’s

    What are brownstones?

    Growstones are made of quartz that is treated to be hard and scratch-resistant. Growstones are used in conjunction with plants, which grow into the stone to anchor it in the ground. Growstones can be used in many different applications including growing succulents, herbs, cacti and more!

    Growstones are made from quartz and are treated with a special adhesive that makes them extremely durable.

    What are they good for?

    The benefits of using growstones are numerous.

    They are an easy way to have a garden or pot without the hassle of having to constantly water and maintain your plant’s soil. This means that you can enjoy your garden throughout the year and not have to worry about watering. You don’t have to continuously fertilize and weed your plant’s soil either, since growstones keep your plant’s roots planted into the ground. Growstones also provide a more stable environment for plants since they are much easier to move than pots. They also do not need to be watered as often because the soil is already moistened when the plant is placed in them

    What sizes do they come in?

    Growstones come in many different sizes so you can choose which one will work best for you.

    These sizes range from the smallest size, which is about 1 inch by 2 inches, to the largest size, which is about 6 inches by 12 inches. The smaller sizes of growstones are great for planting small seeds or seedlings while the larger ones are ideal for large plants.

    What’s a quality grow stone product?

    Growstones are from Aqua-Tropical Technologies are designed to help you in your quest for high-quality plants that grow and thrive in an aquaponics system.

    Growstones are a series of three, pre-cut plant containers that are specifically designed for use in an aquaponics system. They are made of a high quality plastic and they feature a built-in reservoir for water circulation and aeration.

    What are the advantages of these kinds of stones?

    Growstones have several advantages over other stones: They can be used for growing both fish and plants They are made from recycled glass They are durable They are easy to clean They come in various sizes They are dishwasher safe They are biodegradable Growstones are made from 100% recycled glass, and the material is durable and very strong. The pieces are also dishwasher safe, which is a huge advantage if you are cleaning your system often.

    Conclusion On Growstones For Aquaponics

    Growstones are perfect for the aquaponics system because they will offer you a problem-free aquaponics growing medium.

    With that said, we do hope you have learned some things about growstones for aquaponics. If you have any questions don’t hesitate to ask us as we will give you a quick reply.

  • Super Oxygenated Water For Plants

    Super Oxygenated Water For Plants

    Super oxygenated water in plants enhances nutrients absorption as well as root growth, especially in hydroponics. It will also assist the vegetative phase and flowering phase of your plant. This is why the importance of dissolved oxygen in plants cannot be overemphasized.

    In this guide, we will be discussing super oxygenated water for plants and more. So read on to gain some knowledge.

    Is Super Oxygenated Water Good for Plants?

    Oxygen is definitely good for plants. You might be wondering how plants need oxygen because they take in carbon dioxide in exchange for releasing oxygen. Even though this is true, plants do need oxygen just as you and I need oxygen to breathe.

    Super oxygenated water in plants equals dissolved oxygen. Dissolved oxygen is the driving force of all types of plant systems in general. Be it traditional plants or hydroponic plants, oxygen plays a significant role in your plant’s health.

    Is Super Oxygenated Water Good for Plants

    Importance of Super Oxygenated Water for Plants

    • Nutrients Absorption: super oxygenation of water in plants improves the absorption or uptake of nutrients from your plants’ roots. Let’s take organic phosphate as an example. The presence of oxygen in your plants’ roots will oxidize organic phosphate into absorbable inorganic phosphate which can be easily absorbed and use by plants.
    • Sufficient Growth: super oxygenated water in your plant will increase your plant’s growth and development of roots resulting in better yield.
    • Aerobic Respiration: oxygen is needed by the plant root system for aerobic respiration. This aerobic respiration is an essential activity that supplies the energy needed for plant root development.
    • Prevent Root Rot: you need to make sure the root of your plants have access to adequate oxygen so they don’t start to rot.

    How to Oxygenate Water for Plants

    Water is an important factor especially when it comes to hydroponics. Oxygenated water is also a significant element in your hydroponics or aquaponics system for healthy growth.

    How to Increase Dissolved Oxygen in Water for Hydroponics Plants

    Oxygenating water for plants in hydroponics is essential. The roots of your plants will need to have a nice environment so they can breathe easily.

    As we know the roots are embedded in the grow beds which are made up of growing media. This is why the media needs to have the ability to access adequate oxygenation for the plant roots.

    So, below are some ways you can oxygenate your hydroponics plants:

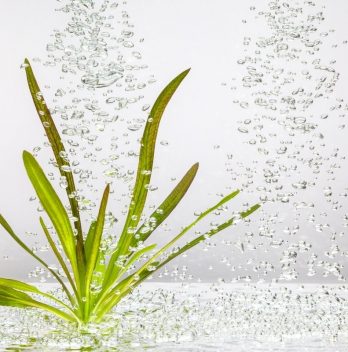
    Airstone: one common method of supplying super oxygenated water to your hydroponic plants is by making use of an air stone. The pump in the hydroponics is attached to the air stone and the air is pushed through the stone. There are various sizes and shapes of air stone which makes them easy to fit excellently well into your hydroponic system. Even though some air stone produces large bubbles, we recommend purchasing the ones that produce smaller bubbles for the efficiency of supplying adequate oxygen to your root system.

    Air Diffusers: another way is by using an air diffuser. Air diffusers distribute air into water by their bendable tubes. They are made up of bendable tubes having holes inside them which they use in distributing oxygen. Air diffusers release air or oxygen evenly into the tubes with their evenly distributed holes.

    Siphon: the common ebb and flow (or flood and drain) in the hydroponics system makes use of siphon. Siphon is a method that spontaneously drains water from a hydroponic grow bed. As water is siphoned from the grow bed, it unveils or opens the plant root hair system to air. This process supplies oxygen to the root of the plant.

    AQUANEAT Air Stone, 4 X 2 Inch Large

    81iYEL5PeDL. AC SL1500

    Oxygenated Water for Aquaponics Plants

    When it comes to aquaponics, it is essential for both your fish and plants to have adequate oxygen.

    This is because oxygen plays a crucial role to fish development. With adequate oxygen, your fish will be very efficient in providing your plants with good nutrients and it will also increase the production of more fish for your plants’ development. Deprived of oxygen both in your fish and plants may cause them to die.

    Factors that Affects Oxygen Concentration in Plants

    The main factors that affect the oxygen concentration in plants are temperatures. Temperatures are a critical determinant of oxygen in plants.

    During hot weather such as summer, the temperature increases and it causes a decrease in oxygen availability.

    At night when the temperature is cool, there is the presence of algae in your water tank. Even though we always try to minimize the presence of algae, a little bit is important to produce oxygen in your water tank.

    Factors that Affects Oxygen Concentration in Plants

    FAQ’s

    How do you make oxygenated water for plants?

    The process of making oxygenated water is known as hydroponics. It requires a special type of soil, called aeroponic media, and a special lamp that provides the light needed by the plants to grow. The oxygenated water is added to the soil in a small reservoir above the roots of the plants. In order to make this kind of system, you need some special equipment. such as an air stone.

    What does aerating water do for plants?

    Aerating your pond water is a great way to get the air in the water. It also helps keep the oxygen levels higher. You can use an aerator with or without electricity. You can buy them at almost any garden store. They will run on either electricity or battery power. It depends on what you like better.

    What is highly oxygenated water?

    Highly oxygenated water is water that has been exposed to pure oxygen. This process removes the carbon dioxide from the water and replaces it with oxygen. The amount of oxygen in the water is controlled by the concentration of dissolved oxygen (DO) in the water. The higher the concentration of DO in the water, the more oxygen the water will contain.

    How do you increase oxygen in soil?

    The most obvious way to increase oxygen is to add compost, but it may also be possible to improve your soil by adding extra organic matter, or by adding nitrogen fertiliser. So basically, adding compost would probably be the most effective way to increase oxygen.

    How do you give plants oxygen?

    Plants breathe by using the carbon dioxide we exhale and the water vapor we perspire. Plants take oxygen from the air and use it to make sugars and water. They can’t make oxygen out of nothing so they have to take it from the air. There are many different ways plants do this. For example, some plants use water to absorb the oxygen and then release it back into the air through their leaves, while others use the process known as diffusion. Diffusion is when a gas (oxygen) passes from a low concentration to a high concentration. Diffusion is a very slow process so it would not be practical to use it to remove all the oxygen from the air, but it is good at removing smaller amounts. This is what plants use to breathe.  
     

    Do all plants release oxygen?

    There are two ways to answer this question. The first is to describe the process of photosynthesis and how it works in a general way. The second is to look at specific plants and see what happens when they are exposed to different levels of light. The general description In photosynthesis, light energy is captured by chlorophyll molecules in green plants and algae. These chlorophyll molecules then bind with carbon dioxide, water, and other substances to form glucose.
    The process releases oxygen as a waste product. The waste oxygen is expelled into the air.
    Some plants will actually release more oxygen when exposed to light. 

    Conclusion

    Super oxygenated water is pretty important for the growth of your plants and the development of your plants’ roots.

    Therefore, always ensure you provide sufficient oxygen for your plants so you can enjoy bountiful yield.

  • Cheapest Hydroponic Growing Medium

    Cheapest Hydroponic Growing Medium

    Just because hydroponic is a soil-free system does not mean we would not have anything to support our plants. This is why we have the hydroponic growing medium that replaces soil or dirt. So, if you’re searching for the cheapest hydroponic growing medium, then look through our guide.

    We have outlined the cheapest hydroponic growing medium with the right information and some great tip to make your search easy. So, read on to know your best pick.

    What Is A Hydroponic Growing Medium?

    A hydroponic growing medium is a soil-free component that helps to hold sturdy or support the plant root system in the hydroponics. However, it does not provide nutrients. It is a permeable material therefore it can absorb and hold moisture, nutrients, and oxygen for the root system which is needed to grow healthily.

    A hydroponic grow medium can also be a non-permeable material. You just have to increase the watering schedule so your plant root does not dry out.

    Types And Characteristics Of Hydroponic Growing Medium

    Before we dive into the cheapest hydroponic growing medium, let’s have an idea about the types and characteristics of some grow medium.

    There are various hydroponic mediums available for your hydroponic use. Any type works great. They simply depend on the type of plant you wish to grow, the type of hydroponic system been used, and your preference.

    There are so many growing mediums are accessible to suit your needs, budget, and preference. We have listed a few of the most common types of hydroponic growing medium used.

    1. Rockwool

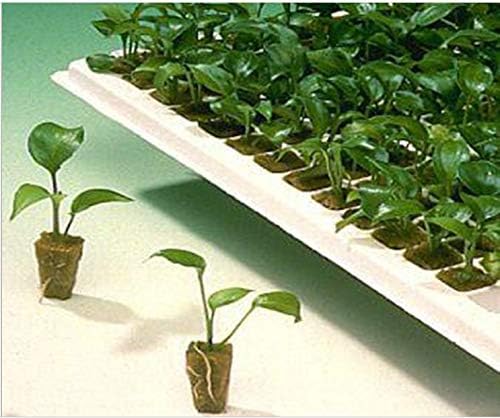
    Rockwool is one soil-free hydroponic growing medium that has been in existence for a long period. It’s been longed used for plant starters and cloning. It is an inert media made from melting rock and other processes. Rockwool is meant to be pre-soaked and it has been shaped into cubes, slabs, or blocks.

    Rockwool is now been used in place of starter plugs which helps in rapidly encouraging the sprouting of seeds in your farm.

    Rockwool

    2. Coco Coir

    Coco coir is a famous and best-loved growing medium among hydroponic farmers. They come from the husk of coconuts and are great for hydroponic plant support and moist retention.

    The soilless coco coir is loved because of its awesome characteristic protection of seed and makes them start strong. It will protect your seeds from buildup salt and too much sunlight that can harm your seeds. At the same time being a good medium free of fungi or pathogens.

    3. Oasis cube

    Oasis cubes is another great grow media comparable to Rockwool and they are made for both seeds and cuttings. It is an inert growing media that require no pre-soaking and has a neutral pH.

    4. Expandable Clay Pebbles or Pellets

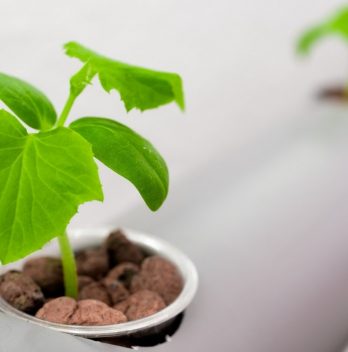
    The expandable clay pebbles or pellets also called hydroton pellets is a pH neutral grow media. They are great supports for your plants which will also fit in net pots and they are reusable. Although they are not so cheap, they are cost-effective and great for your hydroponic plants.

    5. Perlite

    Perlite is another great media used for hydroponics. Apart from being a growing media, it is commonly used as soil additives by traditional soil growers. It is made from heating volcanic glass.

    Perlite is not as good as standalone media. It is usually mixed with other grow media such as vermiculite, coco coir, as well as soil, and it’s usually mixed 50/50. Perlite is less expensive and it’s reusable.

    Perlite

    6. Vermiculite

    Vermiculite can be compared to perlites and it is made from heating mineral rocks till it expands into pebbles. It is mostly used in a mixture with other grow media.

    4 Recommended Cheapest Hydroponic Growing Medium

    We have listed some recommended cheapest growing medium you can go for:

    1.    GROW!T JSCPB – Coco Coir Mix Brick (Pack of 3)

    Grow!t coco coir mix is an awesome organic growing medium for your seeds and seedlings to germinate and start strong. It is one of the cheapest good quality coco coir and it’s easy to store and it expands very well. It is also biodegradable and renewable.

    Another advantage we admire is that it offers protection against pathogens and fungi, therefore, giving your plant healthy growth. It also protects against the build-up salt.

    Grow!t coco coir mix is a soil-free medium that holds water adequately and there’s no risk of plant drowning. It conveys nutrients throughout your plant root thereby improving plant development. It also has good aeration.

    Pros

    • Great water retention, nutrient circulation, and aeration.
    • Offers protection for your plants.
    • Expandable and easy to store.
    • No over-saturation problems.

    Cons

    • May need washing.
    Cheapest Hydroponic Growing Medium - Coco Coir

    2.    Grodan Mini Cubes Rockwool Hydroponic Grow Media + THCity Gloves – 2 Gallon Bag

    The Grodan mini cube is a type of Rockwool and it is an inexpensive hydroponic growing medium. It comes in a cotton-like candy fiber and has been compacted into various shapes such as blocks, cubes, or slabs.

    Grodan mini cube will serve as a great anchor for your hydroponic plants in their various developmental stages. This type of growing media will retain moisture and deliver nutrients to your plant root. It is great in providing good air circulation (oxygen) for the growth of your plant.

    We admire the fact that it comes with a pair of lovely gloves for your comfort and protection when handling your medium.

    If you wish, the cuttings or seedlings you started in Grodan mini cube can be transplanted to dirt or your soilless growing medium. Grodon will work fine if all other growing conditions are met.

    The downside is that they need to be presoaked and the pH range will need to be monitored.

    All in all, this is a good option you can consider when choosing the cheap hydroponic growing medium if all other conditions are met.

    Pros

    • Retains moisture.
    • Delivers nutrients to plant roots.
    • Good air circulation.
    • Comes with fine pair of gloves.

    Cons

    • Needs to be presoaked.
    71mhBuNB7fL. AC SL1000

    3.  1.5 inch Rockwool/Stonewool Grow Cubes

    1.5 inches Rockwool is another cheap and available option for your hydroponic growing medium. It can be used for seed starters, root cuttings, and so on.

    This medium provides a good anchor for your plant even for starter plants. It has great air circulation and excellent drainage properties. It also conveys nutrients to your plant root for adequate and rapid growth.

    You can either use it for your garden hobby or commercial growing purpose. The size is excellent to fit into a standard flat grow tray.

    Even though it requires presoaks before use, overall this is a good option you can consider when choosing the cheapest hydroponic growing medium.

    Pros

    • Affordable.
    • Great for seed starters and cuttings.
    • Provides anchor for plants.
    • Great air circulations, drainage, and delivers nutrients.

    Cons

    • Requires presoak.
    51jpB7a1%2BNL. AC
    1. Clay Pebbles – 100g Hydroponic Clay Pebbles Growing Media Anion Clay Rocks

    Clay pebble is another cheap soil-free hydroponic growing medium as well as aquaponics. It is safe and reliable and does not emit any toxic substances. They are also free from pests and diseases.

    This growing medium is great support for your plant root and has excellent retention of moisture. It is as well a good transport media for nutrients. Another positive thing is that they are capable of storing nutrient and releasing it to the plant root slowly.

    They might not be the best of the best, but you can work your way around it.

    Pros

    • Support plants root.
    • Great water retention.
    • Great in transporting nutrients.

    Cons

    • Needs washing because they are dusty.

    Points To Consider When Choosing The Cheapest Growing Medium

    You need to put into consideration some points when choosing the cheapest hydroponic growing medium. We have outlined these points and they will help you make the right decision.

    • Water Holding Capacity: one important point to know when choosing your growing medium is its water retention. Because nutrients are dissolved in water, the medium needs to be able to hold water and transport nutrient solution for the usefulness of your plant growth.
    • Good Anchor: because there is an absence of soil that gives support: the growing medium should be able to provide an adequate anchor to hold your plant sturdy.
    • Aeration: the growing medium must have good air circulation which is required for your plants’ growth.
    • Affordability and Availability: you should also consider if the growing medium is affordable and available in your region.

    You should also note that apart from choosing the right growing medium, all other growing conditions need to be met for you to have a smooth and running hydroponic garden.

    Points to Consider When Choosing the Cheapest Growing Medium

    FAQ’s

    What growing medium is best for hydroponics?

    One favorite growing medium is perlite. It’s lightweight, easy to mix into any solution and has a great absorption rate. The only thing is that it doesn’t seem to hold moisture very well. You can buy pre-mixed bags at your local gardening store. There are some good reasons to use coco coir. It’s cheap, light weight, easy to mix with water and will absorb up to 5 times its weight in water. The only thing is that it is not very absorbent so you will need to add more fertilizer to it than if you were using a more absorbent medium like peat moss or vermiculite. .

    Can rocks be used in hydroponics?

    I would suggest using them as an addition. If you are not familiar with hydroponics, it is a method of growing plants using nutrient solutions. It works by having the roots in a solution and the plant uses the water to transport nutrients into the root system. There are two basic types of hydroponic systems: a hanging basket system and a tray system. In a tray system, the roots are grown in a tray of nutrient solution and they are submerged in the solution. The roots grow down into the solution and the solution is constantly being replaced. This is a slow growing method because the roots are growing into the nutrient solution rather than pushing through it. In a hanging basket system, the roots grow out of the nutrient solution.

    Is perlite a good hydroponic medium?

    Perlite is a hydrophilic, air-filled, spherical, glassy volcanic rock. It does have some beneficial qualities, but like any other growing medium it has some drawbacks too. One big drawback is that it is very light, almost weightless, so you have to hold it up for your plants or they won’t grow well. Another major drawback is that it is a poor nutrient medium. It is a very poor nutrient medium. It does contain some nutrients, but the nutrients are so low in quantity that it is basically worthless as a nutrient source.
    Additionally, it is a very light material and will expand when wet.

    Do you need soil for hydroponics?

    No, you don´t. What is the best soil for growing plants? Hydroponic systems can be a little tricky to set up, but once it’s set up and running, it’s an easy way to grow a variety of crops. If you’re planning on growing hydroponically, then you’ll need a container that will hold water and your plant roots.
    These containers are called “soil-less” or “water-less.” Water-less containers are designed to be used in a hydroponic system. The main purpose of this system is to grow plants using water, rather than soil. In hydroponic gardening, you need to keep your roots constantly moist, so water-less containers are perfect for this type of gardening. It can be easy to start seeds or seedlings in a hydroponic system. This method is also great for indoor gardens.

    Conclusion

    Hydroponic growing medium supplies your plants good moisture so your plants do not dry out. They also convey nutrients and can act as a buffer in case your pump or any other essential part fails.

    All in all, before you settle finally for a particular medium, try and experiment with the various medium. This way, you can pin down the appropriate growing medium for your plant’s growing needs.

    Various plants have different growing needs and they will thrive with different growing mediums. Also, make sure all other growing requirements are met.

    We recommend you give your system a trial and error so you can perfect all the needs of your hydroponic system.