Category: Hydroponics

  • Aquaponic Fish To Plant Ratio

    Aquaponic Fish To Plant Ratio

    Now, you might be wondering what the standard aquaponic fish to plant ratio is, we will let you know in this post.

    Aquaponics is an awesome approach to combining fish with plants to yield great results. Aquaponics fish to plant ratio is important to consider if you wish to maximize the end product in your aquaponics system. So let’s discuss what it is.

    Brief Into Aquaponics

    The fish in your aquaponics excretes their waste product as ammonia which is the fertilizer generator. This ammonia is transformed into nitrate by the beneficial bacteria for the use of your plants. The plant in turn purifies these wastes from the fish tank by absorbing them.

    So, the number of fish you are raising should produce adequate fish waste for your plants’ use. Also, the fish food used in feeding the fish should be enough to produce optimal nutrients for plant use.

    If this fish waste is not enough, your plants might be deficient in nutrients and might not grow well. This is why we need to get the aquaponics fish to plant ratio for a better yield.

    Brief Into Aquaponics

    Talking About The Fish To Plant Ratio In Aquaponic

    When we talk about fish to plant ratio in aquaponic, we will need to know the size of grow bed to know the plant ratio. That is, if you’re making use of a grow bed, the size of the grow bed will determine the capacity of the plant.

    It is recommended that the volume of the fish tank should be approximately equal to the grow bed volume. This implies that the ratio of the aquaponics fish tank to plant should be approximately 1:1. However, if we’re looking at it from a commercial structure, we can raise the ratio to 1:3 or 1:4 based on the density of fish and the rate of water flow.

    Let’s talk about the rate at which you feed your fish because it’s a direct factor to consider in the aquaponics ratio.

    Feeding Rate Factor

    You should note that the ratio of fish to plants also depends on how you feed your fish. This is because of the nutrient waste they will provide your plant. Normally, fish can make use of about 80% of food and expel 20% of nutrient waste materials.

    In a standard situation, the recommended grow bed size should be at least 12 inches deep and let’s assume you have 5 feet by 5 feet grow bed. Then the appropriate food to feed your fish will be around 20 to 40 grams per day square meters.

    Other Factors

    Other factors to consider that can influence the capacity of fish to plant are the volume of the grow bed and the density of the growing media used. Note that the growing media encourages good bacteria colony. So, in a standard condition, we can recommend 1 kilo of fish per 50 liters of grow bed.

    Another point to note is the ammonia and bacteria population. A good bacteria population quantity will enhance the conversion of ammonia to nitrate for the use of your plant. This implies if there’s a limit in the bacteria population, you will be limited to the number of fish you can have in your aquaponics system. This will limit you from getting enough fish production and reduce the nutrient that your plant is supposed to receive.

    Quality of Water

    Now, when it comes to the quality of water in aquaponics, you should understand why the fish to plant ratio is important as well as the bacteria population. For example, if the waste materials that serve as nutrients for the fish are not able to be absorbed by your plants, it can pollute the water quality.

    If there’s too many fish in the water and there are not enough bacteria to convert ammonia to nitrates, the bio-filtering plants will not able to absorb and purify all these wastes. This turns into toxic ammonia in the fish water tank and ammonia can be pretty harmful to your fish.

    Elive AquaDuo 10 Aquarium Fish Tank Water Filter, Natural Aquaponics or Power Filter for Tanks Up to 10 Gallons

    91T8wsj8DXL. AC SL1500

    Although a couple of plants may grow, however, the issue of polluted fish water is not solved. This can reduce the growth and activities of the fish. A possible approach to this situation is to introduce enough helpful; bacteria that can convert ammonia to absorbable nitrate for plant use.

    It also helps if you can decrease the fish feed to reduce the fish waste products that are slowing the growth of your fish or simply reduce the biomass of your fish.

    Final Say On Aquaponic Fish To Plant Ratio

    An efficient and productive aquaponics system is the goal of every farmer. Thus, sustaining the nutrient balance from the supply of your fish to your plants is crucial. This is why getting the right aquaponic plant fish to plant ratio in aquaponics is important.
  • Raising Prawns In Aquaponics

    Raising Prawns In Aquaponics

    If you love prawns and you wish to raise some for yourself in your aquaponics, then waste no time in getting started. Raising prawns in your aquaponics can be an excellent way of adding a different touch of diversity to your system.

    It’s possible to raise prawns together with your tilapia fish or any other fish you may have in your system. We will enlighten you on how to introduce freshwater prawns into your aquaponics system. So let’s begin.

    Guidelines On Raising Prawns In Aquaponics

    Raising prawns along with fish is pretty dynamic. Prawns are bottom feeders and they will feed on anything they find. This includes the fish waste that is not absorbed by your plants making them a reliable filtering animal. They can as well feed on snails and other organic matter so if you’re having issues with snails in your aquaponics, adding prawns might be a way out.

    The best type of aquaponics to use for raising prawns is a floating raft. To introduce prawns into your aquaponics, integrate them into your fish tank or under the floating raft. You can as well integrate them in both floating raft and fish tank. Let’s discuss this in detail.

    1. Floating Raft: under your floating raft, it’s usually a habit to have a handful of organic waste such as dead roots, leaves, etc. Prawns like to feed on organic waste so they can be helpful in this aspect. You might also be wondering if prawns will feed on your plants’ roots, the answer depends. In a standard situation, prawns won’t eat your root. However, when they become hungry or when you have too much prawn population, it’s possible they bite on your plant roots. For this reason, ensure you control their population. Take out some if they become too many in your system.
    2. Fish Tank: another possible way to incorporate prawns into your aquaponics is to put them in your fish tank. Prawns are bottom dwellers, so you don’t have to worry about them crawling up to your fish. They will as well feed on excess fish waste thereby maintaining a clean bottom tank.
    3. Both Fish Tank & Floating Raft: it is also possible to incorporate prawns in both your fish tank and floating raft. This is usually the best option as you get to maintain clean both a fish tank and floating raft.

    Precautions To Take When Raising Prawns In Aquaponics

    Remember they both prawns and fish can be territorial so you need to keep both from each other.  There are some precautions you need to put in place so your prawns and fish do not attack each other or even meet each other.

    When prawns are in their juvenile stage, it’s possible for your fish to want to feed on them. So, it’s necessary you create a barrier to keep them away from each other. You can make use of a bird mesh with corner PVC trays by laying them in the bottom of your fish tank. This mesh will separate your prawns from your fish. The mesh is also permeable enough for the fish waste to move through the layers of the mesh to meet the prawns so they can feed on the fish waste.

    Precautions To Take When Raising Prawns In Aquaponics

    Stocking Density

    The recommended stocking density for a single prawn should be about two square feet of tank space.

    Tank Size

    You should have at least 135 gallons or 500 liters of a tank for both fish and prawns. There should however be a barrier like the bird mesh we discussed earlier.

    Temperature Requirements

    Theideal temperature for prawns should fall between 57 degrees to 105 degrees Fahrenheit. However, the standard temperature is around 78 degrees to 88 degrees Fahrenheit.

    Feeding

    Prawns will feed on just about anything. You can however feed them with prawn pellets and planktons.

    PH Range

    Another requirement is pH range, therefore, you should ensure you monitor the pH with a quality pH matter. Prawns will do well with a recommended pH range between 7.8 to 8.5.

    Temperature pH Meter Monitor Tester Sensor test Kit 0~14.0pH for Hydroponics Aquarium

    7180qNLFHIL. SX466

    Final Say On Raising Prawns In Aquaponics

    We can see there are great benefits to raising prawns in your aquaponics. You can agree there’s nothing more amazing than having freshly harvested prawns together with fish from your aquaponics system. You get that fresh exclusive meaty taste compared to the regular frozen prawn sold in stores.

    This is what you get raising both prawns and fish and if you plan to sell them it will also be a great investment. Prawns attain market size in about 4 to 6 months, so you can always have a steady sale once they are matured.

  • How To Grow Basil Hydroponically

    How To Grow Basil Hydroponically

    Let’s explore how to grow the flavorful basil hydroponically. Growing various plants hydroponically is becoming an interest to many growers as it offers great benefits such as healthy plants, greater yields, dirt-free process, and many more.

    Basil is one common herb you can grow hydroponically. It is one of people’s favorite and it’s pretty easy to grow. So, read on to discover how to grow basil hydroponically.

    Varieties Of Basil Plant

    Basil plant comes in different varieties and all varieties are suitable to grow hydroponically. These varieties differ in features such as flavor, resistance to disease, yield, and growth. Here are the various types of basil plants you can choose:

    1. Cinnamon basil
    2. Dark opal basil
    3. Lemon basil
    4. Holy basil
    5. Sweet basil
    6. Sweet Thai basil
    7. Purple ruffles basil
    8. Spicy bush basil
    9. Lime basil
    10. Christmas basil
    Varieties Of Basil Plant

    Before choosing the variety to grow, the first thing you should do is to pin down the most appropriate basil plant preferable for your hydroponics. Also, make some inquiries about the productive cultivation necessities.

    However, if we want us to recommend the type to go for, our favorite type is the bush and sweet basil variety. They are both great for growing in hydroponics.

    Get To Know How To Grow Basil Hydroponically

    The first step to commencing how to grow basil hydroponically is to decide how you wish to start. You can commence by seed germination, cloning basil plants, or simply obtaining plants from garden stores near you and transplanting them.

    • Starting With Seed Germination: seed germination is pretty easy to commence basil plants. Just keep them at the appropriate temperature of about 75 degrees. You can make use of a rapid rooter plug for seed germination. You should start to notice germination around 3 to 10 days.
    • Germination From Cuttings: cloning is another way of starting basil germination. Simply get the right plants with healthy growth and great traits.
    • Buying And Transplanting Basil: you can as well buy basil plants from a garden store and transplant them into your hydroponics system.

    Planting Basil Hydroponically

    Most types of hydroponics systems will work with growing basil plants. However, there are a couple of hydroponics systems that will suit and work better compared to others.

    Remember to give your basil plants space of at least 6 to 12 inches to encourage aeration and avoid the growth of fungal.

    Also, trimming your basil plants whenever they are full is recommended. Aim to trim above the lateral buds to stimulate growth. Trimming will increase the yield of your basil plant as there will be more room to grow. Ensure you make use of sharp tools for trimming and avoid pinching.

    You can make use of the trimmed portions for your tasty meal.

    Basil Temperature Requirements

    The required temperature for hydroponics basil is around 65 to 80 degrees. They also require mild humidity for optimal growth.

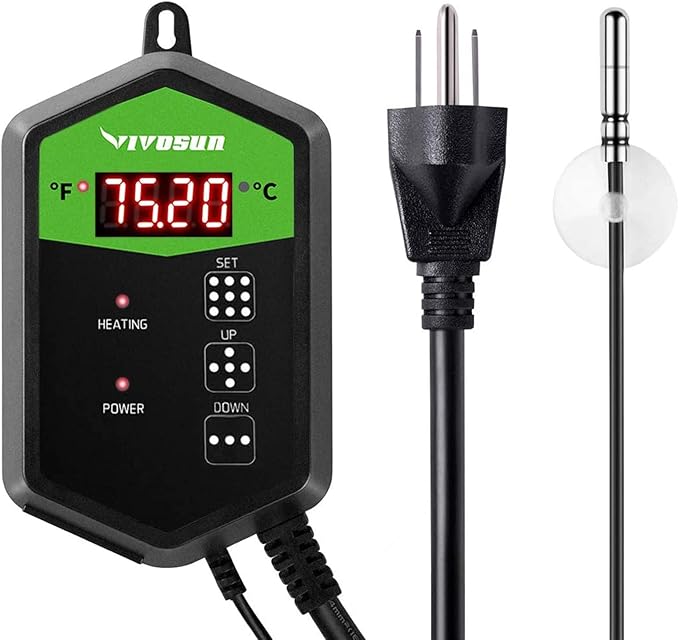
    VIVOSUN Digital Heat Mat Thermostat Temperature Controller 40–108 ºF for Seedlings, Germination, Rooting, Fermentation

    715pl8fMLdL. AC SX679

    Light Requirements

    The hydroponic basil plant will thrive under moderate light. For optimal growth, supply your basil plants 13 to 16 hours to light daily.

    PH Requirements

    Basil plant requires a pH range of 5.5 to 6.5.

    Nutrient Requirements

    The nutrient requirements for your hydroponics basil are pretty simple as the aim is for just its vegetative stage. Thus, what you need is a vegetative nutrient solution.

    You want to supply your basil plants with a nutrient scheme rich in nitrogen. Adding a bit of calcium and magnesium to your nutrient scheme is also fine.

    Harvesting

    The best part of planting is obviously the harvesting time. To harvest, you can harvest the entire basil plant or just take off some leaves.

    Harvesting Basil

    To store your harvested basil plants, keep them in a vented bag of about 55 to 60 degrees. This way, you can have a stable shelf life with 10 to 12 days duration. It is not recommended to store basil plants in a cooler. A better place is to store them in a jar of water in a cool room.

    FAQ’s

    Is it hard to grow basil hydroponically?

    Growing basil in a hydroponic system is easy. Basil is a very easy plant to grow. If you have the space and time, it is easy to grow from seed. The biggest problem you will have is finding the right type of nutrients and the right equipment to use.

    There are many different types of hydroponic systems available on the market. All you have to do is look for a hydroponic system that has the features that you want. The type of nutrient solution you use is also important. Some nutrients are better than others. You can use a commercial nutrient solution or you can make your own. Making your own is easier than buying one. There are different types of nutrient solutions available on the market. The most popular one is the water-soluble solution. This solution is made from a powder that dissolves in water.

    This method is used by farmers, food producers, and even by some home gardeners. It’s also the best way to grow herbs that have been bred to be hardy in areas where the soil is not suitable for traditional gardening. You can grow basil from seed, or buy transplants from your local garden center.

    How do I grow basil hydroponically?

    First, you will need a system to grow your plants. This could be as simple as a shallow plastic tray or it could be a more elaborate system using a reservoir. If you plan on growing large quantities of plants, you’ll want to buy a system that’s made for commercial use, since these systems have been engineered for high production.

    You’ll need to do is measure the area where you’ll be growing your herbs. The next step is to decide if you want to grow them indoors or outdoors.

    If you’re growing them indoors, you’ll want to figure out how much space you have available. You’ll need to purchase an inexpensive light fixture and set it up. You can purchase a small greenhouse that is made specifically for growing hydroponically, but it can cost as much as $

    If you’re growing your herbs in an outdoor garden, you will need to determine what size garden you need. Most garden centers will have information on how much square footage you need to grow your herbs, and you can use this to figure out how big your garden should be. Once you know how much space you have available, you can begin planning your hydroponic system.

    You can purchase a tray system or you can build your own. In either case, you’ll need to decide if you want to go with a shallow plastic tray or a reservoir. The most common type of system is the shallow tray system, which consists of a tray and a pump. The tray is filled with a solution and placed in the location where the plants will be growing.

    The nutrients are added directly to the tray as needed. With a shallow tray system, you’ll need to refill the tray periodically so that you don’t run out of nutrients. Some growers recommend adding a small amount of fertilizer every day. Others use the same nutrient solution for a week or more, and then change it out every two weeks. You’ll also need to monitor the pH of the solution, since it should be between 3.5 and 4. If the pH becomes too low, your plants won’t be able to utilize the nutrients properly. You’ll need to add an acidifier to keep the pH balanced.

    Once you’ve determined how you’ll grow your herbs, you’ll need to figure out what type of nutrients you want to use. You have several options, including organic fertilizers, compost, and manure. The most common nutrient solution is a 1:1 mixture of fish emulsion and water. You can add other ingredients, such as seaweed and kelp, to the solution to boost the nutritional value. The amount of fertilizer you add will depend on how much light the plants receive. Some growers recommend adding as little as one teaspoon of fertilizer per gallon of solution. Other growers add as much as 2 teaspoons per gallon. If you’re growing your herbs in an outdoor garden, you may want to use compost instead of fish emulsion. Compost is made up of plant materials that have decomposed naturally, so it contains nutrients that your plants can use.

    What are some other concerns?

    If you live in a very humid area, you will need to make sure your nutrients don’t dry out. You’ll also want to provide a place for the excess water to drain off, so that the solution won’t get too saturated. 

    Conclusion On How To Grow Basil Hydroponically

    Growing basil plants hydroponically is easy, fun, and you will enjoy great benefits. No matter the variety you choose, you can be sure of a successful and productive basil growth in your hydroponic system.

    Follow the right steps and supply your basil plants with all the requirements we stated above and you can watch your plant grow bountifully.

    We hope this article has enlightened you on how to successfully grow basil plants hydroponically. Happy growing folks!

  • Best Plants For NFT System

    Best Plants For NFT System

    We will be discussing what plants are best for the NFT system. The versatile Nutrient Film Technique (NFT) is a type of hydroponic system basically used to cultivate leafy greens or vegetables. It is a hydroponics or aquaponics technique that is especially suited for commercial purposes.

    The nutrient film technique makes use of a thin film of hydroponic nutrient solution to run smoothly across the root of your plant. The thin flow of steady nutrient solution to the root of the plants’ channels is where the name of this technique was derived from. Read on to discover the best plants for the NFT system.

    Best Plants Grown In NFT System

    Nutrient film techniques are only fit for growing some particular types of plants. These types of plants include broccoli raab, certain herbs, spinach, salad or leafy greens, cruciferous vegetables.

    Let’s take a look at these plants in details:

    1. Certain Herbs: some certain herbs are ideal for the NFT system and they are the popular options grown in the NFT channel. An excellent type of herbs is basil because they are the simplest and popularly grown. Their root system is not large and they grow pretty fast. Other types of herbs suitable to grow in NFT include cilantro, parsley, Thai, lemon, Genovese, and so on.
    2. Salad or Leafy Greens: they include various types of spinach, lettuce, and arugula.
    3. Brassicaceae Family: also known as cruciferous vegetables include mustard greens and kale. However, the nutrient film technique is not ideal for the types that form heads like broccoli and cabbage because of the space limit. They grow big and have massive roots and their maturity period is lengthened thus, making them inappropriate plants for the NFT system.
    4. Certain Fruits & Flowers: certain flowers and fruits are not left out in the NFT system. Examples of fruits that can be grown in the NFT channel are strawberries. Strawberries are not big growing fruits and they can fit in a shallow system. Thus, making them ideal for NFT. Examples of flowers that can be grown in NFT channels include orchids, pansies, and nasturtiums.

    NFT system is basically for growing leafy greens with a growth period that is short. However, nutrient film techniques are not suitable for larger or taller plants like cabbage, trees or shrubs, and root crops. They are also not suitable for plants with larger root systems or plants that take longer to grow.

    Characteristics To Consider When Choosing Plants For NFT

    The nutrient film technique (NFT) is a narrow and limited channel that allows a thin flow of nutrient-filled solution below the plant roots. This thin channel allows the upper part of the plant to be subjected to air and also remain dry.

    Therefore, when choosing the plants to grow in your nutrient film system, you should consider the following characteristics.

    Characteristics To Consider When Choosing Plants For NFT
    1. The Root System Should Be Minimal: one crucial thing to consider is the root system. The root system should be minimal and accommodating enough to convey the nutrient solution for your plants’ growth. We don’t want a heavy root system as this can consume all the space available and clog up the nutrient film channel.
    2. Plants Should Be Lightweight: because the nutrient film system is narrow, you should only consider growing lightweight plants. Plants that are heavy and need supports like the heavy-hanging fruits are not ideal for the NFT system.
    3. Short Harvest Period: another thing to consider when choosing plants to be grown in your NFT system is the harvest period. The time to harvest should be short. We are talking about plants attaining maturity within 3 months starting from the seed sowing period. Leafy greens are mainly in this group. Some seed pack comes with the information of the harvest time.

    Planting With NFT System

    To commence planting in the NFT system, we normally start with seeds. Usually, most hydroponic growers prefer starting seeds in cubes and transplanting them into the hydroponic system.

    We recommend the same for NFT and as the seedlings attain a height of about 2 inches; they can be transplanted into the NFT channel. Supply the necessary nutrient solution into your NFT channel till your plant attains harvest size.

    When harvest time comes, harvest your crops by carefully lifting your plants out of the NFT channel.

    FAQ’s

    What is a NFT system?

    NFT stands for Nutrient Film Technique. Most of the indoor growing enthusiasts are using NFT for growing plants. NFT is a very popular hydroponic method among growers. In fact, NFT has become a favorite among indoor growers.

    If you are a newbie, then you must be wondering about what exactly is NFT hydroponic system. Well, NFT is a very simple technique which can be used for growing plants without any hassle. This is because NFT is a completely new and innovative concept of hydroponics. This technique helps the plants to absorb nutrients from the solution or water which is being used.

    In this method, a nutrient solution is continuously sprayed on the growing media which helps the plants to absorb nutrients through roots. NFT is a very effective way of growing plants. It is also a very cheap method. This technique is mostly used in the greenhouse.

    Is it affordable?

    Yes it is. It is very easy to maintain and requires very little space. It is also a very cheap method. One can easily buy the required equipment at low cost. Using NFT hydroponic system is eco-friendly as it does not use any pesticides, fertilizers or any harmful chemicals.

    What plants can grow in NFT system?

    There is no hard and fast rule, but here are some examples of plants that will grow well in NFTs. The list is not exhaustive, but it will give you an idea of what you can grow. Hydroponic gardeners can use a wide range of plants to grow, as long as they are adapted to low-nutrient, nutrient-poor media. These include herbs, salad greens, lettuce, and radishes, as well as fruits, vegetables, and flowers. 

    Also, sunflowers, lettuce, tomatoes, peppers, cucumbers, melons, squash, herbs, bulbs. If you want to grow a lot of plants, it’s the best choice. I used NFTs for many years and they worked great.

    Can you grow strawberries in NFT hydroponics?

    The best way to grow strawberries is to use a strawberry grow kit. The benefits NFT hydroponics is an environmentally friendly, easy to use system that allows you to grow your strawberries without any soil or water.

    It’s a very simple system that takes only about an hour to set up, and there are no chemicals involved in growing your strawberries. This is a good system for beginners who are just starting to grow their own fruits and vegetables.

    The benefits of growing strawberries in NFT hydroponics are:

    Grow strawberries anywhere (even on a balcony)

    No need to buy soil or nutrients

    Grow strawberries year-round

    Get great looking plants

    Enjoy the benefits of growing your own food Save money (you don’t have to pay for soil or nutrients)

    Easy to grow (no need for expensive equipment)

    You can grow strawberries in a very small space (compared to traditional gardening methods) You can grow strawberries in areas where there isn’t much sunlight

    You don’t have to worry about pests and weeds The system is very simple to use You don’t need any chemicals You can grow your own food and save money The system is inexpensive to purchase and set up

    The system is very easy to use, and it doesn’t require any training.

    Conclusion

    We have concluded that the best plants for NFT systems are mainly leafy greens. The plants should also have minimal root systems, be lightweight, and have a short harvest time.

    If you can comprehend and follow these rules for planting in NFT systems, you can be sure of enjoying a smooth and productive harvest.

  • Transferring Soil Plants To Hydroponic

    Transferring Soil Plants To Hydroponic

    Transferring soil plants to hydroponic is quite possible if you follow the right steps. Rather than waiting on germinating seeds and growling seedlings, you can simply send them into the soil. So, when they reach about 3 to 4 inches long, they are set to be transferred into your hydroponics.

    However, you need to get the process of transferring soil plants to hydroponic correctly or they won’t come out successful.

    This is why we’ve put together this article to enlighten you on the steps to successfully transfer soil plants to your hydroponics system. So, read on to learn.

    Materials Needed For Transferring Soil To Hydroponic

    The following materials are required for transferring your soil plant into a hydroponic system:

    • A plant from dirt.
    • Water to wash off the root system.
    • Growing medium.
    • Net pots.
    • Hydroponic system.

    iDOO 12Pods Indoor Herb Garden Kit

    81zN%2Blc2HfL. AC SX569

    Steps On Transferring Soil Into hydroponic

    Even though transplanting traditional soil plants into the hydroponics system looks pretty easy, it’s important you get the steps right. This way, common errors that some growers make are avoided and you get an accurate result at the end.

    Transferring soil plants to a hydroponic system is pretty easy. Just follow these steps to achieve a smooth transition:

    1. Use Matured Plants Only

    The first thing is to obtain your plant or seedlings and make sure they are fit enough for the transition. Use seedlings that are at least 3 inches tall.

    1. Remove Plants From Soil

    With care, remove the plant from the soil and ensure you don’t pull it out. Make sure the roots are safe and intact as you carefully take them out.

    Remove Plants From Soil
    1. Remove Soil And Clean The Plant

    Next, carefully give the root a little tap and remove the dirt around the plants still ensuring the root is safe. After doing this, go ahead and rinse the plant with water. Try to dip the whole root into the water and rinse carefully.

    If you notice any pests around your plant, rinsing them will take them out. However, you can make use of neem oil to further rid them off.

    1. Place In Hydroponic Net Pots

    Now, get your net pots and put a little growing medium. Gently spread the plant root into the net pot and fill it up with the growing medium of your choice.

    1. Add Appropriate Nutrients

    Supply your plants with the appropriate nutrients. Try not to overfeed or underfeed the nutrient.

    1. Leave Set Up In The Dark

    Allow the plant to adjust its new environment by leaving it in a dim light area for a couple of hours. The root does not really require light to develop.


    Additional Tips To Avoid Shock

    Plant shock when it comes to transferring soil plants to a hydroponic system is not unlikely, especially among beginners. If your transplant fails to develop after transplanting, you might be wondering what you did wrong. Just do a bit of check and try again carefully this time.

    Also, take note of the following tips so you can prevent plant shock as your plant transition into your hydroponics system:

    • Make sure the plant to be transplanted is healthy and matured enough.
    • Prepare your growing medium-well.
    • Sterilize the new environment your plants will be transitioning to. Remember they are vulnerable, so try to keep them healthy.
    • It helps to pick plants to be transplanted during their vegetative and seedlings periods. Never allow them to reach or near their flowering period before transplanting.
    • Make sure the temperature is maintained optimally. Nutrient water temperature should fall between the range of 65 to 75 degrees Fahrenheit.
    • Try to select roots with more hairs or long hairs. This is so the roots are capable of reaching the nutrient reservoir and absorbing adequate nutrients for growth.
    • Try to balance the soil conditions and hydroponic conditions as your plant transition. For example, you need to supply your transplanted plant with the right nutrient for its healing and growth. If you can, it helps to measure the soil nutrient before transplanting so you can keep the same nutrient levels when you transplant.
    Additional Tips To Avoid Shock

    Plants That Has High Chance Of Smooth Transition

    You should know that not all types of plants will transition successfully. Some plants have a higher tendency for the smooth transition than others. Examples are Pepper, tomatoes, spinach, mint, spring onions, basil, parsley, cilantro, and so on.

    Conclusion

    The transition of soil plants into a hydroponic system needs to be done accurately to avoid plant shock. If you follow our guidelines, you can be sure of a successful transition.

  • What To Feed Tilapia In Aquaponics

    What To Feed Tilapia In Aquaponics

    If you’re into raising tilapia and you’re wondering what to feed your tilapia in aquaponics, we’ve got the right answer for you. One added reason, why most farmers love raising tilapia for their aquaponics, is that they feed on broad varieties of food.

    Tilapia feeds on food sources that are at the bottom of the food chain. However, the best type of food to feed your tilapia for your aquaponics system is to feed them with organic tilapia food. This organic fish food contains the right nutrient requirements for your tilapia and plants.

    Types Of Tilapia & Their Feeding

    First, let’s understand the different stages of tilapia feeding.

    • Newly hatched tilapia known as fry feed on organisms that float on water such as detritus and neuston. Their foods should be in smaller pieces.
    • The juvenile tilapias (fingerlings) are omnivores that is; they can feed on both plants and animals such as worms, insects, duckweed, etc.
    • The adult tilapias are herbivores, so they feed on plants such as algae, duckweed, bacteria, detritus, and other plants.
    Types Of Tilapia & Their Feeding

    What Should You Feed Your Aquaponics Tilapia?

    We mentioned earlier that tilapia can feed on a wide variety of food. In their wild habitat such as streams, lakes, etc, they usually feed on diatoms and a lot of blue-green algae.

    However, you should know to keep them far away from feeding on your algae. This is because algae are needed by your plants in the aquaponics system for nutrient recycling.

    Feeding With Pellets

    Adult tilapia can also be feed with pelleted food which comprises all important nutrients like vitamins, minerals, and proteins. You can as well feed the newly hatched fry with pellets, but they should be in smaller pieces.

    Organic Tilapia Feeding

    If you’re a fan of all organic, then everything that goes into your aquaponics should be organic. Examples of organic food to feed your tilapia fish includes cassava plants, lengko plants, duckweed, sweet potato plants, lettuces, cocoyam leaves, etc. Among all these plants, duckweed has the smallest food sizes and it will fit all stages or sizes of tilapia.

    You can combine these organic foods with commercial fish food to increase their proteins and for a more balanced filled nutrient.

    Other Types Of Tilapia Feed

    • Bran chaff feed such as white bran or wheat bran.
    • Pomace feed and cereal feed such as rice sprouts, malt, etc.
    • Oil cake feed such as rapeseed meal, cottonseed meal, or soybean meal.
    • Animal feed such as blood meal, meat and bone meal, fish meal, etc.
    • Compound feeds are the pelleted feed and extruded feed.

    Common Varieties Of Tilapia: What They Feed On

    The common varieties of tilapia are the Nile tilapia, the Mozambique tilapia, and the Blue tilapia. Here is what they feed on:

    • Nile tilapia feeds on detritus and phytoplankton.
    • Mozambique tilapia feeds on vegetation and bottom algae.
    • Blue tilapia feeds on detritus and zooplankton.

    Lakeway Tilapia Pro Pack 4000 Tilapia Food – 4 Pounds

    91KUEa0GQlL. AC SX569

    Tilapia Nutrient Requirements

    Nutrient requirements in your aquaponics tilapia are crucial so your plants can have access to adequate nutrients.  Although various species of tilapia require various growth periods, thus, their nutrient demand will be a little different.

    Nile tilapia fingerlings for example require about 35% to 40% protein contents. While adult tilapia of about 45 to 50 grams requires 20% to 25% protein content.

    The blue tilapia fingerlings will require a protein content of about 36%. While for the adult blue tilapia, they will require about 26% to 36% protein content.

    Avoid Overfeeding

    You should avoid overfeeding your fish. If you supply your fish with an excess amount of food, these foods will end up in your floating system causing hindrance and water clog. You can scoop out uneaten food. Also, pay attention to how much they eat and readjust when next you feed them.

    You should always feed them twice a day and the food should be eaten within 30 minutes of feeding. However, if you feed them and you notice they aren’t hungry, scoop out the food and don’t feed them for a while.

    Avoid Overfeeding Tilapia

    FAQ’s

    What is the best food to feed tilapia?

    When choosing a tilapia food, you want one that is a good source of calcium and phosphorous, and contains other minerals and vitamins.You can feed them live or frozen. A combination of live and frozen is best, as they both have a more natural flavor. Fish Food – This is another good source of protein. You can purchase dry, freeze-dried, and canned fish food. Tilapia food is typically made from a mix of various ingredients.

    You can also buy foods that are specifically designed for tilapia. Some of these include: Aquarium Fish Food Tilapia – This is a specially formulated tilapia food. It has a high level of calcium, and other nutrients. Tilapia are omnivores, so they need a variety of foods, and this is a good way to ensure that they get all of the nutrients they need. The food will provide them with a more natural flavor, as well as more nutrients.

    Shrimp Food Tilapia – This is another great food for tilapia. It has a natural shrimp flavor, which is beneficial for the health of your fish. Feeding Tilapia Tilapia should be fed on a regular basis. Depending on the size of your tank, you should feed your fish once or twice a day.

    How can I make tilapia grow faster?

    The only thing I can think of is to reduce the size of his ration. If you are feeding him twice a day, he should eat roughly 1/2 of the amount you are feeding the rest of the fish. So if you are feeding 1/4oz. twice a day, then he should eat 1/8oz. of food twice a day. You can also try adding some live plants to the tank. This will increase his appetite.

    What do tilapia eat naturally?

    Tilapia are omnivorous fish that eat both plants and animals. They can be a vegetarian when fed a diet of algae.
    But like most fish, they need meat to survive. So, what’s the best way to feed them? Well, there are two ways to feed them: live food and dry food. Live food is a great option because it keeps your fish in good shape and allows them to grow quickly.

    Tilapia is a freshwater fish that is native to South America and Africa. It is one of the most common fish species in the world, with an estimated total production of about 25 million tons per year. Tilapia are generally kept as aquarium pets, and there are many varieties of them. There are two types of tilapia: the goldfish-like tilapia and the black carp-like tilapia. The goldfish-like tilapia is much smaller than the black carp-like tilapia. Both types of tilapia are commonly found in ponds and tanks in home aquariums. The fish is also known as cichlid or lake tilapia.

    Final Say

    Tilapia feeds on just a bit of everything. It’s why they are the most commonly reared fish in aquaponics. Feeding your tilapia fish the appropriate food will increase their growth in just about 240 days. So, get them eating well so you can have a heavy pound of fish at the same time healthy plants by the end of harvest time.

  • How To Grow Watercress In Aquaponics

    How To Grow Watercress In Aquaponics

    Watercress is one of the easiest and healthiest plants to grow in your aquaponics garden. So, if you’re wondering how to grow watercress in aquaponics, you’ve come to the right place.

    Watercress is a water-loving plant and it is popular for its tasty flavor when added to meals. They are great for adding spice to your soup, fresh salad mix, as well as a sandwich.

    This article attempts to give you the details on how to grow watercress for your aquaponics garden. So let’s begin.

    Why Grow Watercress In Your Aquaponics Farm

    Being a water-loving plant, you can agree it is one of the best leafy green plants to grow in your aquaponics garden. Watercress is a highly nutritious and fast-growing plant. For this reason, watercress is one of the most loving plants to grow especially among commercial hydroponic and aquaponics growers.

    Also, growing watercress for your aquaponics garden will be an amazing way of introducing newbies to the world of aquaponics.

    Why Grow Watercress In Your Aquaponics Farm

    2 Ways To Grow Watercress In Aquaponics

    You can grow watercress easily by planting from their seeds or you can simply grow them from cuttings.

    1.    Propagation From Seeds

    Watercress propagation from seed should begin to show germination between a couple of days or two weeks.

    Plant about 10 to 15 seeds in the net pots growing medium. The seeds will begin to sprout from 3 days and continue to grow for 4 to 5 weeks. Then ready for harvest.

    2.    Propagation From Cuttings

    Watercress can be grown or cultivated from its aerial roots where the nodes of the matured plants are.

    Cut the stem of the watercress and take away the lower parts of the leaves. Lay the cuttings on your aquaponics bed and watch them give rise to new roots in a couple of days.

    You can also obtain bunches of watercress stem from grocery stores.

    Guidelines On How To Grow Watercress In Aquaponics Successfully

    Having decided the method of propagation (either seeds or cuttings), we can now look into the specifications and guidelines to follow. Below are the guidelines on how to successfully grow watercress in an aquaponics garden:

    1. Fish Choice: first things first, choose the appropriate fish you wish. Tilapia, trout, and catfish are the best options if you want a smooth and easy aquaponics process. Also, you should accurately calculate the number and proportion of fish to the water tank. For example, the standard rule is one matured fish per 5 gallons of water.
    2. Water Tank Setup: do the normal aquaponics tanks set up. Place your pump inside the water tank for aeration.
    3. Grow Media: choose an appropriate growing medium for your plant. You can use grow media such as hydroton, rock wool, etc. Remember watercress plants are water-loving so ensure the growing medium used can absorb water.
    4. Spacing: ensure you give your plants adequate spacing. This is so they don’t compete with nutrients from overcrowding. Space them around 9 to 12 inches apart.
    5. Temperature: watercress will do well in a temperate environmental climate. Temperature range from 50 degrees to 60 degrees Fahrenheit will be ideal.
    6. Sunlight or Grow Light: watercress herbs thrive in full sun. However, if you’re growing them indoors, they will do well under high output grow lights.
    7. pH Range: the appropriate pH range for the watercress plant is a slightly acidic and slightly alkaline environment. Therefore, the pH range will be between 6.0 to 7.5. Always test your solution so you can keep track of the nutrient levels.
    8. Fish Feed: you can start with fish pellets as these pellets comprise the complete nutrient balance for your plants’ growth. They contain vitamins, proteins, carbohydrates, and minerals.
    9. Bacteria: another important thing is you should encourage bacteria. It is this bacteria that will convert the fish waste in ammonia into nitrates for plant use.
    10. Add Watercress Plant: lastly, plant your watercress either by seed germination or by cuttings and watch them grow.

    Self-Cleaning Fish Tank That Grows Food, Mini Aquaponic Ecosystem

    81UrJsWk8KL. AC SX569

    FAQ’s

    What can you grow watercress?

    Watercress is a popular, easy to grow green vegetable. It has been cultivated for centuries and is an excellent source of vitamins A, C, E and K. You can grow it in your garden or even in a pot on the patio. This perennial plant grows well in moist soil. It is very adaptable to a variety of growing conditions. Watercress grows best in water or soil with a high humidity content.

    You can grow watercress in a pond, but it will have to be kept in a container if you don’t want it to escape the pond.

    Why is watercress good for aquaponics?

    Here are a few reasons why watercress is such a great plant for aquaponic systems: It’s easy to grow – Watercress can be grown in any garden or window box and can be planted directly into the aquarium.

    Watercress also does well in containers, but the roots tend to spread out more than they do in the soil. It’s low maintenance – Watercress can be harvested regularly without much effort. If you don’t like the taste of the leaves, you can just harvest the roots. Watercress is a fast growing plant that can be harvested within 6-8 weeks. It’s drought tolerant – The roots are able to withstand dry conditions and will continue to grow even if there is not enough water available.

    Watercress is very easy to grow – It doesn’t require much attention and it is quite forgiving when it comes to temperature fluctuations.

    How long does watercress take to grow in aquaponic?

    It takes approximately one month to grow in soil and two weeks in aquaponics.

    Watercress has small, thin leaves that are rich in vitamins and minerals.Watercress is native to the Mediterranean region and grows best in fertile soil with good drainage. The plant can grow up to 4 feet tall.

    What’s the main concern when growing watercress in aquaponic?

    It’s possible to grow watercress in aquaponics but you have to be careful to maintain a healthy balance of bacteria and plants. If you don’t, the bacteria can cause the plants to die. The bacteria are what converts nitrate into nitrite which is what you need for the plant to be able to uptake the nitrates from the water. The plants also require nitrate so the bacteria are essential.

    Final Note

    Having said all these on how to grow watercress in aquaponics: you should know there are other little precautions to be taken for a smooth aquaponics watercress garden. Things like:

    • Monitoring the activities of your fish daily.
    • Observe their feeding pattern.
    • Avoid overfeeding so you don’t clog your aquaponics system and create excess waste that your plant can absorb. Watercress does not do well in clogged or stagnant water. The water needs to be flowing, well circulated, and aerated always for optimal production.

    With that said. We do hope you’ve learned some things on how to grow watercress for your aquaponics garden.