Category: Hydroponics

  • How Often Should I Give My Plants Nutrients

    How Often Should I Give My Plants Nutrients

    Nutrients are essential for the development of plants. If you’re wondering how often you should give your plants nutrients, we will let you know in this article.

    Nutrients are supplied to plants to enhance growth and maximize yield. You need to be aware of how often to give your plants nutrients the right way.  This way, you don’t predispose your plant to underfeeding or overfeeding which can both be detrimental to your plants’ health.

    So, read on to discover how often to feed your plants.

    Get To Know How Often To Add Nutes During Flowering

    How often you should give your plants nutrients will depend on many factors. Be it manure, worm casting, plant food, etc. fertilization of your plant does not have to be too complex.

    In a soil-based plant, if you begin your planting with soil that is already abundant in nutrients, there’s not much to be done in giving your plants more nutrients. This implies mainly for growing foliage such as lettuce and parsley.

    Get To Know How Often To Add Nutes During Flowering

    However, if you are planting for comprehensive stages such as flowering, maturing of fruits, etc. they will require some nutrient boost.

    How To Supply Plant With Nutrients

    Always apply fertilizer moderately from the start. The nutrient scheme that follows your nutrients can be followed from the start. Then monitor your plant closely and adjust or apply nutrients as required.

    We recommend you don’t totally go by the nutrient scheme given to you by the manufacturers. Some manufacturers may clearly want you to run out of nutrients so you can buy more. As such, their direction may usually be on the high side.

    You can begin with half portion or 70% portion that was recommended then continue adjusting or adding more portion as needed.

    Also, take note not to apply too much nutrient or fertilizers that are rich in nitrogen. Too much fertilizer which is rich in nitrogen can supply your plants plenty of foliage but minimal fruits or flowers.

    Fox Farm Liquid Nutrient Trio Soil Formula – Big Bloom, Grow Big, Tiger Bloom Pint Size

    A1CDZgsVkXL. AC SL1500

    Other Factors When Water Nutes

    Other factors to consider on how often you should give your plants nutrients are to consider the stages of their growth and grow medium used.

    • For the stages of growth, the younger will demand few nutrients. But as they mature into vegetative, flowering, etc, they will require more nutrients.
    • Most grow medium used are usually inert and does not contain nutrients. Thus, it is required to provide them with optimal nutrients.

    Can I Water & Apply Nutrient To My Plants?

    Watering your plant and applying nutrients to your plant will depend on some factors.

    For instance, the size of the container will tell how often you give your plants nutrients whenever you water. The watering requirement for a bigger container is not much. Watering can be done once weekly or once every other week. Therefore, nutrient feeding is required anytime you water.

    In a smaller container, watering several times weekly may be required. So, do you apply nutrients every time you water?

    It’s okay if you apply nutrients every time you water. All you need to do is to calculate how often you water every week. Then go ahead and portion the nutrients that will last every week you water. This way, each time you water, you supply your plants’ nutrients in the right amounts without overfeeding or underfeeding.

    Another alternative is to portion the nutrients into two watering. You have to water and apply nutrients the first two weeks and water only the subsequent week. This way, you give your plant a chance to rest from nutrient applications.

    FAQ’s

    Should I use nutrients when I water?

    Yes, the nutrients are only added when you water your plants. You should not water a plant with nutrients, then add them to the soil afterwards. They will just sit on top of the soil and do nothing. The nutrients are for your plants when they are actively growing. Soak your fertilizers in water before adding to the soil. Your plants will need nutrients at different times during the growing season.

    Your plants may need them every week, or once every two weeks. For example, if you plant tomatoes, you’ll want to fertilize with a tomato fertilizer. This will give your plants the nutrients they need when they are actively growing. If you have a lot of young plants, fertilizing every two weeks will be fine. If you have mature plants, you may want to fertilize once a month. The best time to fertilize is when your plants are actively growing. In the fall, it’s important to start thinking about fall cleanup. It is tempting to wait until the end of the season to deal with garden debris. That’s a mistake, as there are often a few weeks left in the season when fall cleanup can be done successfully. You can do it now, and avoid doing it later when it may be too late to save the season’s harvest. Soil moisture is also essential for healthy plants. If soil is dry, plants have to work harder to get water and nutrients.

    How often should I feed my plants?

    I’m here to tell you that it depends on what you want to achieve. To answer this question, we need to understand the difference between a plant and a tree. A plant needs to grow up into a tree, so it needs to be fed and watered regularly throughout its life.

    I’ve been told that it’s not necessary to feed every week, but it is recommended to feed at least once a week.

    I don’t fertilize the soil, but I do fertilize my plants. I fertilize my plants once a month, usually with fish emulsion. It’s not a bad idea to fertilize once a month, though. A good way to find out if you need to fertilize more frequently is to look at your plants’ growth. If you see any wilting or yellowing, then you should fertilize more frequently. You can also look at the color of your leaves, and see if they are becoming duller. If they’re turning brown, then you should fertilize more frequently. I just use a small bucket with about an inch of fish emulsion in it, and add that to the soil.

    How long does it take for fertilizer to work on plants?

    Fertilizer should be applied as soon as the soil is ready to receive it. This is usually within a few days of planting but there are some crops that can tolerate waiting longer. There is no specific length of time that will work for all types of plants, it just depends on the type and age of the plant, its growth stage, the amount of fertilizer you’re using and how much water the soil is getting.

    Should I Use Nutrients Every Time I Water My Indoor & Outdoor Plants

    Indoor and outdoor plants’ nutrient requirements differ. Outdoor plants have the opportunity to dive in and search for nutrients in the soil even if the nutrient supply is limited. There is also the additional benefit of rainwater which contains some nutrients and also allows plants to take in nutrients optimally.

    However, for indoor plants, there’s no privilege of nutrient-filled rainwater and soil content is also restricted. The good thing about indoor plants is that they are less exposed to outdoor pests. There is also the advantage of not being disturbed by the forces of nature such as wind, scorching sun, etc.

    Now when it comes to how often you should give your indoor or outdoor plants nutrients, it will solely depend on how your plants are kept, i.e. their condition. But generally, you should always monitor your plant and decipher if they look like they require addition or boost of nutrients.
  • How To Fix Nutrient Burn

    How To Fix Nutrient Burn

    A couple of growers may face nutrient burn sometimes during the course of their growing period. The thing is do you know how to fix nutrient burn?

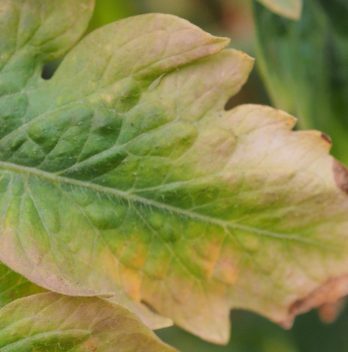
    Drying out leaves, curling of leaves, browning of leaves, etc are common issues seen among indoor growers and the most probable cause are nutrient burns. It is crucial you recognize the signs and act fast to save your plant from severe or irreversible damage.

    If you’re experiencing nutrient burn on your farm and you’re looking for how to fix or solution we will put you through this.

    Nutrient Burn During Flowering Info

    Nutrient burn is the over-fertilization or overfeeding of nutrients to your plants. When you supply your plants with their required nutrient in excess, they tend to absorb all of them thus resulting in nutrient burn. Plants are not equipped to handle over-fertilization therefore, they will simply absorb the entire nutrient you supply them.

    Causes Of Nutrient Burn

    Mostly, nutrient burn is caused when you feed your plant with too much nitrogen. Nitrogen is one of the components in plants’ nutrients and it’s mostly used during plants’ vegetative phase. Nitrogen needs to be in the right proportion with other nutrients to avoid the presence of excess nitrogen.

    However, it’s not only excess nitrogen that can cause nutrient burns. Overfeeding of other nutrients can as well cause this.

    Nutrient Burn Leaves Signs

    The first step to fixing nutrient burn is identification. Be sure your plant is suffering from a nutrient burn by looking at the signs. Some early signs can point out if your plant is suffering from nutrient burns. They are:

    • Leaves will give a very deep green coloration.
    • You may notice the tip of your leaves bending at 90 degrees.
    • Yellowish or brownish coloration of the tips of the leaves.
    • The branch or stalk may start to turn purple or red.

    Advanced signs to look out for when it comes to nutrient burns:

    • The signs of the tip of leaves turning yellow will spread back and inwards throughout the leave until it dies off or withers away.
    • You may also notice leave twisting.
    • The edge of the leaves starts to curl. This curling of leaves usually indicates the presence of too much nitrogen.
    • Yellowish patches that separate themselves from the green-colored leaves.
    Nutrient Burn Leaves Signs

    Learn How To Fix Nutrient Burn

    Once you’ve identified that your plant is suffering from nutrient burns, it’s time to take action. The good thing is if you can detect nutrient burn early, it can be resolved before it gets any worse.

    Follow these guidelines to successfully fix your plant:

    1. Remove Damaged Parts: The first step and fastest way to fixing nutrient burn is to do away with the damaged plant leaves, buds, flowers, etc. When your plant leaves have become yellow there’s nothing you can do to make them green. The only solution is to carefully remove the yellowed leaves or the entire affected part and allow them to regrow.
    2. System Flushing: Next step is to flush the entire system so the excess built-up nutrient can be washed away. With a hydroponics system, wash your growing medium with clean and balanced pH water. To your hydroponic nutrient reservoir, pour out all the content and replace it with pH-balanced water. Use this balanced pH for about 24 hours in your hydroponic system. Then gradually introduce a small concentrated nutrient for about a week and balance it later when the plant is able to welcome the appropriate nutrient amount. In a soil-based system, simply water in the soil using pH-balanced water to flush out excess nutrients. Water your soil slowly and wait a bit to allow the water to assimilate between each watering plan.

    General Hydroponics pH Control Kit for a Balanced Nutrient Solution

    81Pm5DEtpTL. AC SX569

    A nutrient burn may be minimal, gradual progress, or severe. In the case of very severe burns especially during the vegetative stage, it’s usually best to start over-planting. This is because recuperation may be unachievable or may take a longer time to recover and it will be better to just start over.

    FAQ’s

    Can plants recover from nutrient burn?

    The short answer is no. Plants can’t recover from nutrient burn, because nutrients are not lost, they are just changed in their form. The longer answer is that it depends on the plant species and the amount of nutrients in the soil. There is some evidence that plants can recover from nutrient burn, but this is not always the case. In general, plants will not grow in nutrient-deficient soils, but if the soil is rich enough, the plants will grow fine.

    What are the signs of nutrient burn?

    Plants are more sensitive to nutrient deficiencies than we are. Plants respond to low nutrient levels by making a number of adjustments. These may include:

    • Decreased growth rate

    • Diminished photosynthetic capacity

    • Decreased yield

    • Less or no flowering

    • Poor quality fruit

    • Loss of vigor and death

    How do you reverse plant nutrient burn?

    Plant nutrients are essential for your plants to grow. However, when the nutrient level is too low, the plant will have a hard time growing. Too much of a good thing is not healthy either. You may see this as a condition that can be corrected by increasing the plant nutrient levels.

    If you notice that your plants appear to be suffering from nutrient burn, the following actions should be taken:

    • Evaluate the soil for nutrients and pH.

    • Monitor the amount of fertilizer used. • Evaluate the irrigation schedule.

    • Correct the deficiencies.

    If you want to get your garden growing again, I recommend adding more organic matter (such as compost or manure) to the soil.

    Does nutrient burn affect new growth?

    Nutrient burn isn’t really good for anything. The only reason it is often mentioned is because the term nutrient burn is so often used by gardeners who are not very knowledgeable on the subject, and they don’t know any better. Nutrients are needed in the plant in order to grow, and when they are missing or are present at too high a concentration, they can cause serious damage to the plant. Plants that have been deprived of nutrients for a long period of time will often experience stunted growth and lower yields.

    How do you fix fertilizer burn on plants?

    There are a lot of ways to fix fertilizer burn. It depends on what the cause of the burn was and the severity of the burn. If it is a very deep burn, there are some treatments that will actually get rid of the burn. If it is just a slight discoloration, you can cover the plant with a plastic bag and keep it in place for a day or two. The light will help it heal.

    If you use a bag, make sure it is the clear type so you can see what’s going on. If you want to get rid of the burn, you can do one of two things. You can either put the fertilizer on top of the soil (which will keep it in place until you want to remove it), or you can mix specialized burn fertilizer with water and apply it directly to the burned area. It will penetrate the burned area and help it heal. If you don’t have a lot of money to spend on this, you can always add some liquid kelp to your fertilizer solution. That will help heal the burn. Liquid kelp is available at most garden centers.

    Nutrient Burn Recovery Prevention

    The best thing to save your plant is to prevent nutrient burns from happening in the first place. Do all you can to reduce the chances of nutrient burn from occurring. The excess nutrient can be catastrophic to your plants if not detected on time.

    Ensure you use the appropriate amount of nutrients in their correct proportion for each growth stage. You should also monitor the pH of your solution or soil with a good pH reader.

  • Ceramic Metal Halide vs LED

    Ceramic Metal Halide vs LED

    Let’s discuss Ceramic Metal Halide vs LED. Is anyone better than the other? We will find out. In the world of hydroponics, grow light continues to advance. Various types of grow light such as ceramic metal halide and light-emitting diode (LED) are made available for the use of your hydroponic plants.

    With the developments of grow lights in hydroponics, we are going to be comparing ceramic metal halide to LED. So let’s get into it.

    About Ceramic Metal Halide

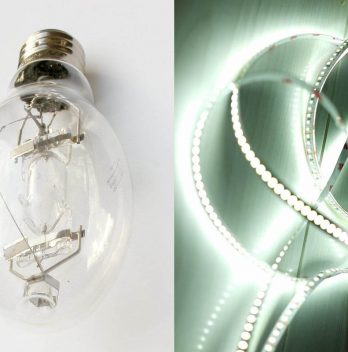
    Ceramic metal halide is a type of grow light that that is a very close match to mimicking the work sunlight does on plants. It is one of the most efficient grow lights capable of producing high-standard light that can cover a large location or area of the hydroponic farm.

    Ceramic metal halide supplies the biggest gram per watt. They are also capable of converting ultraviolet light to good ultraviolet wavelength which helps enhance plants’ growth. This type of UV spectrum is useful in repelling pathogens such as mildew and mold as well as some pests.

    About LED Light

    Light-emitting diode (LED) is another great type of grow light used in indoor hydroponics. They consist of hundreds of lights known as diodes. LED will supply their light in a specific and narrow wavelength.

    The light-emitting diode will supply light that will usher them into their vegetative phase of the blue spectrum and flowering phase of the red spectrum.

    CMH vs LED

    We have taken a brief look into both ceramic metal halide and LED. Now let’s compare which is better between ceramic metal halide vs. LED.

    • Healthy Plants: You get more healthy plants when you grow under ceramic metal halide rather than LED light. You also get better quality and higher yield when making use of ceramic metal halide grow light.
    • Duration Of Cultivation: The duration length you wish to cultivate will determine which type to go for. If you wish to use your grow light for up to 5 years or more, it’s best you go for LED. This is so you can save cost over the long period of time you make use of this grow light. Also, a light-emitting diode bulb will last you up to 50,000 hours, unlike a ceramic metal halide which will only last about 30,000 hours.
    CMH vs LED - Duration of Cultivation
    • Grow Space: If your grow space is of the bigger and taller side, then it is ideal you go for ceramic metal halide. This is because your ceiling distance from plants will be increased thus encouraging better heat management. It will also encourage optimal light coverage for bigger and fuller plants as well as better aeration. On the other hand, LED grow little emits light heat and this heat supply must fit the appropriate grow room size of your plants. Take for instance during winter periods, ceramic metal halide will supply your plants adequate heat. Whereas when using LED grow light, you may need to obtain an extra heater to your grow room to help with cold periods.
    • Beneficial Ultraviolet Spectrum: Ceramic metal halide will offer your plant a beneficial ultraviolet spectrum. This beneficial UV spectrum will help in stimulating considerable resin and terpene production. UV spectrum will also help wade off mildew and mold as well as any other pest.
    • Vertical Growing Space: Ceramic metal halide is known to be very efficient in vertical growing plants. This is because of their high canopy penetration.
    • Additional Cost: The major additional cost for metal halide is bulb replacements. The bulb needs to be replaced every 12 to 18 months of use. LED however doesn’t require replacing the bulb but LED may also require additional cost. For instance, if your grow space requires extra heat, you may have to invest in a heater to suit your growing needs. Ceramic on the other hand will generate adequate heat for your plants’ growing needs.
    • Commercial Purposes: Ceramic metal halides are a great choice for commercial purposes. They are also great for hydroponic hobbyists with large space thereby providing a bigger yield. LED on the other hand is ideal for hydroponic growers with moderate grow space especially for growing space with lower ceilings. LED will also offer you bigger quality production.

    VIVOSUN 315W Ceramic Metal Halide CMH/CDM Grow Light Kit

    Ceramic Metal Halide vs. LED

    Ceramic Metal Halide vs. LED Final Say

    In final thoughts, choosing the best option when it comes to ceramic metal halide vs LED will solely depend on your preference. Both LED and ceramic metal halide is great to grow lights that will offer you great results. Our comparison above should guide you in choosing which suits your growing needs.

  • How Far Should Seedlings Be From Grow Light

    How Far Should Seedlings Be From Grow Light

    Light is one of the most crucial requirements for growing plants indoors. Positioning your grow light in the perfect area is important to ensure your plants get the appropriate grow light quantity. Now, when it comes to seedlings, we would like to know how far seedlings should be from grow light.

    Seedlings are fragile and require proper care as they develop. We will be discussing how far should your seedlings be from grow light so they can grow appropriately.

    Get To Know How Far Grow Light Should Be From Seedlings

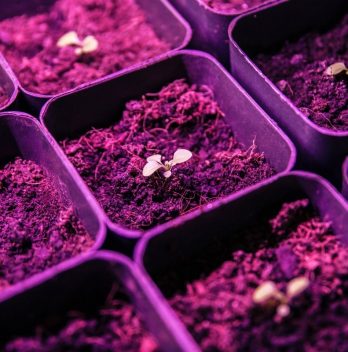
    Although a couple of seed varieties require darkness to grow, some plant seedlings do require light for seedlings’ development. The seedling phase is a very fragile phase and they usually require less light intensity. Thus, the distance from your grow light to seedlings should be far enough to reduce light intensity.

    Some may think that supplying optimal light to your plants will increase plant growth and yields. This is true, but have in mind that this applies to only matured plants. Your seedlings will be too delicate during this stage, so they will require tender care. When your plants are established, you can go ahead and feed them with optimal light intensity.

    Let’s take a look at various types of grow light and how far you should place them from your plants.

    LED Grow Seedling Light & Wattage

    Generally, you should position your LED to grow light around 24 to 36 inches above the canopy seedlings.

    Also, how far you should position your grow lights towards your seedlings will solely depend on the power or wattage of the light bulb. A bulb that is bright and far away from the plant could supply a similar light intensity with a dimmer or low light bulb closer to the plant.

    Grow light with lower wattage of around 200 should be positioned between 12 to 20 inches above the plants’ canopy. On the other hand, grow light with higher wattage should be placed 34 to 46 inches from the plants’ canopy.

    LED lights release mostly red and blue wavelength, thus there are appropriate for plants early stage such as seedlings. They are also great for the flowering phase and fruiting phase as these stages require more intensive light for optimal yield.

    LED Grow Light, Roleadro 75W Grow Light for Indoor Plants Full Spectrum Plant Light for Seedling

    71Q382ioL7L. AC SX569

    Fluorescent Grow Light

    Fluorescent growth light comes in 3 types namely T5, T12, and compact fluorescent lamps. The added advantage of using fluorescent grow light is that it rarely causes light burn. This is because it does not produce too much heat. Notwithstanding, ensure you keep a close eye on the light heat and intensity.

    Fluorescent growth light should be positioned between 6 to 12 inches for seedlings. For the vegetative and flowering phase, position your grow light between 12 to 16 inches for maximum production.

    Other Plant Stages Grow Light Distance

    Let’s take a look at other plant stages to grow light distance requirements:

    • Vegetative Phase: the LED grow light distance for the vegetative phase of a plant is between 12 to 24 inches above the plants’ canopy. The light position is closer to the plant because optimal light is required during photosynthesis for rapid plant growth. The light intensity will also help in the development of stronger and healthier stems and roots.
    Other Plant Stages Grow Light Distance - Vegetative Phase
    • Flowering Phase: when the vegetative stage is complete and the plant advances into the flowering phase, the light intensity requirements diminish. The distance from the top of the plant to the grow light should be between 18 to 24 inches. In the flowering phase, plants start to grow in height and develop fruits. As your plants grow taller, you can decide to change or not change the distance of the grow light. Usually, if you don’t want your plant to grow too tall, you should leave the grow light distance the same.

    Disadvantages Of Too Much Light

    As we have pointed out earlier that light is one of the key factors to seedling development, we would also point out what too much light can cause your plants.

    If your seedlings receive too much light, it can cause stress to your plant. To know if your plant is taking in too much light, look for any sign of light burns, leave discoloration. Abnormal or stunted growth is another sign to look for.

    Once you see these signs, it’s a call for action. Adjust the distance of your grows light accordingly to fix the problem quickly.

    Disadvantages Of Too Much Light

    FAQ’s

    How close should I keep my seedlings to their grow lights?

     If you are in a spot with good sunlight, then you may be able to get away with having them closer. I would say that if they are on a tray, then you should be able to get away with putting them as close as the tray allows. As far as lighting goes, you will probably need a full spectrum LED grow light. I am not sure what kind you have, but I know that the HID bulbs are really only effective when there is no direct sunlight, otherwise it will not light up.

    I’d say at least 18″ apart for optimal growth. If you’re doing it right, you shouldn’t need much more than a 2-3 foot gap, depending on the height of the lights. If they’re too close together, you’ll be wasting energy and possibly burning your plants.

    Does the type of light matter in terms of the distance?

    Yes. You’ll need to figure out what the light spectrum is that you are growing for. If you’re trying to grow plants that are grown for eating then you will need to know how much of the spectrum they are best at consuming.

    Then you will need to calculate the amount of light that is needed to provide that amount of light to your plant. For example, if you are growing tomatoes, you would use a combination of red, blue and yellow lights to simulate sunlight. The more red light, the more heat, and the more yellow light, the more light but also more energy. You can get away with less red light if you have enough blue and yellow light. For example, if you had two 5500K fluorescent tubes, one blue and one yellow, it would be able to produce about 1.2 times as much light as a single fluorescent tube of similar wattage. If you had two of the same tubes but they were only 5500K then you could get around twice the amount of light. It’s best to figure out what the light spectrum for your plant is going to be before setting up the grow room. You don’t want to grow plants in the wrong light spectrum.

    Can they be too far apart?

    My understanding is that it’s not a problem to put the grow lights too far away from the seedlings. However, you may want to get closer so that the light is more diffused and even. It’s easier to keep a grow light in a plant than a human. You could also try to use LED grow lights. These are much more energy efficient, and will last a lot longer. 

    Conclusion: How Much Light Should Seedlings Get?

    How your grow light should be far from seedlings will depend on the type of grow light you’re using and the wattage or light intensity. With the information we have given above, we hope you have learned the right distance to place your grow light from your seedlings.

  • Are White LED Lights Good For Growing

    Are White LED Lights Good For Growing

    There have always been consistent debates about the effectiveness of various types of grow lights for indoor hydroponics. Among these various debates, let’s get to know if white LED lights are good options for growing.

    Grow lights such as LED mimics the work sunlight does on plants. They are an artificial source of light for enhancing the growth of indoor hydroponic plants. So, if it interests you to find out if grow lights such as white LED lights are good for growing, we will let you know in this post.

    White LED Lights Are Made Of

    Firstly, let’s get to know what a white light really is. In a clear sense, white LED lights are not actually white. They are combinations or packed diodes of different colors to give white color to human eyes.

    The combinations of colors that appear white to human eyes are many. One of them is an equal amount of red, blue, and green color combinations. Another combination is blue and yellow color combinations and many more. However, these lights are not a complete spectrum. Changing the amount or level of each color will result in color temperatures of light.

    White LED Lights Are Made Of

    Let’s Find Out If White Led Grow Lights Are Good For Burgeoning

    The short answer is yes, white LED lights are definitely good for growing. Even though most growers are used to purple grow lights and may think white LED lights don’t offer much value to plants’ growth: well, that’s not the case. Your indoor plants can also benefit from using white LED grow lights.

    • Regular White Light Led Grow Light (Full-conversion)

    Note that there we have regular white LED used in most homes, offices, etc. These types of white LED are standard fluorescent lights. They are actually made of ultraviolet light that is made of blue, green, and red.

    There is a powdered phosphor coating in the tube of this light that converts the ultraviolet light into green, red, and blue. However, they are seen as white to the human eyes. The ultraviolet light discharged by the LED is usually transformed into white light by the phosphor coating.

    This transformation or conversion is known as full-conversion white LED. Although this type of white LED will work for growing plants, the efficiency won’t be that great.

    LED Grow Light,6000K Full Spectrum Clip Plant Growing Lamp with White Red LEDs for Indoor Plants

    61pUrl7WK L. AC SX569
    • White LED Lights (Partial-conversion)

    In today’s market, there is the introduction of a better type of white light which is a partial conversion LED used in an indoor garden. It makes use of blue light instead of ultraviolet light. The phosphor coating here changes part of the blue light into yellow light. This yellow light consists of red and green.

    This yellow light now merges with the rest of the blue light to form white light. Now, this type of white LED is very efficient for growing plants compared to the regular one.

    Today’s white LED spectrum light will supply a full light spectrum of various wavelengths.

    Wavelength Of White LED Light

    Various plants in their different growth phases require a certain type of light. This is where color temperature comes into play where specific wavelengths are required for different phases in a plant’s life cycle.

    The changes in the amount proportion of each color contained in the white LED will determine the color temperature. For instance, warm white light of color temperature 3000k has more red wavelengths. On the other hand, cool white light of color temperature 6500K has more blue wavelengths.

    Now when it comes to changing the color temperature for the white diode, all you need do is make use of a thicker phosphor layer. Then you can change the blue LED’s wavelength.

    Below are some color temperatures for various stages of a plant’s growth:

    • Vegetative Phase: Red light is ideal for the vegetative phase of a plant and this falls in the 5000K range.
    • Flowering Phase: Cooler temperatures are ideal for the flowering phase. Thus, you should go for the 2700K to 3000K scale. 2700K is specifically for the flowering stage; however, if you wish to make use of your light for all growth stages, then 3000K is the ideal number.
    • Generally For Plants: for growing plants generally both 5000K and 6500K are perfect. However, if you plan on indulging in just veggies 6500K will work fine.

    FAQ’s

    Can you use a white LED light to grow plants?

    Yes, you can use a white LED light to grow plants. There are many different ways to use an LED light for growing plants. You can use a cool white or warm white LED light. You can also use the red and blue LED lights. It’s not a good idea to use a white LED light for any other purpose. However, the best way to do this is to use an LED grow light that has been specifically designed for growing plants. The reason being that LEDs produce a specific wavelength of light, and these are what plants need to grow. Using any other type of lighting would not be the best option for growing plants.

    When should you use white LED as opposed to flourescent?

    You can use an LED light to grow plants, but it’s not the same as a fluorescent bulb. While fluorescent lights are made of tubes that contain mercury vapor, LEDs don’t have any mercury. They also emit a different wavelength of light than conventional fluorescent lights, and their spectrum is more like sunlight.

    The LED light is much more efficient than a conventional fluorescent bulb, so it will last longer and cost less to run. It won’t heat up the room as much as a fluorescent bulb, so your house won’t be hotter in the summer. And since LEDs don’t contain mercury or have any other hazardous chemicals inside them, you can put them in an area where children and pets play.

    LED lights are great for growing herbs, veggies, fruits, and flowers. But if you’re looking to grow houseplants or succulents, you should use a fluorescent light instead. Fluorescent bulbs emit the same spectrum of light as sunlight, which is great for plants that like bright sunlight.

    Can any LED light be used as a grow light?

    Yes. The only restriction is that the spectrum of the light must be within the tolerance range of the plants’ requirements, which is typically a range of 400 to 700nm for most plants. The higher the wavelength, the more blue light, and the lower the wavelength, the more red light. The light is typically measured in lumens. A typical fluorescent bulb emits about 100 lumens, so one lumen is equal to one lumen per watt.

    How do I change the color of my LED grow light?

    You can adjust the color of your LED lights by using the colored filters that are available from most LED lighting manufacturers. The colored filters come in a variety of colors such as red, yellow, blue, and green. The colored filters are usually designed to match the spectrum of light emitted by the bulbs. Some colored filters have their own special name and are labeled accordingly. For example, “G-Red” is a red filter, “G-Green” is a green filter, etc. The filters can be purchased individually, or they can be bought as a set.

    Conclusion About White Led Spectrum

    So, we have concluded that white LED lights are indeed is good for growing indoor plants. It will offer your plant efficient growth and stronger results.

  • Leaving Grow Lights On 24 Hours

    Leaving Grow Lights On 24 Hours

    The impact of grow lights in hydroponics gardening is very essential as it mimics the work done by natural sunlight. There’s is no disputing that leaving grow light on for long will result in faster growth. However, the question is: is leaving your grow lights on for 24 hours ideal? Let’s look into this.

    Leaving your grow lights on for 24 hours will sure supply your plants more light and if you notice they aren’t getting adequate light, increasing the number of light supply is fine. However, this is usually not the ideal way out and we will let you know why.

    Can You Leave Grow Lights On 24 Hours A Day: Ideal Or Not?

    It is not the best idea to leave your grow light on for 24 hours even if your plants are not getting enough light supply. The best solution is to obtain more light installations or switch to a stronger grow light. Thus, it’s not ideal to leave your grow light on all day and we will give you more reasons.

    Reasons Why Leaving Grow Lights On For 24 Hours Isn’t Ideal

    Let’s take a look at some reasons why leaving your grow lights on 24 hours is not recommended:

    1. No Resting Time For Plants: when you run your grow light all day, your plants will have no time to rest. Just like a human being needs rest, plants also require a resting stage. Have in mind that the natural sun does not go up all day. We have the night time which is the dark cycle of the plants. Allow your indoor hydroponics plants to also have this dark cycle. During the dark cycle which is the resting stage, it is believed plants use this period to convey nutrients into the most distant part of the plants.
    2. Not Ideal For The Flowering Phase: 24 hours lighting duration is not ideal for plants that need to enter the flowering phase. Your plants won’t transition into the flowering phase unless you decrease the hours of lightening. Now if your plants are already in their flowering phase and you up the light duration to 24 hours, doing that can be quite catastrophic. This can cause your plant to go back to the vegetative phase and it might even take a long time to return to its flowering phase.
    3. Additional Cost: An additional cost is another reason. More electricity will be used and it might require you to change the bulb frequently.
    4. Additional Heat: more heat is will be emitted when you leave the grow lights all day. It will require you to also run more fans as well as other cooling instruments to control the excess heat.
    5. Puts Stress On Equipment: additional stress is put on your equipment as they are working all day without rest. This can reduce the lifespan of your equipment.

    Giixer 1000W LED Grow Light, Dual Switch & Dual Chips Full Spectrum for Hydroponic Indoor Plants

    71GAL%2BeUBUL. AC SX569

    Leaving your grow lights on for 24 hours long has just one advantage. Your plant receives more light and it will result in rapid growth. This is usually ideal for plants that require only the vegetative phase. So, plants like veggies may benefit from this. Nevertheless, the disadvantages of leaving your grow lights on for 24 hours outweigh the advantages.

    How To Determine Light Duration: Factors To Consider For 24 Hours Of Light

    Put these factors into consideration when deciding the duration to leave grow lights on:

    1. Type Of Plants: there are different types of plants namely low-light, medium-light, and high-light plants. Always determine the type you are growing.
    2. Type Of Grow Light: the types of grow light we have are LED, compact fluorescents, regular bulbs, metal halide, and high-intensity discharge lights. All these grow light supply different capacities of light so you can choose one whichever that suits your growing needs.
    3. Growing Phase: vegetative type of plants may benefit from 24 hours light duration. But flowering and fruiting plants will require a dark phase. The cloning or seedling germination phase is critical so they require both light and dark phases. You can supply them with 12 to 16 hours of light and 8 hours of the dark phase.
    How To Determine Light Duration: Factors To Consider For 24 Hours Of Light

    What Are The Ideal Hours For Running Grow Light?

    It is required to supply your hydroponics plants with at least 12 hours of light and at most 18 hours of light daily. However, if you notice your plants aren’t receiving optimal light you can replace the fixtures or switch to a more powerful light.

    Light Output Plants Require

    All flowering plants and fruit-bearing plants require 20 to 40 moles of light daily. 18 hours grow light duration can supply 20 moles of light if you make use of LED grow light that has 308 micro-moles of light.

    For a 12 hours light duration to produce 20 moles of light, your grow light must be able to supply about 462 micro-moles of light.

    FAQs

    What happens if you leave grow lights on all the time?

    You’re probably wondering what happens when you leave grow lights on all the time. After all, you’re growing plants and there’s no doubt that they will need to use a lot of energy to do so. If you have ever looked at grow lights before, you may be surprised to find out how much power they actually use.

    This is a very interesting question. I’ve had a lot of experience with grow lights and what I do know is that I don’t leave my lights on all the time. I only turn them on when I need them. The first thing that comes to mind is the light spectrum. If you leave your lights on all the time, the spectrum will be different than it would be if you were to turn them on at a specific time. This will affect the quality of the plants, and it could also cause other problems.

    Another thing that I’ve noticed is that my lights tend to stay warmer. When I first started using them, they were so bright that I thought they were burning the plants. But as time went on, I discovered that they actually helped the plants by increasing the temperature, which allowed them to grow faster. Now I know this might sound weird to some people, but for me, turning the lights off for a few hours has worked out well. It doesn’t seem to affect the plants much at all.

    Why shouldn’t I leave my grow lights on all the time?

    You risk burning your plants. This is probably the biggest reason why you shouldn’t leave your grow lights on for 24 hours.

    The fact is that when you leave grow lights on for 24 hours, it creates an environment where your plants can use up all of their energy reserves and grow to a point where they can no longer recover. This can result in stunted growth, and even death.

    You also risk wasting electricity. It’s true, if you’re using LED grow lights, then you’re going to be using a lot of electricity over the course of 24 hours. If you’re using a 10-watt grow light for 24 hours, then you’re going to be using up 1,000 watts of electricity.

    Can seedlings get 24 hours of light?

    You may think that this is a time when it would make the most sense to keep them showered in light non-stop, b ut the truth of the matter is that just like mature plants, seeds need to rest after a certain period of time.

    What should I consider when it comes to light duration?

    Light duration is one of the most important factors to determine the quality of a light. This is because it affects the plants growth, flowering and fruiting cycles. It also affects the light spectrum. You can have a very bright but short light duration. Or you can have a very weak but long light duration.

    1.To determine the light duration, you need to know the following factors:

    The intensity of the light source

    The spectrum of the light

    The amount of light emitted at any time

    The color temperature of the light source

    The size of the plant container

    The light source

  • PH For Hydroponic Lettuce

    PH For Hydroponic Lettuce

    You might be interested in growing lettuce hydroponically. If you’re wondering what’s the best pH for hydroponic lettuce, we will let you know in this post.

    Leafy greens such as lettuce are some of the most common crops to grow in hydroponics. They are especially great for hydroponic newbies. Lettuce is pretty easy to grow and you will derive lots of healthy benefits from incorporating it into your diet.

    Now growing hydroponic lettuce has some requirements such as a balanced pH, nutrient solutions, accurate temperature range, etc. We will cover the best pH for hydroponic lettuce and other requirements you need to know. So, read on to learn.

    Lettuce Hydroponic System

    The lettuce hydroponic system is a method of growing lettuce without the use of soil. Water solutions dissolved in nutrients are used to grow lettuce plants.

    With a lettuce hydroponic system, you enjoy faster growth, higher yield, healthier crops, and many more benefits. You can commence lettuce hydroponic by purchasing a complete hydroponic system or go for a DIY unit.

    Required pH For Hydroponic Lettuce

    Constant monitoring of your lettuce nutrient solutions is paramount in maintaining a smooth and running system.

    The required pH for hydroponic lettuce ranges from 5.6 to 6.2. This pH range is acidic enough to reduce the activities of algae and at this pH range, plants can absorb nutrients adequately for their growth.

    The pH range for seedlings should be adjusted to 6.4 and as your plant matures, the pH should be adjusted to 6.0.

    However, if the pH goes high on the pH scale, it falls into the alkaline range which is not good for your plant. The alkaline range that’s too much or too high can cause a nutrient lockout. Nutrient lockout causes the inability of your hydroponic lettuce plants to absorb nutrients.

    When nutrient lockout occurs, your lettuce plants will start to show signs of nutrient deficiencies. Symptoms such as yellowing of leaves, wilting of plants, stunted growth, and so on will be seen.

    Required pH For Hydroponic Lettuce

    You may end up losing your lettuce plants if action is not taken fast. Hence, ensure you always monitor your pH levels at least once a day.

    You should also note that plants absorb nutrients at various pH ranges. Hence, the pH level is borne to change constantly. The only thing you can do is to make sure they fall in between the lettuce plant’s recommended pH range which is 5.6 to 6.2.

    Making use of pH up and pH down products are great to maintain a steady and balanced pH range.

    Hydroponics Nutrient Solution For Lettuce

    The recommended hydroponic nutrient solutions to successfully grow lettuce are those that contain majorly calcium, magnesium, and potassium, and they are needed in high quantities.

    Calcium is especially crucial for the growth of lettuce because a calcium deficiency can cause lettuce leaf tip burns. This issue is very common so ensure the levels of your calcium are accurate.

    General Hydroponics MaxiGro Plant Food For Vigorous Growth, 2.2 lb

    The nutrient solutions must provide all necessary key elements for maximum production at their vegetative stage. At the same time, these nutrient solutions must not push the lettuce into its flowering or bolting stage. Flowering only causes bitter lettuce and we want to avoid that.

    Although lettuce has different varieties and some are more or less sensitive to nitrogen: always ensure the nutrient solution that you are buying suits the type of lettuce variety you will be growing. Read the nutrient pack instructions for better directions and use.

    Other Requirements For Hydroponics Lettuce

    • Temperatures: The recommended temperatures should range from 68 to 75 degrees Fahrenheit. Note that all varieties of lettuce love cool temperatures. If the temperature is high, bolting or flowering will take place. We however want to prevent bolting from occurring because it always gives rise to bitter lettuce leaves. Temperatures that exceed 77 degrees Fahrenheit will cause bolting.

    • Light Requirements: Lettuce plants do not require much light. Light duration from 10 to 15 hours daily is enough. They can be supplied with moderate or low light.

    Other Requirements For Hydroponics Lettuce - Light

    • Aeration: Some lettuce varieties can tolerate low oxygen levels. However, we recommend you always maintain a well-aerated system as this will boost the healthy growth of roots. We recommend dissolved oxygen concentration (DO) to be around 8 ppm.

    • Growing media: Lettuce will do well in most growing media such as rock wool, coco coir, etc. However, the main growing medium is the nutrient solution. It is the nutrient solution that provides most of the support for lettuce growth.

    Can Vinegar Be Used to Lower pH in Hydroponics?

    Vinegar, also known as acetic acid is a weak acid that can be used to lower pH in hydroponics systems. It can however be used only as a temporary solution as it does not remain stable for long.

    The pH in hydroponics changes constantly so it would be better to use an acid with more stability, such as phosphoric acid.

    How Do You Use a Hydroponic pH Meter?

    A pH meter is a very important tool to have and use if you are running a hydroponics system. It is more important than it would be if you were growing plants in the soil. The reason for this is that pH fluctuates more in aquaponics than in a soil-based plant-growing medium. 

    Soil has what is referred to as a buffering capacity. What this means is that it can correct for pH changes to be the in the right pH range for the plants that you are growing. Soilless growth media such as those used in hydroponics systems lack this ability and advantage.

    To be able to manage the pH in your hydroponics system, a pH meter like this one is an absolute necessity. You will need to monitor the pH of our system daily to avoid any adverse consequences. The thing with unfavorable pH changes is that you want to catch them as early as possible before they cause any problems which may damage or even kill your fish. Here is how you use a hydroponic pH meter:

    • Using test strips

    Using test strips is by far the cheapest way to test your hydroponic pH. Test strips are covered with a pH-sensitive dye that will change color when dipped into the water. You will then compare this color to the color chart to determine the pH of your hydroponics solution

    • Liquid test kits

    This is another popular method used to test for pH. It is also more accurate than the test strip method, so if you are looking for more accuracy this may be the choice for you. These test kits are commercially available and can be purchased from various distributors. The way this work is that you put a few drops of pH-sensitive dye into a vial containing your water or nutrient solution. The color of the solution will change, and you will compare this color to a color chart to determine the pH, just as you would do with the test strips.

    • pH meter

    The best and most efficient way to test pH in your hydroponics system is with the use of a digital pH meter. They come in different types and price ranges. You can find one to suit your needs as well as your pocket. Digital pH meters are very easy to use, simply insert the electrode into the water and it will give you a pH reading. Remember to calibrate your meter regularly so that it will give you accurate readings. 

    Can You Use Hydrochloric Acid to Lower pH in Hydroponics?

    Hydrochloric acid can be used to lower pH in hydroponics. It can however be dangerous in high concentrations, as it can damage your plants. So you need to be careful if you use it, or use safer acids such as phosphoric acid which can even be beneficial to your plants by adding phosphates which are plant nutrients.

    Conclusion

    We hope that you have learned all you needed to know about the required pH for hydroponic lettuce. Remember to always monitor your hydroponic nutrient pH constantly and adjust when you notice any slight change.

    Happy growing!

    FAQ’s

    What is the best hydroponic fertilizer for lettuce?

    When grown in soil, lettuce does not need to be fertilized. As long as the plants are getting enough water, they can get their nutrients from the soil. If you are growing in a greenhouse, you should add fish emulsion or compost tea to the soil, which will provide the nutrients needed for your plants.
    Lettuce needs a lot of water to grow well. Keep the soil moist, but do not let it get soggy. Water thoroughly when the weather is warm and the soil is dry. A small amount of fertilizer can be applied at this time. Once temperatures cool down in fall, water less often. In order to grow the best-tasting lettuce, plant seeds about 3 weeks before the last frost date. The lettuce seeds will germinate once the temperature warms up in spring. After they have germinated, thin the seedlings so that there is only one or two plants per square foot. This will allow them to grow large and have plenty of room to spread out.

    Lettuce needs a slow-release fertilizer to grow, and it also needs high levels of nitrogen. The best time to fertilize lettuce is in the fall. The leaves should be dark green, shiny and crisp. If the lettuce leaves are yellow, they need more nitrogen.

    What pH should water be for hydroponics?

    The pH of the water is one of the most important factors in growing plants.

    There are many different ways to measure the pH of a solution, and there are many different theories as to how much the pH affects plant growth.  However, it is safe to say that a pH of around 5.0 is ideal for growing healthy plants. If you use distilled water, you can adjust the pH of the solution easily by adding more or less H2O. However, if you use tap water, you will need to buy some chemicals to make the pH of the water exactly what you want. pH is measured on a scale of 0-14, with 0 being the most acidic, and 14 being the most alkaline.

    What happens if pH is too low in hydroponics?

    There are a few things that can happen when pH is too low in a hydroponic system. Most of the time, you won’t even notice anything. Your plants will be fine, and you will have a healthy crop. If you’re growing in a soil based hydroponic system, you will need to change your water to ensure that it’s not too acidic. This is important because soil contains many beneficial microbes that are essential for plant growth.
    These microbes work with the roots of your plants to absorb nutrients, and they also help break down organic waste in the soil. If your pH is too low, these beneficial microbes will not be able to do their job. Instead, your plants will suffer from nutrient deficiencies and may even die. You can lower the pH of your hydroponic solution using a simple pH test kit. You’ll find that most of the time, the pH of your solution is fine.